Cutting Edge: Where to Trim Your LED Strip Lights for the Perfect Fit
LED strip lights are a popular lighting solution that is known for its versatility and flexibility in adding an aesthetic appeal to home interiors. These lights can be used in various settings, from highlighting a particular feature in a room to accentuating the ambiance of a space. However, one of the most significant advantages of LED strip lights is their ability to be customized and trimmed to fit any space. This feature makes it possible to create a seamless and professional-looking lighting design that enhances the beauty and functionality of your home. With so many options available in the market, it can be challenging to determine the right way to trim your LED strip lights for the perfect fit. Fortunately, there are several cutting-edge techniques and tools that can help you achieve the desired result. In this article, we will explore the different methods for trimming LED strip lights and provide tips and tricks to ensure that you get the best results. Whether you are a DIY enthusiast or a professional designer, this guide will equip you with the knowledge you need to create a stunning lighting design that will transform your home.
LED strip lights are an innovative type of lighting that have gained immense popularity in recent years, primarily because of their versatility and flexibility. These lights are made up of small LED bulbs that are attached to a strip, which can be easily trimmed to fit any desired length or shape. LED strip lights come in a variety of colors and brightness levels, making them ideal for creating ambiance in any space. They are also energy-efficient, long-lasting, and easy to install, making them an attractive option for both residential and commercial applications. The ability to trim LED strip lights to fit any surface or shape has made them a favorite among DIY enthusiasts and professional interior designers alike, proving that functionality and style can coexist beautifully.
Trimming LED strip lights is an essential step in achieving the perfect fit for your lighting needs. A well-trimmed LED strip ensures that it fits into the desired space perfectly, without any gaps or overlaps. This not only enhances the overall aesthetic appeal of the space but also ensures that the lighting is evenly distributed. Additionally, trimming LED strip lights allows for customization of the lighting to fit any room or space, regardless of size or shape. This process also helps to reduce wastage of materials and ensures that the strip light is a perfect fit, eliminating the need for any additional accessories. In summary, trimming LED strip lights is crucial in achieving the perfect fit and ensuring a seamless lighting experience.
Understanding LED Strip Lights

LED strip lights are a popular lighting solution that can be used for a variety of purposes. They are perfect for creating ambiance in a room, adding accent lighting to furniture and decor, or even lighting up a workspace. The strips are made up of small LED lights that are placed close together, and they can be cut to fit any length or shape. LED strip lights are energy-efficient, easy to install, and come in a wide range of colors and brightness levels. They are also flexible and can be bent or curved to fit around corners or other obstacles. When it comes to installing LED strip lights, one of the most important things to consider is where to cut them to fit the space you are working with. Cutting LED strip lights is a simple process, but it requires some planning and precision to ensure that the cut is in the right place and that the lights will still function properly. It’s important to measure the space where the lights will be installed and to mark the cutting points carefully. Once the strip is cut, it will need to be connected to a power source using special connectors. With a little bit of planning and some careful cutting, LED strip lights can be customized to fit any space and create the perfect ambiance.
LED strip lights are a modern, energy-efficient lighting solution that offers a wide range of options for customizing your home or business’s lighting. These strips consist of small, individual LED lights that are connected together on a flexible circuit board. They come in various colors, sizes, and brightness levels, making them suitable for a range of applications. LED strip lights are easy to install and can be cut to fit any space, making them ideal for accent lighting, under-cabinet lighting, and other decorative purposes. With their low energy consumption, long lifespan, and ability to create a variety of lighting effects, LED strip lights are quickly becoming a popular choice for homeowners and businesses alike.
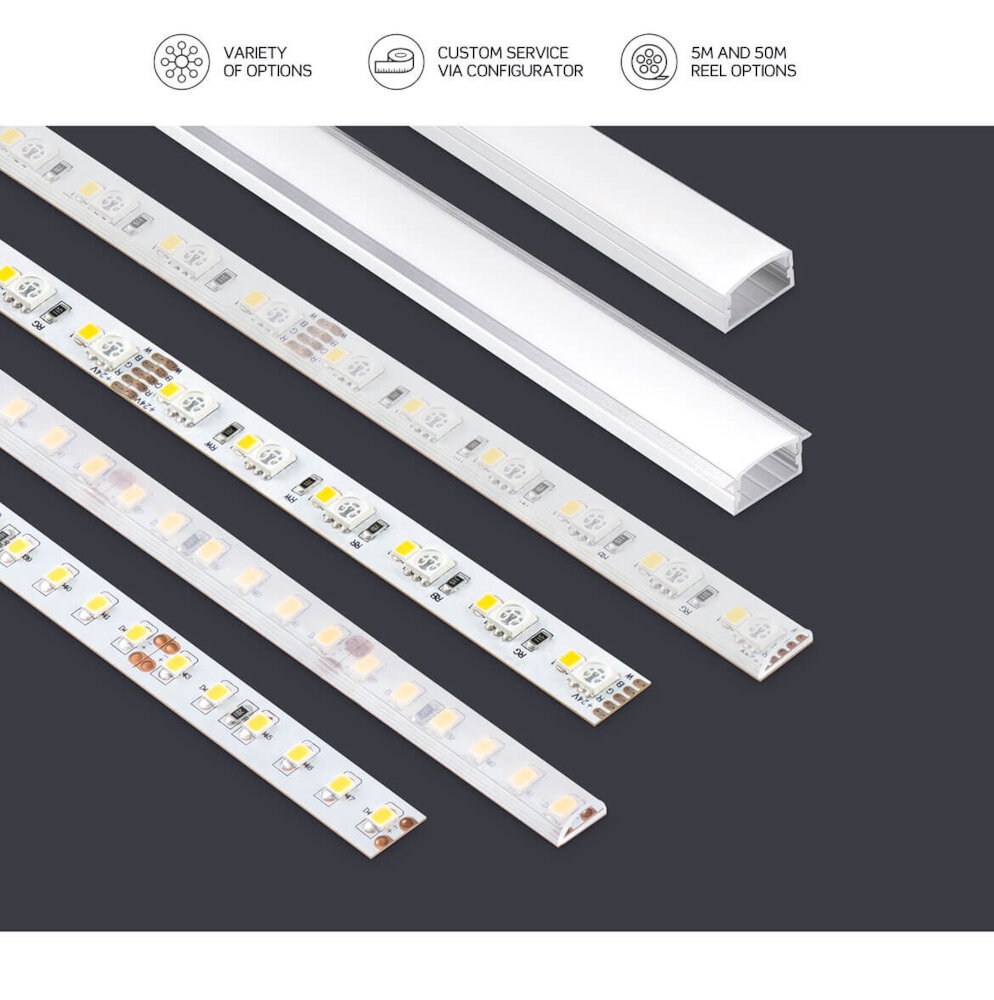
LED strip lights are a versatile and energy-efficient lighting solution that can be used for a variety of purposes. There are several types of LED strip lights available in the market, including RGB, single color, and color temperature adjustable strips. RGB strips are capable of producing a wide range of colors by combining red, green, and blue LEDs. Single color strips come in a variety of colors, including warm white, cool white, and daylight white. Color temperature adjustable strips allow users to adjust the color temperature of the light emitted, from a warm yellowish hue to a cool bluish-white tone. Additionally, LED strip lights come in different lengths, densities, and levels of brightness, making them highly customizable for any project or setting.
LED strip lights have become increasingly popular in recent years due to their numerous advantages. Firstly, they are energy-efficient, consuming very little power in comparison to traditional lighting options. Secondly, they are long-lasting and durable, with a lifespan of up to 50,000 hours. Thirdly, they are versatile and can be used for a variety of purposes including ambient lighting, accent lighting, and task lighting. Additionally, LED strip lights are easy to install and can be cut to fit any space, making them perfect for customized lighting solutions. Finally, they are available in a wide range of colors and intensities, allowing for endless creative possibilities. Overall, LED strip lights are a great choice for anyone looking for an eco-friendly, long-lasting, and versatile lighting option.
How to Trim LED Strip Lights

LED strip lights are a popular and versatile lighting solution that can be used for everything from accent lighting to task lighting. One of the great things about LED strip lights is that they can be easily trimmed down to the perfect length for your project. However, if you’re not careful, trimming your LED strip lights can be a bit tricky. Here are some tips to help you get the perfect fit. First, it’s important to remember that LED strip lights can only be cut at certain intervals. Check the manufacturer’s instructions to find out where these intervals are located. Once you know where to cut, use a sharp pair of scissors or a utility knife to make a clean cut. Be sure to cut the LED strip lights in a straight line to avoid damaging the circuit board. Once you’ve made the cut, you may need to reattach the wires or connectors to the end of the strip. This can be done using soldering or with special connectors designed for LED strip lights. With a little patience and attention to detail, you can easily trim your LED strip lights to the perfect length for your project.
When it comes to trimming LED strip lights, having the right tools is essential. Firstly, a sharp pair of scissors or wire cutters will be necessary to cut through the strip without damaging the components. Additionally, a ruler or measuring tape will come in handy to ensure precise cuts are made. A soldering iron is also essential if you need to reattach any components after trimming the strip. Finally, it’s always best to have a heat gun or lighter on hand to seal the cut ends to prevent fraying or damage. With these necessary tools, you’ll be able to trim your LED strip lights to the perfect fit for any project.
Trimming LED strip lights to fit your desired space is a simple process that can be done in just a few steps. First, measure the length of the space where you want to install the LED strip lights, and mark the cutting points on the strip with a pencil or marker. Next, use a sharp pair of scissors or a cutting tool to cut along the marked lines. Be sure to cut along the designated cut line, as cutting in the wrong spot can damage the circuitry and render the strip unusable. Finally, reattach any necessary connectors or wires and test the LED strip lights to ensure they are functioning properly. With these easy steps, you can customize your LED strip lights to fit any space perfectly.
When trimming LED strip lights, there are several precautions you should take to ensure safety and accuracy. First, make sure the strip is turned off and unplugged before cutting. Use a sharp pair of scissors or a cutting tool specifically designed for LED strips. Always cut along the designated cut lines to avoid damaging the circuit board. Be sure to measure and mark the strip beforehand to ensure an even cut. Additionally, if you plan to reconnect the cut strip, use a soldering iron and heat shrink tubing to secure the connection. Taking these precautions will ensure a clean and precise cut while also preventing any potential electrical hazards.
Where to Trim LED Strip Lights
When it comes to LED strip lights, one of the most important steps in achieving the perfect fit for your space is knowing where to trim them. LED strip lights come in a range of lengths, but oftentimes, they may not be the exact size you need. Fortunately, cutting them down to size is a simple process, but it’s important to know where to make the cut. The good news is that LED strip lights are designed to be cut at specific intervals, typically marked by a dotted line. These intervals can vary, so it’s important to check the product specifications or consult with the manufacturer to ensure that you’re cutting the lights correctly. Once you’ve determined where to cut your LED strip lights, it’s important to make sure that you’re using the right tools for the job. A pair of good quality scissors or a sharp utility knife can do the trick, but you’ll want to make sure that you’re cutting them cleanly and evenly. It’s also important to note that cutting your LED strip lights will affect the circuit, so you’ll need to make sure that you’re cutting them in the right place to avoid damaging the circuit. With a little bit of planning and the right tools, you can easily trim your LED strip lights to the perfect size and achieve the perfect fit for your space.
When deciding where to trim your LED strip lights, there are several factors to consider to ensure that you get the perfect fit. First, you need to determine the length of the area where you want to install the LED strip lights. This will help you determine how many LED strip lights you need and how much of each strip you need to cut. Second, you need to consider the location of the cuts. You want to cut the strips in a spot that will not interfere with the lights and will not leave any exposed wires. Lastly, you need to consider the type of LED strip lights you have. Some LED strip lights can only be cut in certain places, so it is important to check the manufacturer’s instructions before making any cuts. By considering these factors, you can ensure that you get the perfect fit for your LED strip lights.
When it comes to trimming LED strip lights, there are a few ideal places to do so for the perfect fit. One such place is at the designated cut points on the strip, which are usually marked by a dotted line or scissor icon. These cut points allow for precise trimming without damaging the circuitry of the strip. Another ideal place to trim LED strip lights is between LED bulbs, as this creates a seamless transition between the cut sections. However, it is important to note that cutting the strip in the wrong place can result in damage to the circuitry or loss of functionality, so it is always best to consult the manufacturer’s instructions before making any cuts.
When trimming LED strip lights, there are several common mistakes that can easily be avoided. The first mistake is cutting the strip too short or too long, which can result in the LED lights not lining up properly. Another mistake is cutting the strip in the wrong place, which can cause damage to the circuit board and render the strip unusable. It is also important to use the correct tools when trimming the strip, such as sharp scissors or a utility knife, to avoid jagged edges and uneven cuts. Lastly, it is crucial to follow the manufacturer’s instructions and guidelines when trimming the strip to ensure that it works properly and safely. By avoiding these common mistakes, you can achieve the perfect fit for your LED strip lights and create a stunning lighting display.
Tips for Achieving the Perfect Fit
Achieving the perfect fit for your LED strip lights can be a challenging task, but with the right tips and tricks, you can easily trim them to fit any surface or space. One essential tip is to measure the length of the surface you want to install the LED strip lights on accurately. Make sure to measure twice to avoid any mistakes, and keep in mind that you can always cut the strip shorter if needed. Also, when measuring, consider any corners or curves as they will affect the overall length of the strip. Another tip for achieving the perfect fit is to use the proper tools for cutting the LED strip lights. A sharp pair of scissors or a precision knife will do the job, but it’s essential to cut the strip carefully and precisely. It’s also advisable to cut the strip lights in small increments, rather than attempting to cut the entire length at once. By doing this, you can avoid any mistakes or accidental cuts that could compromise the overall fit. With these tips in mind, you can easily achieve the perfect fit for your LED strip lights and create a stunning and unique lighting design for your space.
Before trimming your LED strip lights, it is crucial to accurately measure the area where you plan to install them. Failing to do so can result in an uneven and unpolished look. It is recommended to use a measuring tape or ruler to determine the length required for the strip lights. Additionally, take into consideration any angles or corners in the space, as this can affect the amount of strip lighting needed. By taking the time to measure correctly, you can ensure that the LED strip lights will fit perfectly and provide the desired effect. Always remember, measure twice and cut once.
Before permanently installing your LED strip lights, it is essential to test them to ensure they’re functioning correctly. This step not only saves you time and effort but also avoids any disappointment of finding out that the lights don’t work correctly after installation. To test your LED strip lights, connect them to a power source and observe if they light up evenly without any flickering or dimming. It is also advisable to test the lights in a dimly lit area to ensure that they are bright enough for your desired use. In case of any issues, it’s best to troubleshoot and make necessary adjustments before proceeding with the installation process. Testing your LED strip lights is a crucial step that guarantees satisfaction in the long run.
When it comes to installing LED strip lights, achieving the perfect fit is essential for a seamless and professional-looking finish. One of the most important steps in this process is adjusting the length of the LED strip lights to fit your specific space. To do this, you’ll need to determine the exact length of the area you want to illuminate and then cut the LED strip lights to the appropriate length. However, it’s important to remember that cutting the strip lights in the wrong place can damage the circuitry and render them useless, so it’s crucial to know where to make the cut. By following the manufacturer’s instructions and using the proper tools, you can easily trim your LED strip lights to the perfect size and achieve a flawless installation.
Trimming LED strip lights is a crucial step in achieving the perfect fit for any lighting project. Not only does it allow for customization of the length, but it also ensures that the strip can fit into any tight or awkward spaces. Proper trimming also prevents any overhanging or exposed wires that can be hazardous and unappealing. Furthermore, trimming can also help to conserve energy and reduce waste since it allows for the use of only the necessary amount of LED strip lights. By taking the time to trim LED strip lights, you can achieve a seamless and polished finish that will enhance any room or project.
Trimming LED strip lights is a simple process that can be done by anyone. First, measure the length of the area where the strip light will be installed and mark the cutting point on the strip. Use a pair of sharp scissors or a sharp utility knife to carefully cut through the strip along the marked line. Once the strip is cut, it is important to seal the exposed end to prevent damage to the circuit. This can be done with a silicone sealant or a heat shrink tube. Finally, connect the strip to a power source and enjoy the perfectly fit lighting in your space. With these few easy steps, you can customize your LED strip lights to fit any space and create a beautiful ambiance.
Achieving the perfect fit with LED strip lights can take some trial and error, but it’s well worth the effort. Before cutting your strips, take accurate measurements and plan out your installation carefully. Choose the right type of connectors and power supply for your needs, and make sure you don’t overload your circuit. When it comes time to cut your strips, use a sharp pair of scissors or a precision cutting tool to make clean, straight cuts. Be sure to seal the ends of your strips with silicone or another type of waterproofing material to protect them from moisture damage. And finally, take your time with installation and testing to ensure that your strips are working properly and providing the perfect amount of light for your space. With these tips and a little bit of practice, you’ll be able to achieve the perfect fit with your LED strip lights every time.
Conclusion
In conclusion, trimming your LED strip lights to the perfect fit is a crucial step in achieving the desired lighting effect for your space. With the right tools and techniques, you can easily customize the length of your LED strips to fit any area, whether it’s for functional lighting or decorative purposes. However, it’s essential to follow the manufacturer’s guidelines and take safety precautions to avoid damaging the LEDs or causing electrical hazards. By mastering the art of cutting edge LED strip lights, you can enjoy a seamless and stunning lighting display that enhances the ambiance of your home or commercial space.

