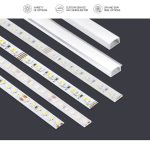
Cutting LED Light Strips: Discover the Best Places to Make Precise Cuts
LED light strips are a popular and versatile lighting option that can add a touch of ambiance to any space. These strips can be cut to fit any desired length, making them perfect for a variety of applications, from accent lighting to task lighting. However, cutting LED light strips can be a bit tricky, especially if you want to make precise cuts. It’s important to know where to make the cuts to avoid damaging the strip or ruining the lighting effect you’re trying to achieve. There are several factors to consider when cutting LED light strips, such as the type of strip you’re using, the tools you’ll need, and the location of the cut. In this article, we’ll explore the best places to make precise cuts on LED light strips, as well as provide some tips and tricks to help you achieve the perfect cut every time. Whether you’re a DIY enthusiast or a professional electrician, this guide will help you get the most out of your LED light strips and create stunning lighting effects in any space.
LED light strips are a versatile lighting solution that can be used for a variety of applications, including home decor, accent lighting, and even automotive lighting. These strips consist of small, individual LED lights that are mounted on a flexible circuit board, which allows them to be easily cut to size and bent or curved to fit any surface or shape. LED light strips come in a range of colors and brightness levels, and can be controlled using a remote or smartphone app. They are energy-efficient and long-lasting, making them a popular choice for both residential and commercial lighting projects. When cutting LED light strips, it is important to use the proper tools and techniques to ensure a precise cut and a clean finish.
Making precise cuts is crucial when cutting LED light strips as it ensures that the strips will fit perfectly in the desired location. A clean, straight cut will prevent any damage to the LED lights and maintain the overall aesthetic of the installation. It is important to measure and mark the areas where the cuts will be made and use the appropriate tools such as sharp scissors or a precision knife to make the cuts. Additionally, taking the time to make precise cuts will save time and money in the long run by avoiding mistakes and the need to replace damaged LED lights. Overall, taking care to make precise cuts is an essential step in achieving a visually appealing and functional LED light strip installation.
Understanding LED Light Strips
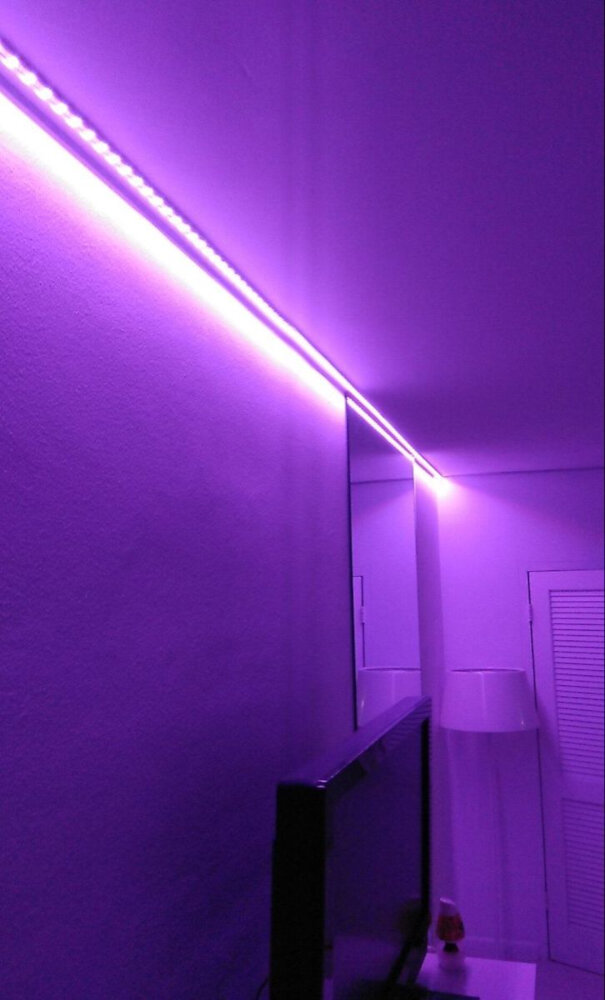
LED light strips are a versatile and energy-efficient lighting solution that has gained popularity over the years. These strips are composed of small LED lights that are mounted on a flexible circuit board. They come in a variety of colors and can be customized to fit any space or design. LED light strips are perfect for accent lighting, under-cabinet lighting, and even as a primary source of illumination. They are easy to install and can be cut to fit any length, making them an ideal choice for DIY enthusiasts. When it comes to cutting LED light strips, precision is key. The best places to make cuts are at the designated cut marks that are usually found every few inches along the strip. Cutting at these marks ensures that the circuitry of the strip is not damaged, and the remaining strip will still function properly. It is important to use the right tools when cutting LED light strips, such as a sharp pair of scissors or a precision knife. Additionally, it is crucial to make sure the strip is properly secured before making any cuts, as a loose strip can cause damage to the circuit board or the LEDs themselves. With the right tools and technique, cutting LED light strips can be a simple and effective way to achieve a custom lighting solution for any space.
LED light strips are made up of tiny light-emitting diodes that produce light when a current is passed through them. The diodes are mounted on a flexible circuit board that can be cut to fit any desired length. The circuit board also includes a driver that regulates the amount of current flowing through the diodes, ensuring that they don’t burn out. LED light strips are energy-efficient and long-lasting, making them a popular choice for accent lighting, under-cabinet lighting, and other decorative applications. They can be cut to size using a sharp pair of scissors or a craft knife, making it easy to customize their length and fit them into any space.
There are several types of LED light strips available on the market, each with its unique features and uses. The most common types include standard, high-density, and color-changing LED light strips. Standard LED light strips are the most basic type and are ideal for general lighting purposes. High-density LED light strips are more powerful and brighter than standard strips, making them suitable for use in areas where bright lighting is required. Color-changing LED light strips, on the other hand, are designed to change color, making them perfect for creating mood lighting or decorative effects. Additionally, there are waterproof LED light strips that can be used in damp or wet environments, and flexible LED light strips that can be bent and shaped to fit any surface. When cutting LED light strips, it is essential to choose the right type of strip for the specific application to ensure optimal performance and longevity.
LED light strips have become increasingly popular for their versatility and convenience. They can add a touch of ambiance to any room, highlighting architectural features or accentuating furniture pieces. LED light strips are also commonly used for under-cabinet lighting in kitchens and bathrooms, as well as in closets and pantries to make finding items easier. Additionally, they are often used in home theaters and gaming rooms to add a futuristic feel to the space. LED light strips are also a great choice for outdoor lighting, providing a warm glow for patios, decks, and walkways. Whether for practical or aesthetic purposes, LED light strips are a versatile and cost-effective option for any home or business.
Cutting LED Light Strips
LED light strips are an innovative and versatile way to add extra lighting to any space. They are easy to install and can be cut to fit any length required. However, cutting LED light strips can be a bit tricky, especially if you want to make precise cuts. There are several places where you can cut LED light strips to ensure that you get the best results. The best place to cut LED light strips is at the designated cut points. Most LED light strips have cut points every few inches, which is where you should cut the strip. These cut points are usually marked with a small scissor icon or a dotted line. Cutting the LED light strip at these points will ensure that you don’t damage the circuitry and that the strip will still work correctly. If you need to cut the strip in between the cut points, you can use a pair of sharp scissors or a craft knife to make a precise cut. However, you need to be careful not to cut through any of the copper contacts or the circuitry, as this can cause the strip to stop working.
When it comes to cutting LED light strips, having the necessary tools can make all the difference in achieving precise cuts. A sharp pair of scissors or a razor knife is essential for clean cuts without damaging the strip. A ruler or measuring tape can help ensure accuracy in cutting to the desired length. A cutting mat or surface can prevent damage to the work area and provide a stable surface for cutting. Additionally, wearing protective gloves and eye goggles can provide safety and prevent injury. By having these necessary tools on hand, one can confidently and accurately cut LED light strips for their desired project.
When it comes to cutting LED light strips, it’s crucial to know where to make precise cuts to achieve the desired lighting effect. The best places to make cuts depend on the intended use of the LED light strips. For example, if you’re installing them in a tight space, cutting them in between the LED lights may be the best option. However, if you’re looking to achieve a specific length, cutting them at the designated cut lines is recommended. It’s important to keep in mind that cutting LED light strips can damage the circuitry, so it’s crucial to use sharp and precise tools such as a pair of scissors or a utility knife. By carefully choosing the right places to make cuts, you can create a customized lighting design that fits your specific needs.
When cutting LED light strips, it’s important to make precise cuts to ensure a seamless and professional-looking installation. Here are some tips for achieving accurate cuts: First, measure the length needed and mark the spot with a pencil or tape. Next, use a sharp pair of scissors or a utility knife to make the cut. It’s important to apply steady pressure and use a straight edge to guide the cut. Additionally, ensure that the strip is securely fastened and flat on the cutting surface to avoid any slipping or uneven cuts. By following these tips, you can make precise cuts and achieve a flawless installation of your LED light strips.
Installing Cut LED Light Strips
Installing cut LED light strips can be a fun and creative way to add lighting to your home or office. However, it is important to follow the correct steps to ensure they are installed safely and effectively. The first step is to measure the area where you want to install the LED light strips, and then cut them to the correct length using sharp scissors or a utility knife. It is important to make precise cuts to avoid damaging the strips or having them come loose from their mounting adhesive. Once the strips are cut, you can attach them to the desired surface using the adhesive backing or mounting clips. It is important to ensure that the surface is clean and dry before attaching the strips to ensure they stick properly. When choosing where to install your cut LED light strips, it is important to consider the purpose of the lighting. If you are installing them in a workspace, you may want to place them above or below cabinets to provide extra light for tasks such as cooking or reading. If you are installing them in a bedroom or living room, you may want to place them behind furniture or along the baseboards to create a warm and cozy ambiance. No matter where you choose to install your cut LED light strips, they can add a unique and stylish touch to any space. With proper installation and placement, they can also provide functional lighting that can make your daily tasks easier and more enjoyable.
Before cutting LED light strips, it is crucial to prepare the surface to ensure a clean and precise cut. The first step is to clean the area where the cut will be made thoroughly. This will remove any dirt, dust, or debris that may interfere with the cutting process. Once the surface is clean, measure and mark the exact location where the cut will be made. This will ensure that the cut is made in the right place and at the right angle. Finally, use a sharp cutting tool, such as a box cutter or a pair of scissors, to make the cut. It is important to apply enough pressure to ensure a straight and even cut. By properly preparing the surface, you can achieve a precise and professional-looking cut for your LED light strips.
Proper installation techniques are vital when cutting LED light strips. It is recommended to measure twice and cut once to avoid any mistakes. The cutting area should be clean and free of any debris to ensure a precise cut. A sharp cutting tool should be used to prevent any damage to the strip. When making the cut, it is important to avoid damaging any of the LED lights or circuitry. The cut should be made at the designated cut lines on the strip. After the cut, the exposed wires should be properly sealed to prevent any moisture or dirt from entering. Following these proper installation techniques will ensure that the LED light strips are cut accurately and safely.
Maintaining and caring for LED light strips is essential for ensuring their longevity and optimal performance. After cutting the strips to fit specific areas, it’s crucial to handle them with care to avoid damaging the fragile components. Regular cleaning of the surface that the strip is adhered to can prevent dust and dirt buildup that may obstruct the LED’s illumination. It’s also essential to keep the power supply and controller in a dry and well-ventilated area to prevent damage from moisture or overheating. Checking the connections periodically and securing any loose wires can prevent electrical issues that may cause the lights to malfunction. By following these simple maintenance and care practices, you can ensure that your LED light strips function optimally for years to come.
Troubleshooting
Troubleshooting is an essential part of any DIY project, and cutting LED light strips is no exception. It’s not uncommon to encounter issues during the process, such as uneven cuts or damaged lights, but there are ways to resolve them. If you notice that the LED lights are not working after cutting the strip, the first thing to do is to check if you cut through the copper contacts. If so, you will need to strip the wires and solder them back together, ensuring that the colors match. Additionally, if the LED lights turn on but are dimmer than before, it could be due to a voltage drop caused by the length of the strip. In this case, you can try using a power booster or adding another power supply to the end of the strip. Another common issue with cutting LED light strips is uneven cuts. This can happen if you don’t use a straight edge or if the scissors or cutter blades are dull. To avoid this, use a ruler or a straight edge to mark the cutting line and ensure that the blade is sharp. You can also use a miter saw or a rotary tool to make precise cuts. If you accidentally cut the strip in the wrong place, you can try using a connector or a soldering iron to rejoin the two pieces. It’s important to note that cutting LED light strips can be tricky, so take your time and be patient. With the right tools and techniques, you can achieve the perfect cut and create a stunning lighting display in your home or workspace.
One common problem when cutting LED light strips is that they can easily become damaged if not cut correctly. This can lead to uneven lighting and a shorter lifespan for the lights. To prevent this, it is important to use a sharp tool such as scissors or a knife and make precise cuts at the designated cutting points. Another common issue is that the adhesive backing may not stick well after cutting, causing the strip to fall off. To solve this, thoroughly clean the area where the strip will be placed and use additional adhesive if necessary. Overall, taking the time to make careful cuts and properly adhere the strip can ensure that your LED lights will shine bright for a long time.
When cutting and installing LED light strips, it is important to take necessary measures to avoid damage. Firstly, make sure to use sharp and appropriate cutting tools such as scissors or a utility knife. Avoid applying too much pressure while cutting, as this can damage the strip. Additionally, always cut along the designated cut lines as indicated on the strip. When installing the strip, handle it with care and avoid bending or twisting it excessively, as this can cause the circuitry to break. Finally, before connecting the strip to a power source, double-check that it is properly aligned and secured in place to prevent any accidental damage. By following these precautions, you can ensure a successful installation without any damage to the LED light strip.
Although the task of cutting LED light strips may seem like a simple DIY job, there are certain situations where seeking professional help is necessary. If you are not confident in your ability to make precise cuts, lack the proper tools or experience, or are dealing with complex installation requirements, it may be best to leave the job to a professional electrician or LED light strip installer. Additionally, if you encounter any technical problems such as wiring issues or damage to the light strip itself, seeking professional help can save you time, money, and potential safety hazards. Remember that the safety and functionality of your electrical system is crucial, so when in doubt, do not hesitate to seek help from a qualified professional.
In any DIY project, precise cuts are essential to achieving a professional-looking finished product. When it comes to cutting LED light strips, the importance of precise cuts cannot be overstated. Not only does it ensure that the light strip fits perfectly in the designated space, but it also helps to maintain the integrity of the LED lights themselves. Any incorrect cuts or sloppy work can lead to damaged or non-functional LED lights, which can be a costly mistake. Additionally, precise cuts help to avoid any gaps or overlapping sections, which can significantly impact the overall appearance and functionality of the LED light strip. Therefore, taking the time to plan and execute precise cuts is crucial to the success of any LED light strip project.
In conclusion, LED light strips are undoubtedly one of the most versatile lighting options available today. Their flexibility, ease of installation, and customizable features make them suitable for a wide range of applications, from home décor to commercial settings. With the right tools and knowledge, cutting LED light strips can be a simple and effective way to achieve the perfect fit for any space. Whether you want to highlight your favorite artwork, create a cozy ambiance in your bedroom, or add some extra flair to your outdoor living area, LED light strips are an excellent choice. So, don’t hesitate to explore the endless possibilities of these fantastic lighting solutions and bring your ideas to life with LED light strips.
Conclusion
In conclusion, cutting LED light strips can be a daunting task, but with the right tools and techniques, it can be done with precision and ease. The best places to make cuts depend on the type and size of the LED light strip. However, it is essential to follow the manufacturer’s guidelines to avoid damaging the LED lights. Whether you are a DIY enthusiast or a professional electrician, taking the time to learn how to cut LED light strips will enhance your lighting projects and create a unique ambiance in any space. So, don’t be afraid to experiment and unleash your creativity with LED light strips.


