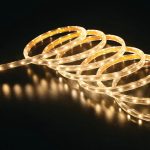
Quick answer: You can replace the LED strip inside some ceiling fixtures, but only when the fixture is built to be serviced and you can match the strip voltage, strip width, connector, LED layout, color temperature, and driver output. If the strip is glued to a heat sink, the driver is burned, the fixture is hardwired, or the replacement part is not listed for that fixture, replacing the whole fixture is often safer and cleaner.
{image_1}
Before You Replace The Strip, Confirm What Failed
A ceiling light can stop working because of the LED strip, the driver, a loose connector, a wall switch, a dimmer, heat damage, or the branch circuit. Replacing the strip will not fix a failed driver or a control problem.
| Symptom | Likely area to check | What it means | Safe next step |
|---|---|---|---|
| One dark section on an otherwise working fixture | LED strip segment or connector | The strip may have an open segment | Power off, inspect strip and connector |
| Whole fixture dead | Driver, switch, breaker, wiring | The strip may not be the failed part | Confirm power path before ordering parts |
| Light flashes once, then dies | Driver protection or strip fault | The driver may be shutting down | Do not keep cycling power repeatedly |
| Light flickers with a dimmer | Dimmer/driver compatibility | The LED strip may be fine | Test with compatible controls |
| Brown board, melted lens, hot smell | Heat or electrical damage | Repair risk is higher | Replace fixture or call an electrician |
When Strip Replacement Makes Sense
Strip replacement is most reasonable when the fixture uses a removable LED board/strip, the driver is working, and you can buy the exact replacement part or a clearly compatible listed part. If the fixture is inexpensive, sealed, or mystery-branded, a full fixture replacement may be the better repair.
| Fixture situation | Repair outlook | Why |
|---|---|---|
| Manufacturer sells the exact LED board | Best repair candidate | Voltage, thermal fit, and connector are known |
| Strip is screwed to an aluminum plate | Possible repair | Heat transfer can be preserved if reassembled correctly |
| Strip is permanently potted or sealed | Poor repair candidate | Opening it can damage insulation and weather sealing |
| Driver output is unknown | Risky repair | The wrong strip can overheat or fail quickly |
| Fixture is hardwired and old/damaged | Often replace fixture | Labor and safety risk can exceed parts value |
{image_2}
Match These Specs Before Buying A Replacement Strip
Do not buy a strip only because it looks similar. LED ceiling fixtures may use constant-voltage strips, constant-current boards, proprietary connectors, or boards designed for a specific driver. The replacement must fit electrically, physically, and thermally.
| Spec to match | Why it matters | Where to look |
|---|---|---|
| Driver output voltage/current | Wrong electrical match can destroy the strip | Driver label inside the fixture |
| Strip length and width | Must fit lens, mounting channel, and heat sink | Measure the old strip |
| Connector type and polarity | Reverse polarity or loose connectors cause failure | Old strip, connector markings, fixture manual |
| Color temperature | Prevents a mismatched room color | Fixture label, old strip markings, product listing |
| LED density and wattage | Affects brightness and heat | Old strip markings and driver rating |
| Listing/fixture compatibility | Maintains safer use in a ceiling fixture | Manufacturer replacement part or listed kit |
Safe Replacement Process
Work with the power off. For a plug-in or low-voltage fixture, unplug the supply. For a hardwired ceiling fixture, turn off the breaker and verify the fixture is de-energized before opening it. If you cannot verify that safely, stop and use an electrician.
| Step | What to do | Watch for |
|---|---|---|
| 1. Kill power | Turn off breaker or unplug the fixture supply | Do not rely only on the wall switch |
| 2. Remove lens/cover | Use the fixture clips, twist tabs, screws, or trim release | Cracked plastic and hidden screws |
| 3. Photograph wiring | Take clear photos before disconnecting anything | Connector orientation and polarity marks |
| 4. Inspect driver and strip | Look for heat marks, swollen parts, loose connectors | Driver damage means strip-only repair may fail |
| 5. Replace with matching part | Install the matched board/strip and restore heat contact | Poor heat transfer shortens LED life |
| 6. Test and reassemble | Power briefly, check for flicker/heat, then close fixture | Stop if there is smell, arcing, or repeated flashing |
{image_3}
Common Mistakes
- Replacing the LED strip when the driver is the failed part.
- Mixing constant-current and constant-voltage LED parts.
- Ignoring polarity on low-voltage strip connections.
- Installing a brighter strip that creates more heat than the fixture can shed.
- Using permanent extension cords or open splices above a ceiling fixture.
- Running a strip while it is still coiled or pressed against insulation without heat sinking.
When To Replace The Whole Fixture
Replace the fixture instead of the strip if the lens is brittle, the driver is burned, the housing is heat-damaged, the fixture is sealed, the exact replacement part is unavailable, or the wiring looks questionable. A new listed fixture is often cheaper than chasing a driver/strip combination that may never work reliably.
Related GarageSanctum Guides
- How to remove an LED light cover
- How long LED light fixtures last
- LED light stopped working troubleshooting
- LED wattage explained
Source Notes
- ENERGY STAR LED lighting guidance explains LED efficiency, heat sinks, and how LEDs produce light.
- EnergySaver lighting label guidance explains lumens, light appearance, and label comparisons.
- OSHA electrical safety guidance summarizes electrical shock, fire, and workplace electrical hazards.