DIY: How to Make an LED Light in 5 Easy Steps
Are you looking for a way to add some extra lighting to your home or workspace? Look no further than this DIY project on how to make an LED light in just five easy steps. With a few simple materials and some basic electrical knowledge, you can create a custom LED light that will brighten up any space. LED lights are a popular choice for their energy efficiency, durability, and versatility. They come in a variety of colors and can be used for anything from task lighting to accent lighting. By making your own LED light, you can customize it to fit your specific needs and preferences. Plus, it’s a fun and rewarding project that will save you money compared to buying a pre-made LED light.
An LED light, or light-emitting diode, is a small electronic device that emits light when a current passes through it. Unlike traditional incandescent bulbs, LED lights do not rely on a filament to produce light, which makes them more energy-efficient and longer-lasting. LEDs come in a variety of colors and can be used in a wide range of applications, from lighting up a room to illuminating a computer screen. They are also important for their eco-friendliness, as they consume less energy and produce less heat than traditional bulbs, making them a great option for those who want to reduce their carbon footprint. By making an LED light in five easy steps, you can not only save money but also contribute to a more sustainable future.
LED lights are becoming increasingly popular due to their energy efficiency and long lifespan. However, the cost of purchasing them can be quite high. By making an LED light at home, you can save a significant amount of money. The materials needed for this DIY project are relatively inexpensive and can be found at most hardware stores. Not only will you save money by making your own LED light, but you will also have the satisfaction of creating something yourself. Plus, you have the freedom to customize the design and features of the light to fit your specific needs. With just five easy steps, you can have a high-quality LED light that will last for years to come.
Materials Required

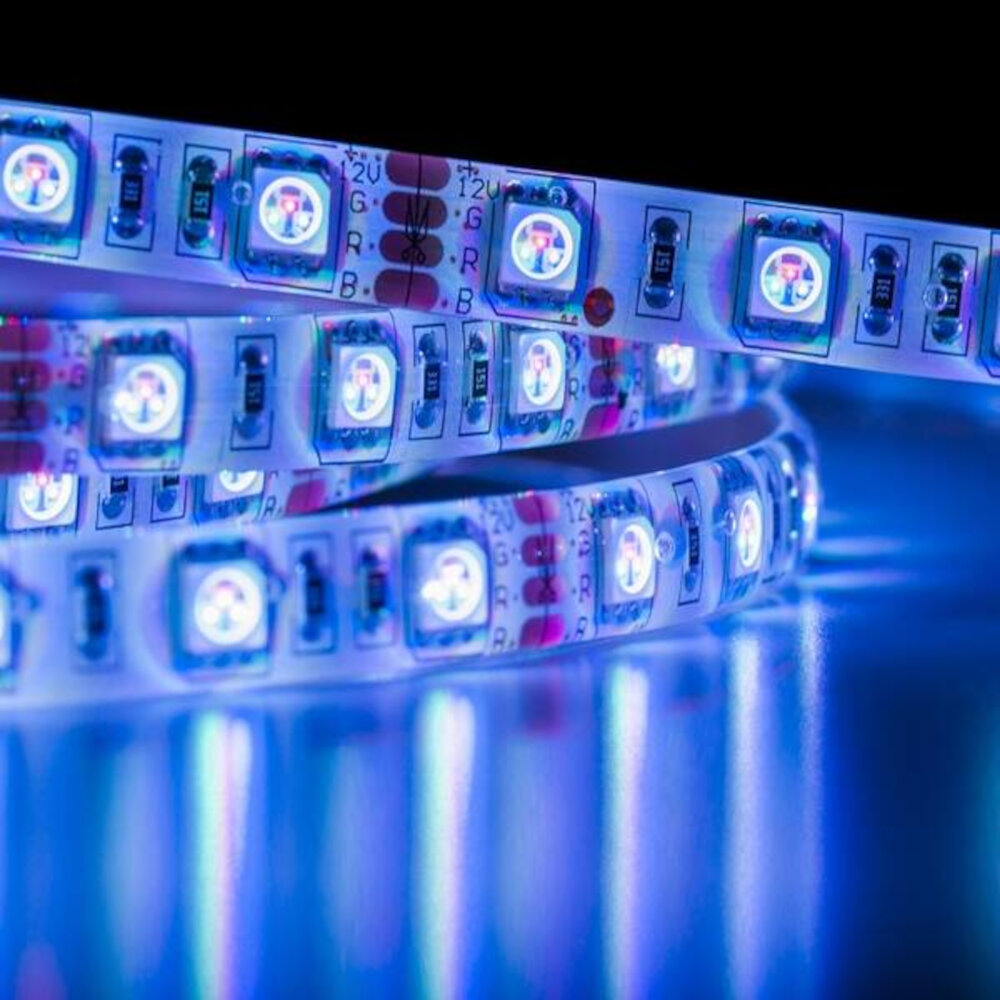
When it comes to making an LED light, there are a few essential materials that you will need to get started. Firstly, you will need an LED light strip, which is available in various lengths and colors to suit your needs. These strips come with adhesive backing, making it easy to attach them to any surface. Additionally, you will need a power supply to provide electricity to the LED strip. Depending on the length of the strip, you may need a power supply that can handle a higher voltage. It is important to choose a power supply that matches the specifications of your LED strip to avoid any damage or failure. Apart from the LED strip and the power supply, you will also need a soldering iron, solder wire, and wire cutters. These tools will allow you to connect the LED strip to the power supply and make any necessary adjustments. Additionally, you may need a heat gun or electrical tape to secure the connections and prevent any wires from coming loose. It is important to have a well-ventilated area when working with a soldering iron and heat gun to avoid inhaling any fumes. With these materials on hand, you will be able to create a customized LED light that adds a touch of ambiance and style to any room or space.
To make an LED light, you will need a few essential materials, including a power source, an LED light strip, a resistor, wires, a soldering iron, and a soldering wire. The power source can be a battery or a power supply unit, depending on the size of the light. The LED light strip is the main component that will emit the light and can come in various colors and lengths. The resistor is critical to regulate the current, preventing the LED from burning out. Wires are used to connect the components, and a soldering iron and soldering wire are necessary to solder the wires and components together. Having these materials on hand will make it easy to follow the five simple steps to make an LED light that is functional and energy-efficient.
Selecting the right materials for any DIY project is crucial to its success. When making an LED light, there are a few things to consider. Firstly, the LED strip should be chosen based on the length of the area it needs to cover and the brightness required. The power supply needs to match the voltage and wattage of the LED strip. The aluminum channel should be selected based on the width of the LED strip and the shape required. Lastly, the diffuser material should be chosen based on the level of transparency required. It is important to do research and read reviews before purchasing materials to ensure they are of good quality and suitable for the project.
StepbyStep Instructions
Step-by-step instructions are vital when it comes to DIY projects. It ensures that the process is easy to follow, and the end result is achieved without any hassles. In making an LED light, following these instructions is essential to produce a functional piece. The first step is to gather all the necessary materials and tools. These include LED lights, resistors, a power source, and wires. Once these are collected, the second step is to plan the LED light’s design and layout. This includes deciding on the size, shape, and color of the LED lights. The third step is to connect the LED lights and resistors with wires. It is crucial to pay attention to the polarity of the LED lights to ensure that they are connected correctly. The fourth step is to connect the power source to the circuit. Finally, the fifth step is to test the LED light to ensure that it works correctly. These step-by-step instructions make the process of making an LED light less intimidating and more manageable. Step-by-step instructions are beneficial not only for DIY projects but also for other areas of life. They provide a clear and concise guide for people to follow, enabling them to complete tasks more efficiently. Additionally, they can be used to teach others how to do something, making the process more accessible for everyone. In making an LED light, following step-by-step instructions is an excellent way to learn about electronics and how they work. It is also a fun and creative way to make a unique piece that can be used in everyday life. By following these instructions, anyone can make an LED light in just five easy steps, making it a perfect project for beginners and experts alike.
The first step in creating your own LED light involves preparing the LED light circuit. This is a crucial step as it sets the foundation for the entire project. To start, gather all the necessary materials such as LED lights, resistors, wires, and a soldering iron. Next, carefully follow the circuit diagram to connect the LEDs in parallel or series, depending on your preference. It is important to ensure that the resistors are correctly placed to prevent the LEDs from burning out due to excessive current. Once the circuit is complete, test it to ensure that the LEDs light up as desired. With the circuit properly prepared, you can move on to the next step of assembling the LED light.
In Step 2 of making your own LED light, you’ll be assembling the circuit that will power your light. This can seem like a daunting task for those who are new to electronics, but fear not! With a bit of patience and attention to detail, you’ll have your circuit up and running in no time. Start by gathering all of the necessary components, including resistors, capacitors, and of course, the LED itself. Be sure to read through the instructions carefully and double-check your connections before turning on the power. Remember, safety first! Once you’ve successfully assembled the circuit, you’ll be one step closer to having your very own custom LED light.
After completing the previous two steps, the next step is to connect the LED light circuit to the power source. This is the critical step as it determines whether the LED light will function correctly or not. First, ensure that the power source voltage aligns with the LED voltage requirement. This can be done by using a voltage regulator or resistor. Once the voltage is in check, connect the positive and negative wires from the circuit to the power source. Use a soldering iron to connect the wires properly and ensure that there are no loose connections as they can cause a short circuit. Lastly, turn on the power source to test the LED light, and if everything goes well, the LED light will light up brightly, indicating that the circuit is functioning correctly.
Step 4 of the DIY guide on how to make an LED light involves adding the LED to the circuit. This step requires careful attention, as it involves connecting the anode and cathode of the LED to the correct parts of the circuit. The anode, which is the longer leg, should be connected to the positive end of the battery or power supply, while the cathode, which is the shorter leg, should be connected to the negative end of the circuit. It is important to take note of the polarity of the LED, as connecting it incorrectly could damage the LED or the entire circuit. Once the LED is properly connected, the circuit is complete, and the LED light should illuminate when the power source is turned on.
Step 5 of making your DIY LED light is crucial to ensure that it functions properly. Testing the LED light involves connecting the power source and checking if the light turns on. It is important to check the polarity of the LED and make sure that it is connected correctly, as a reversed connection can result in the LED not lighting up or even being damaged. Once the LED light is turned on, you can also adjust the brightness by manipulating the resistance of the potentiometer. Remember to take the necessary safety precautions when handling electricity and always double-check your connections before testing the LED light. With a successful test and some final adjustments, your DIY LED light will be ready to shine brightly!
Tips and Tricks
When it comes to making your own LED light, there are a few tips and tricks that can help ensure your project is successful. Firstly, it’s important to choose the right components, such as the correct LEDs, resistors, and power source. Make sure to research and determine the appropriate specifications for each component, as this can greatly affect the brightness and function of your LED light. Additionally, consider using a breadboard to test your circuit before soldering everything together. This can save you time and frustration in the long run, as it allows you to troubleshoot any issues before making them permanent. Another helpful tip is to pay attention to the wiring and connections. Make sure to use proper wire gauges and colors, and avoid crossing wires or overcrowding your circuit. It’s also important to use a reliable soldering technique, such as a \wet sponge\ or \solder sucker\ to remove excess solder and ensure clean connections. Finally, don’t forget to have fun and experiment with different designs and colors for your LED light. With a little creativity and attention to detail, you can create a unique and functional lighting solution for any space.
If you’re looking to create your own LED light but don’t know where to start, there are a few tips and tricks that can make the process much easier. Firstly, make sure to carefully plan out your project before starting, including the materials you will need and the steps involved. This will help you avoid mistakes and save time in the long run. Additionally, consider using pre-made LED strips or modules to simplify the wiring process. Finally, don’t be afraid to ask for help or advice from online forums or communities, as there are many experienced DIYers who are happy to share their knowledge and expertise. With these tips in mind, you’ll be well on your way to creating a unique and functional LED light that you can be proud of.
When attempting to create an LED light, there are several common mistakes that should be avoided. Firstly, it is important to ensure that the correct voltage is used for the LED. Using too much voltage can cause the LED to burn out, while using too little can result in a dim light. Secondly, it is important to use the correct resistor to prevent the LED from overheating. Failure to do so can result in the LED becoming damaged or even exploding. Additionally, it is important to use the correct wiring technique and to double-check all connections to ensure that they are secure. Finally, it is important to use caution when handling electrical components and to follow all safety guidelines to avoid injury. By avoiding these common mistakes, it is possible to successfully create an LED light in just five easy steps.
Making an LED light at home is a simple and fun DIY project that can be accomplished in just a few easy steps. First, gather all necessary materials including an LED, a resistor, a battery holder, batteries, and wires. Next, connect the resistor to the positive leg of the LED and then connect the negative leg of the LED to the negative end of the battery holder. Finally, connect the positive end of the battery holder to the resistor and the negative end to the negative leg of the LED. Test the LED light to ensure that it is working properly and enjoy your newly created homemade LED light.
When it comes to working with electricity, it is crucial to always exercise caution and take the necessary safety measures. Electrical shocks can cause serious injury or even death, and accidents can happen in a split second. It is important to make sure that all tools and equipment are properly grounded and that you are wearing protective gear such as rubber-soled shoes and gloves. Additionally, it is important to make sure that you are working in a well-ventilated area and that all wires and circuits are properly labeled and organized. By taking these precautions and being mindful of the potential dangers associated with working with electricity, you can ensure that your DIY projects are completed safely and successfully.
Making an LED light at home can be a fun and rewarding DIY project that offers numerous benefits. First and foremost, it is cost-effective, as the materials required are easily accessible and relatively inexpensive. Additionally, it is a great way to customize lighting to suit specific needs, such as brightness or color temperature. Homemade LED lights also tend to be more energy-efficient and have a longer lifespan than traditional light sources, which can save money on electricity bills and reduce waste. Furthermore, building an LED light can be an educational experience that teaches valuable skills in electronics and circuitry. Overall, making an LED light at home is a worthwhile endeavor that can enhance both functionality and creativity.
Conclusion
In conclusion, creating your own LED light is a simple and satisfying DIY project that can be completed in just five easy steps. By following the instructions carefully and using the appropriate tools and materials, you can customize your lighting to suit your needs and preferences. Not only is it a fun and creative way to enhance your home or workspace, but it also provides an environmentally-friendly alternative to traditional lighting options. So why not give it a try and see the bright results for yourself?


