DIY Illumination: Connect LED Light Strips Without Connectors in 5 Easy Steps
Are you looking for a way to brighten up your living space without breaking the bank? Look no further than DIY illumination with LED light strips! These versatile and energy-efficient lights can be easily installed without the need for connectors, saving you time and money. In just five easy steps, you can have a beautifully illuminated space that is both functional and stylish. LED light strips are a popular choice for DIY lighting projects due to their flexibility and ease of use. They can be cut to any length and are available in a range of colors and brightness levels. Whether you want to add a pop of color to your decor or create a cozy ambiance in your bedroom, LED light strips can help you achieve your desired effect. In this guide, we will walk you through the steps to connect LED light strips without connectors, making it easy for you to create a custom lighting solution for your home.
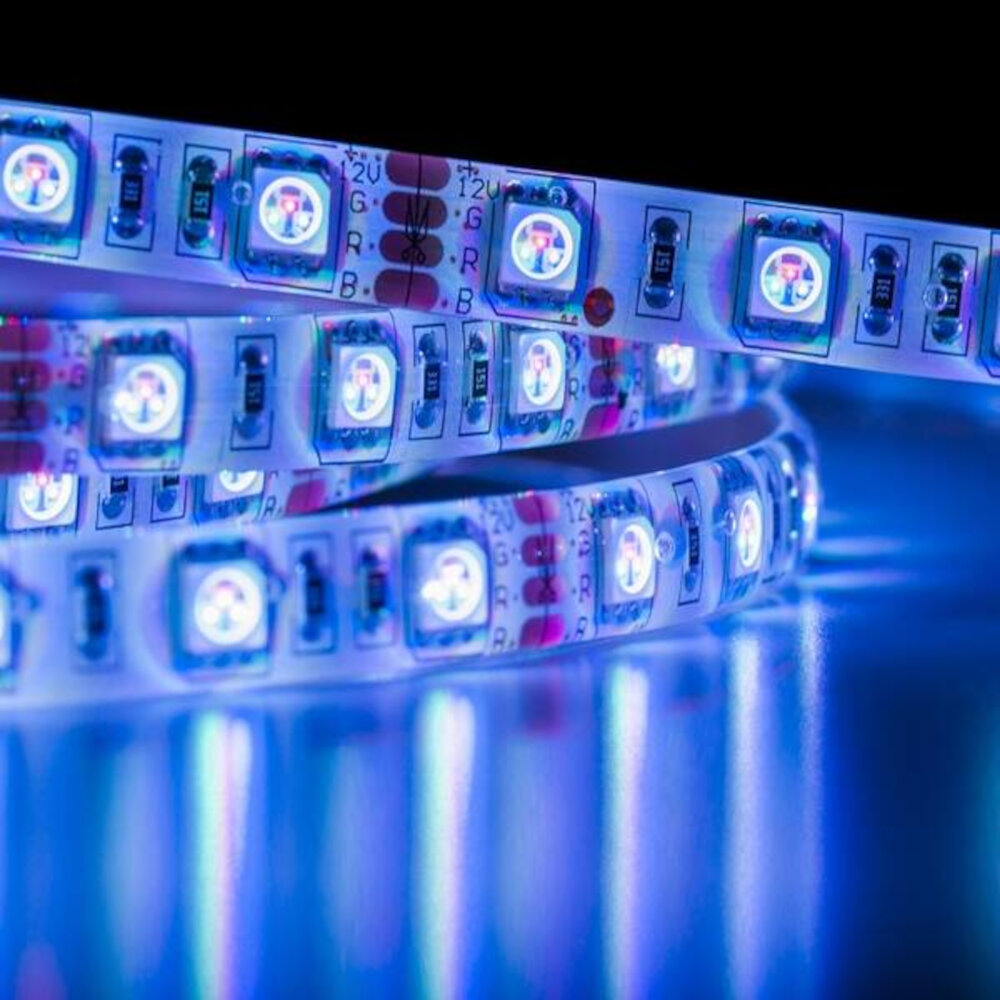
LED light strips, also known as LED tape or ribbon lights, are a versatile lighting source that can be used for a variety of applications. They consist of a flexible circuit board with small LED lights mounted on it, which can be cut to custom lengths and attached to different surfaces. LED light strips come in various colors, brightness levels, and IP ratings, making them suitable for indoor and outdoor use. They are commonly used for accent lighting, under-cabinet lighting, entertainment systems, and decorative purposes. With their low energy consumption, long lifespan, and ease of installation, LED light strips have become increasingly popular among DIY enthusiasts looking to add a touch of ambiance and style to their homes.
One of the most common issues people face when working with LED light strips is connecting them without the use of connectors. This can be a challenging task, as these strips are designed to be connected using specialized connectors that can be expensive and difficult to find. However, with a little DIY ingenuity, it is possible to connect LED light strips without the need for connectors. By following a few simple steps, anyone can create a secure and reliable connection that will allow their LED light strips to function perfectly, without any need for expensive connectors or specialized equipment.
Materials Needed
When it comes to DIY projects, having the right materials is crucial. For this DIY Illumination project, there are a few key materials that you will need to ensure that you can successfully connect LED light strips without connectors. Firstly, you will need a soldering iron and solder wire. This is essential for connecting the wires together securely. You will also need wire strippers to prepare the wires for soldering. A multimeter is also recommended for testing the connection and ensuring that the polarity is correct. Additionally, you will need heat shrink tubing to cover and protect the soldered connections. In addition to these materials, you will also need LED light strips and a power supply. It’s important to choose LED light strips that are compatible with your power supply and that have the correct voltage and current specifications. It’s also recommended to choose a power supply that has a little extra power output than what your LED light strips require, to ensure that they are working at their best. With the right materials and a little bit of patience, you can easily connect LED light strips without connectors and create a beautiful and unique lighting display in your home or workspace.
The first step in any DIY project is to gather all the necessary materials. For this project, you will need LED light strips, a power supply, a wire cutter, electrical tape, and some soldering equipment. It’s important to choose the right type of LED light strips for your project, as there are many different options available. Look for strips with a high number of LEDs per meter, as this will provide a brighter and more even illumination. The power supply should be able to provide enough voltage and amperage to power your LED strips, so be sure to choose one that is compatible with your specific strips. With these materials in hand, you will be ready to dive into the 5 easy steps to connect LED light strips without connectors.
In order to connect LED light strips without connectors, you will need a few materials. The first material is the LED light strip itself, which is a flexible circuit board with small LED bulbs placed along its length. The function of the LED light strip is to provide illumination in a specific area. The second material you will need is a pair of scissors or wire cutters, which will be used to cut the LED light strip to the desired length. The third material is a soldering iron, which is used to join the cut ends of the LED light strip together. The fourth material is solder, which is a metal alloy used to join two pieces of metal together. Finally, you will need electrical tape, which is used to insulate the soldered joints and protect them from damage.
StepbyStep Instructions
Step-by-step instructions are an essential component of any DIY project. They provide a clear and concise guide that allows even beginners to complete a task with ease. When it comes to DIY illumination, step-by-step instructions are particularly crucial. This is because the process of connecting LED light strips can be a little tricky, especially for those who are not familiar with electronics. However, with clear step-by-step instructions, anyone can connect LED light strips without connectors in just five easy steps. The first step in connecting LED light strips without connectors is to measure the length of the strip you need. This is important because you don’t want to cut the strip too short or too long. Once you have the measurement, you can cut the strip accordingly. The second step is to prepare the wires. You will need to strip the ends of the wires to expose the metal conductor. This will allow you to connect the wires to the LED strip. The third step is to connect the wires to the LED strip. This can be a little tricky, but with the right technique, it can be done easily. The fourth step is to test the connection to ensure that the LED strip is working correctly. Finally, the fifth step is to mount the LED strip in its desired location.
The first step in the process of connecting LED light strips without connectors is to cut the strip to the desired size. This can be achieved by using a pair of scissors or a cutting tool that is designed for this purpose. It is important to measure the length of the area where the LED strip will be placed before cutting, to ensure that it fits perfectly. When cutting the strip, it is important to cut along the designated cut lines that are marked on the strip. This will ensure that the strip can be connected to a power source and that the individual LED lights will work properly. Once the strip has been cut to size, it is ready to be connected to the power source.
Step 2 in the process of connecting LED light strips without connectors is to prepare the wire ends. This step requires some attention to detail and the right tools to ensure that the wires are correctly stripped and ready for connection. To begin, you will need to measure the length of wire needed to connect the LED strip to the power source. Once you have measured and cut the wire, you will then need to strip the ends of the wires using wire cutters or pliers. It is important to strip the wires carefully, making sure not to damage the copper strands inside. After stripping, you may also want to tin the wire ends with solder to ensure a strong connection. Properly preparing the wire ends is crucial to the success of the overall project, so take your time and be thorough.
Once you have prepared the LED light strip and the wires, it’s time to move on to the third step: soldering the wires to the strip. Soldering is the process of melting a metal alloy to join two pieces of metal together. In this case, we are using solder to connect the wire to the copper pads on the LED strip. To begin, heat up your soldering iron and apply a small amount of solder to the tip. Then, carefully touch the tip of the iron to the copper pad on the LED strip and the wire at the same time. Once the solder melts and the wire is securely attached, remove the iron and let it cool. Repeat this process for all of the wires, making sure to double-check that each wire is connected to the correct pad. Soldering can be tricky, so take your time and be patient to ensure a proper connection.
Step 4 of the DIY illumination process involves connecting the LED light strips without connectors. This step is crucial to ensure that the light strips work seamlessly and without any interruptions. It requires careful attention to detail, as the strips need to be connected in the correct order to maintain the polarity. You can use soldering techniques to connect the strips or opt for a less permanent solution such as using electrical tape or wire nuts. Whichever method you choose, it is essential to ensure that the connections are secure and well-insulated to prevent any accidental short circuits. With proper attention and a bit of patience, this step can be completed efficiently, leaving you with a beautiful and functional lighting installation.
Step 5 of connecting LED light strips without connectors is the testing phase. This is a crucial step as it ensures that the connection is successful and the lights turn on as expected. To test the connection, plug the power supply into an outlet and switch it on. If the LED lights turn on, then congratulations, you have successfully connected the LED light strips without connectors. However, if the lights do not turn on, then there might be an issue with the connection, and you will need to troubleshoot to identify the problem. Overall, testing the connection is a critical step in the process of connecting LED light strips without connectors and ensures that your DIY illumination project is a success.
Tips and Tricks
Tips and tricks are an essential part of any DIY project, and when it comes to connecting LED light strips without connectors, there are a few things you can do to make the process easier. First and foremost, it’s important to have the right tools and materials on hand, including a soldering iron, wire cutters, and electrical tape. Additionally, it’s important to take your time and work carefully to ensure that your connections are secure and that your LED lights will function properly. Another helpful tip when connecting LED light strips without connectors is to use a multimeter to test your connections before powering up your lights. This will help you identify any issues or potential problems before you turn on your lights, which can save you a lot of time and hassle in the long run. Finally, be sure to check your connections regularly to ensure that they stay secure and that your lights continue to work as they should. With these tips and tricks in mind, you can easily connect LED light strips without connectors in just a few easy steps.
To ensure a successful connection when connecting LED light strips without connectors, there are a few things to keep in mind. Firstly, make sure that the power source is turned off before attempting to make any connections. Secondly, double-check that you have the right type of LED strip for your project, and that it is compatible with the power supply you are using. Thirdly, be careful when cutting the LED strip to size, as you don’t want to damage any of the internal components. Fourthly, use a soldering iron to join the wires together, making sure that you use the correct type of solder and that you don’t overheat the components. Finally, test the connection before mounting the LED strip in place to ensure that everything is working as it should be. By following these simple steps, you can successfully connect LED light strips without connectors and create stunning lighting effects in your home or workspace.
When working with LED light strips, it’s common to encounter some issues during the installation process. One of the most common problems is the failure of the lights to turn on, which can be caused by a loose connection or incorrect wiring. Another issue is flickering lights, which could be caused by a faulty power supply or a bad connection. Additionally, uneven lighting or sections of the strip not lighting up can be attributed to a faulty strip or incorrect installation. To troubleshoot these problems, it’s important to check all connections, ensure proper wiring, and eliminate any potential sources of interference. With a little bit of patience and attention to detail, you can easily solve these common issues and enjoy your DIY illuminated space.
The process of connecting LED light strips without connectors can seem daunting at first, but it can be done easily in just five steps. The first step is to determine the length of LED strip needed and cut it accordingly. After that, strip off the protective layer to expose the copper contacts, then twist together the contacts of the two strips to be connected. The next step is to cover the twisted contacts with electrical tape to ensure they are secure. Finally, connect the LED strip to a power source and test it to make sure it is working properly. By following these simple steps, anyone can create their own DIY illumination without the need for connectors.
If you’re tired of spending a lot of money on connectors for your LED light strips, or if you simply enjoy the satisfaction of doing things yourself, then the DIY approach is the way to go. Not only is it a great way to save money, but it also allows you to customize your lighting to your specific needs and preferences. You’ll feel a sense of pride and accomplishment when you’re finished with your project, and you’ll have learned a new skill in the process. Don’t be intimidated by the idea of DIY – with a little bit of research, practice, and patience, you’ll be able to create something truly unique and beautiful. So why not give it a try?
In conclusion, the value of DIY illumination cannot be overstated. Not only does it allow for customization and personalization of lighting solutions, but it also provides a sense of accomplishment and satisfaction when the final product is complete. With the help of tutorials such as \DIY Illumination Connect LED Light Strips Without Connectors in 5 Easy Steps,\ individuals can easily and affordably create their own lighting solutions without the need for professional assistance. By doing so, they can add a unique touch to their living spaces and enhance the ambiance of any room. DIY illumination is both practical and aesthetically pleasing, making it a worthwhile endeavor for anyone looking to brighten up their home or workspace.
Conclusion

In conclusion, illuminating your home or workspace with LED light strips is not only functional but also adds a touch of creativity and ambiance. While connectors are readily available for purchase, you can easily connect LED light strips without them in just five easy steps. With the right tools and a little bit of patience, you can create a stunning lighting display that perfectly suits your style and needs. So, why wait? Start your DIY illumination project today and enjoy the benefits of beautiful, energy-efficient lighting.

