DIY LED Grow Light Panel: A StepbyStep Guide to Making Your Own Efficient Plant Lighting System
As indoor gardening becomes more popular, plant enthusiasts are constantly looking for new and efficient ways to provide their plants with optimal growing conditions. One of the most important factors in indoor gardening is proper lighting, and LED grow lights have become a popular choice due to their energy efficiency and long lifespan. However, purchasing LED grow lights can be expensive, which is why many people are turning to DIY solutions. This step-by-step guide will show you how to create your own LED grow light panel, specifically designed to provide your plants with the light they need to grow healthy and strong. With a few basic materials and some simple tools, you can create a customized lighting system that is both cost-effective and energy-efficient. Whether you’re an experienced gardener or just starting out, this guide will provide you with all the information you need to create your own DIY LED grow light panel.
LED grow lights are a type of lighting system designed to provide plants with the optimal spectrum of light for growth and development. Unlike traditional light sources, such as incandescent or fluorescent bulbs, LED grow lights produce light in specific wavelengths that are ideal for photosynthesis. As a result, they can provide more targeted and efficient lighting for plants, which can lead to faster growth and higher yields. Additionally, LED grow lights are also more energy-efficient and longer-lasting than other types of lighting, which can help reduce energy costs and maintenance requirements over time. Overall, using LED grow lights can be a great way to enhance the growth and health of indoor plants, while also saving time and money on lighting expenses.
Building your own LED grow light panel can be a game-changer when it comes to growing healthy and thriving plants indoors. Not only does it allow you to customize the spectrum and intensity of the light, but it can also be significantly more cost-effective than purchasing pre-made grow lights. By utilizing high-quality LEDs and proper heat dissipation techniques, you can create an efficient and long-lasting lighting system that will promote optimal growth and yield for your plants. Additionally, the satisfaction and sense of accomplishment that come with creating something yourself can be incredibly rewarding. So, if you’re looking to take your indoor gardening to the next level, consider building your own LED grow light panel and see the difference it can make for your plants.
To make your own DIY LED grow light panel, you’ll need a few materials to get started. First, you’ll need LED strips, which can be found at most hardware stores or online retailers. You’ll also need a power supply to run the lights, as well as a heat sink to dissipate any excess heat. Additionally, you’ll need some wire connectors to connect the LED strips to the power supply, and a drill or saw to cut the aluminum frame that will hold the LED strips. Finally, you’ll need some thermal adhesive to attach the LED strips to the heat sink, and some screws and nuts to secure the frame and power supply. With these materials in hand, you’ll be well on your way to creating an efficient and effective plant lighting system that will help your plants thrive.
StepbyStep Guide
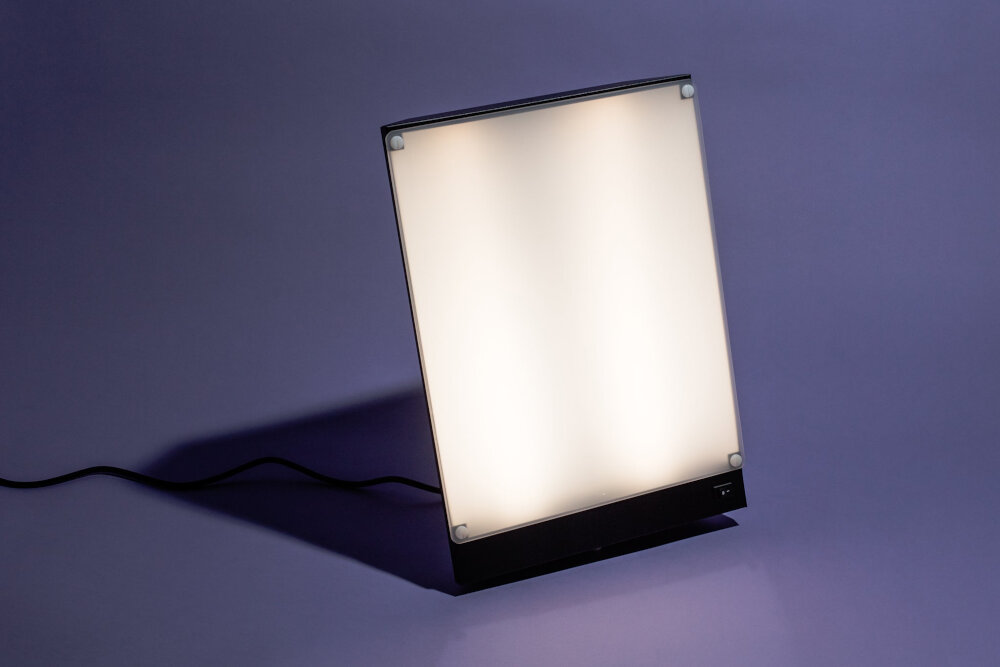
The Step-by-Step Guide is an essential element of any DIY project, especially when it comes to creating an efficient plant lighting system. In the case of making your own LED Grow Light Panel, having a detailed guide can be the difference between success and failure. A comprehensive guide should include a list of materials needed, detailed instructions on how to assemble the components, and helpful tips and tricks for troubleshooting any issues that may arise. When creating a Step-by-Step Guide for a DIY project, it is important to consider the target audience. In this case, the audience is likely to be individuals who are interested in gardening and have some basic knowledge of electronics. Therefore, the guide should be written in clear and concise language, avoiding technical terms that may be confusing to the average reader. Additionally, the guide should be visually appealing, with clear images and diagrams to help illustrate each step of the process. By providing a comprehensive and user-friendly guide, individuals can confidently create their own LED Grow Light Panel, leading to successful growth of their plants.
The first step in creating an efficient LED grow light panel is to design its layout. This involves determining the number of LEDs required, their placement, and the overall size of the panel. It is important to consider the specific needs of the plants being grown, as well as the space available for the panel. Factors such as the color spectrum of the LEDs, their wattage, and the distance between them must also be taken into account to ensure optimal growth and energy efficiency. Careful planning and attention to detail during this stage will ensure that the resulting LED grow light panel is effective, durable, and capable of producing healthy and vibrant plants.
To build the frame for your LED grow light panel, you will need to gather some materials such as aluminum angle bars, nuts and bolts, and a saw. Start by measuring and cutting the angle bars according to the size of your panel. Then, use nuts and bolts to secure the corners of the frame. Make sure that the frame is sturdy enough to hold the weight of the LED lights and the plants. You can also add some brackets or hooks to hang the panel if needed. The frame is an essential part of the LED grow light panel as it provides structural support and ensures that the lights are positioned correctly to maximize their effectiveness.
In Step 3 of making your own DIY LED grow light panel, it’s time to wire the LED lights. First, identify the positive and negative terminals on each LED strip or board. Then, connect the positive terminals of all the strips or boards together, and do the same for the negative terminals. Next, connect the positive and negative wires from the power supply to their corresponding terminals on the LED strips or boards. Make sure to use wire connectors or soldering to secure the connections and prevent any loose wires. Finally, test the lights to ensure they are working properly before mounting them onto the panel. Proper wiring is key to ensuring that your plants receive the right amount and quality of light for optimal growth.
Step 4 of making your own DIY LED grow light panel is to mount the LED grow lights onto the frame. This step requires careful attention to detail and precision to ensure that the lights are mounted securely and at the correct angle. Start by attaching the lights to the frame using screws or clips, making sure that they are evenly spaced and aligned. Next, adjust the angle of the lights to ensure that they are shining directly onto the plants. This step is crucial to ensure optimal growth and yield, as plants need the right amount and intensity of light to thrive. With the LED grow lights securely mounted and properly positioned, your DIY grow light panel is ready to provide your plants with the light they need to flourish.
Step 5 in the DIY LED grow light panel guide involves installing a cooling system for the LED lights. This is an essential step to ensure that the lights do not overheat and cause damage to the plants. There are several cooling options available, including fans, heatsinks, and water-cooled systems. Fans are the most budget-friendly option and work by blowing air over the lights to dissipate heat. Heatsinks are more effective and work by absorbing heat and distributing it throughout the system. Water-cooled systems are the most efficient but also the most expensive. Whichever cooling system you choose, make sure it is properly installed and functioning to ensure the longevity of your LED grow light panel.
Subheding3
A Step-by-Step Guide to Making Your Own Efficient Plant Lighting System\ is where the author explains how to select the right LED lights for the project. The author emphasizes the importance of choosing LED lights with the correct spectrum for the plants being grown. The author also recommends using LED lights with a high efficacy rating to ensure that the plant lighting system is as energy-efficient as possible. Furthermore, the author discusses the importance of selecting LED lights with a high Color Rendering Index (CRI) to ensure that the plants appear healthy and vibrant. Overall, Subheading3 is an essential section of the article that provides readers with the necessary information to select the right LED lights for their DIY grow light panel. In addition to selecting the right LED lights, Subheading3 also covers other essential considerations when creating a DIY grow light panel. For example, the author stresses the importance of considering the heat output of the LED lights when selecting them. The author recommends using LED lights with a low heat output to minimize the risk of the plants being damaged by excessive heat. Additionally, the author suggests using a fan or other cooling system to remove any excess heat generated by the LED lights. By considering these factors, readers can create a DIY grow light panel that is both effective and safe for their plants. Overall, Subheading3 is an informative and practical section of the article that provides readers with the necessary information to create a successful DIY grow light panel.
To get the most out of your LED grow light panel, there are several tips and tricks to keep in mind. First and foremost, it’s important to choose the right color temperature and spectrum for your plants. Most plants require a full spectrum of light, including blue and red wavelengths, which can promote photosynthesis and growth. Additionally, it’s important to position your LED grow lights at the correct distance from your plants to ensure they’re receiving enough light without getting burned. Using a timer to control the amount of light your plants receive each day can also help maximize efficiency, as can adjusting the height of your light panel as your plants grow taller. Finally, make sure to keep your LED grow light panel clean and dust-free, as dust and debris can reduce the amount of light your plants receive and hinder their growth. By following these simple tips and tricks, you can create a highly efficient and effective DIY LED grow light panel for all your indoor gardening needs.
Calculating the wattage and PAR of your LED grow light panel is crucial to ensure optimal growth and yield of your plants. To calculate wattage, multiply the LED’s voltage and current. For example, if your LED has a voltage of 3.2 volts and a current of 700 milliamps, the wattage would be 2.24 watts. To calculate PAR or photosynthetically active radiation, use a PAR meter to measure the amount of light emitted by your LED grow light panel. PAR meters measure the intensity of light in the range of 400 to 700 nanometers, which is the spectrum of light that plants use for photosynthesis. Aim for a PAR value of 400 to 800 micromoles per square meter per second for optimal plant growth. By calculating the wattage and PAR of your DIY LED grow light panel, you can ensure that your plants receive the right amount and quality of light they need to thrive.
Subheding4
Subheading4 in the article \DIY LED Grow Light Panel – A Step-by-Step Guide to Making Your Own Efficient Plant Lighting System\ is all about the materials needed to make your own LED grow light panel. This section is crucial as it provides readers with a clear understanding of what they need to purchase before beginning the DIY project. The materials required include a power supply, aluminum frame, LED diodes, thermal paste, and wires. The subheading also provides a detailed explanation of why each material is necessary, ensuring that readers understand the importance of each item. In addition to this, the subheading also provides an estimate of the total cost of the project, allowing readers to budget accordingly. Furthermore, Subheading4 also provides step-by-step instructions on how to assemble the LED grow light panel. This section is vital as it ensures that readers can follow the instructions easily without confusion. The instructions are clear and concise, making it easy for readers to understand each step. Furthermore, the subheading also provides tips and tricks to make the assembly process more comfortable and more efficient. For instance, it advises readers to use gloves when handling the LED diodes to prevent damage to the diodes. Overall, Subheading4 is an essential section in the article as it provides readers with the necessary information to make their own LED grow light panel easily and efficiently.
One of the most significant factors to consider when contemplating building your own LED grow light panel is the cost. On one hand, buying a premade panel can be convenient and save time. However, the cost of a premade panel can be significantly higher than building one yourself. Building your panel allows you to customize the size and wattage of the panel to match your specific plant’s needs. Additionally, sourcing your own parts and assembling the panel can be an enjoyable and rewarding DIY project. Overall, the cost of building your own LED grow light panel can be significantly lower than purchasing a premade one, making it an attractive option for those on a budget or looking for a fun DIY project.
Building your own LED grow light panel can offer a variety of environmental benefits. Firstly, LED grow lights are highly energy-efficient, using up to 75% less energy than traditional high-pressure sodium (HPS) bulbs. This means less energy consumption and fewer greenhouse gas emissions. Additionally, LED grow lights have a longer lifespan than HPS bulbs, reducing the need for frequent replacements and waste. Using DIY LED grow light panels also allows for customization, meaning you can choose the exact spectrum of light needed for your plants, reducing wasted energy and resources. By building your own LED grow light panel, you not only provide for your plants’ needs but also contribute to a more sustainable future.
Building your own LED grow light panel is a highly beneficial and important project for any indoor gardener. Firstly, it allows you to customize the spectrum and intensity of light to suit the specific needs of your plants, leading to better growth and yield. Secondly, it is a more cost-effective and energy-efficient option compared to buying pre-made panels, which can be expensive and wasteful. Additionally, building your own panel gives you a sense of pride and satisfaction in creating something useful and sustainable. By following a step-by-step guide, you can easily create your own efficient plant lighting system and reap the rewards of healthier, happier plants.
If you’re looking to take your indoor gardening game to the next level, building your own LED grow light panel is a fantastic option. Not only will it save you money compared to buying a pre-made panel, but you also have the freedom to customize it to your exact needs. Don’t be intimidated by the idea of building your own panel – with the right instructions and a bit of patience, it’s a straightforward process. Plus, the sense of satisfaction you’ll get from seeing your plants thrive under your own creation is truly unbeatable. So why not give it a try and take your indoor gardening to new heights?
In conclusion, creating your own LED grow light panel is a cost-effective and rewarding project that can significantly improve the health and yield of your plants. By following the step-by-step guide and using high-quality materials, you can ensure that your panel is efficient, durable, and safe to use. However, it’s important to keep in mind that different plants have different lighting needs, and you may need to adjust the spectrum and intensity of your LEDs accordingly. Additionally, proper ventilation, temperature control, and watering are also crucial factors for successful indoor gardening. With these tips and the knowledge gained from this guide, you’ll be well on your way to growing healthy, thriving plants all year round.
Conclusion
In conclusion, creating your own DIY LED grow light panel can be a cost-effective and efficient way to provide optimal lighting for your plants. By following the step-by-step guide provided, you can customize the size and spectrum of the lighting to meet the specific needs of your plants. Not only will this save you money in the long run, but it also allows you to have control over the quality and sustainability of your plant lighting system. With a little bit of creativity and DIY spirit, you can create an efficient and effective grow light panel that will help your plants thrive.


