Expert Guide: How to Easily Install Your LED Tailgate Light Bar in 5 Simple Steps

Are you tired of the dull and outdated look of your truck’s tailgate? Installing an LED tailgate light bar can give your vehicle a modern and stylish appearance while also enhancing safety on the road. Whether you’re a DIY enthusiast or a novice, this expert guide will provide you with all the necessary information to install your LED tailgate light bar in just five simple steps. LED tailgate light bars are a popular aftermarket upgrade for trucks and SUVs. They provide a bright and highly visible light source that enhances safety while driving at night or in inclement weather. These light bars are available in various lengths and colors, allowing you to choose the one that best suits your vehicle and personal style. With this guide, you can easily install your LED tailgate light bar and upgrade the look and safety of your truck.
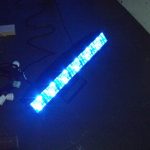
An LED tailgate light bar is a strip of LED lights that is mounted on the tailgate of a vehicle. It is designed to provide additional lighting and enhance the visibility of the vehicle, especially during nighttime driving or in low-light conditions. The light bar is available in various lengths and can be easily installed on most vehicles. It is made of high-quality materials that are durable and weather-resistant, ensuring that the light bar will last for a long time. LED tailgate light bars come in different colors and can be customized to match the color scheme of the vehicle. Overall, the LED tailgate light bar is an excellent addition to any vehicle, providing both style and functionality.
Installing an LED tailgate light bar is a smart move that can offer a variety of benefits. Firstly, these light bars enhance visibility and safety on the road, making it easier for other drivers to see your vehicle in low-light conditions. Secondly, they are energy-efficient and long-lasting, which means you won’t have to worry about frequent replacements or high electricity bills. Thirdly, they add a stylish touch to your truck or SUV, giving it a modern and sleek appearance. Finally, installing an LED tailgate light bar is a simple and straightforward process that can be done in just a few easy steps, making it a cost-effective upgrade for any vehicle owner.
Proper installation is critical when it comes to tailgate light bars, as it ensures not only the product’s longevity but also safety while driving. The installation process of LED tailgate light bars requires attention to detail, and each step must be executed with precision to ensure optimal functionality. The importance of proper installation cannot be overstated, as a poorly installed light bar can cause damage to the vehicle’s electrical system and even create a hazard on the road. Therefore, it is crucial to follow the manufacturer’s instructions and take the time to install the light bar correctly. This will not only ensure the safety of the driver and the vehicle but also provide a professional and sleek appearance to the vehicle.
Step 1: Gather Materials

The first step in installing an LED tailgate light bar is to gather all materials needed for the job. This includes the LED light bar itself, as well as any necessary wiring, connectors, and mounting hardware. It’s important to ensure that all materials are compatible with one another and designed specifically for the make and model of the vehicle. This will help to ensure a seamless installation process and prevent any potential damage to the vehicle or the light bar. When gathering materials, it’s also important to consider the tools needed for the installation. Common tools that may be necessary include wire cutters, crimpers, electrical tape, and a drill with appropriate drill bits. It’s important to have all necessary tools on hand before beginning the installation process to prevent delays and ensure a smooth installation. Once all materials and tools have been gathered, it’s time to move on to the next step in the installation process.
Before starting the installation process of your LED tailgate light bar, it is essential to have all the necessary materials in hand. First and foremost, you will need the light bar itself, which should be the correct size for your vehicle. Make sure to also have the necessary wiring harness, connectors, and mounting hardware. Additionally, you may need a drill and drill bits, wire strippers, electrical tape, and a fuse tap. It’s important to have all the materials ready before starting the installation to avoid any unnecessary delays or trips to the store. By having everything ready, you can easily follow the installation steps and get your LED tailgate light bar up and running in no time.
When it comes to selecting the right materials for your LED tailgate light bar installation, there are some important things you should keep in mind. First, make sure the materials you choose are durable and weather-resistant, as your light bar will be exposed to the elements. Look for high-quality wiring and connectors to ensure a secure and long-lasting connection. Additionally, consider the mounting hardware you will need and choose a suitable adhesive or fastener to ensure your light bar stays securely in place. Finally, be sure to check any manufacturer recommendations or specifications to ensure you select materials that are compatible with your specific light bar model. By taking the time to select the right materials, you can ensure a successful and long-lasting installation.
If you’re looking to add some personal flair to your LED tailgate light bar, there are several optional materials for customization that you can consider. One popular option is to add a vinyl sticker or decal to the light bar, featuring a favorite sports team, hobby, or phrase. Another option is to use colored or tinted lenses to create a unique color scheme that matches your vehicle or personal style. For those who want to take their customization to the next level, you can even add additional LED lights or strobe lights for a more eye-catching effect. Whatever your preferences may be, adding these optional materials can help make your LED tailgate light bar truly your own.
Step 2: Prepare Your Vehicle
In the second step of installing an LED tailgate light bar, it is crucial to prepare your vehicle for the installation process. This step involves several essential tasks that will ensure a smooth and successful installation. Firstly, you should clean the area where you plan to install the light bar thoroughly. This will help remove any dirt, grime, or debris that may interfere with the installation process. Additionally, you should ensure that the surface is dry, as any moisture may affect the adhesive’s effectiveness. Another critical task during this step is to locate the power source where you will connect the light bar’s wires. You can consult your vehicle’s manual or seek advice from an expert if you are unsure. Once you have identified the power source, ensure that it is switched off to avoid any electrical mishaps. You may also need to remove some panels or trim pieces to access the power source comfortably. Overall, preparing your vehicle in this step ensures that the installation process is smooth, efficient, and safe. In conclusion, preparing your vehicle is a crucial step in installing an LED tailgate light bar. It involves several tasks such as cleaning the surface and identifying the power source, which are essential for a successful installation. By following these steps, you can ensure that the light bar is installed correctly and functions optimally. Additionally, it is essential to exercise caution during this step to avoid any electrical mishaps or damage to your vehicle.
Before installing your LED tailgate light bar, it is essential to prepare your vehicle. Start by cleaning the area where you plan to install the light bar. Make sure there is no dirt, grease or debris that may interfere with the installation process. Next, measure the length of the light bar and ensure that it will fit the width of the tailgate. If necessary, trim the light bar to fit the tailgate perfectly. Then, check the wiring of your vehicle to ensure that it is compatible with the light bar. Check your vehicle’s manual or seek professional help if you are unsure about the wiring. Proper preparation will ensure that the installation process is seamless and the light bar works effectively.
Safety is of utmost importance during the preparation phase of installing an LED tailgate light bar. Before starting the installation, it is recommended to read the instruction manual thoroughly and gather all the tools required. While working with electrical components, it is crucial to wear safety gloves and goggles to prevent any injuries. Additionally, ensure that the vehicle’s battery is disconnected to avoid any electrical shocks. Always work in a well-ventilated area to avoid inhaling toxic fumes that may be emitted during the installation process. Lastly, take breaks as necessary to prevent fatigue and stay hydrated to avoid dehydration. Following these safety precautions will ensure a smooth and safe installation process.
When it comes to installing an LED tailgate light bar, there are a few common mistakes that you should avoid. First, make sure that you have the right tools and equipment for the job, including wire strippers, electrical tape, and a soldering iron if necessary. It’s also important to read the instructions carefully and follow them step-by-step, as skipping a step or doing them out of order can lead to difficulties down the line. Additionally, be sure to test the lights before you finish the installation, as this will save you time and frustration if there are any issues. Finally, take your time and be patient, as rushing through the installation can lead to mistakes and a less-than-perfect end result. By avoiding these common mistakes, you can ensure a successful LED tailgate light bar installation.
Step 3: Install the LED Tailgate Light Bar

Installing an LED tailgate light bar is a great way to add style and functionality to your vehicle. Step 3 of the installation process involves mounting the light bar onto the tailgate. Before beginning, ensure that the surface is clean and dry. It is important to wipe down the area with a clean cloth to remove any dirt, grime, or debris. This will ensure that the adhesive tape on the light bar adheres properly to the surface. Next, position the light bar onto the tailgate to determine the placement. Once you have decided on the position, remove the backing from the adhesive tape and press the light bar firmly onto the tailgate. Make sure to apply pressure evenly across the entire light bar to ensure a secure hold. It is important to allow the adhesive tape to cure for at least 24 hours before using the light bar to ensure that it is properly secured. Once the light bar is mounted, you can move on to the next step in the installation process, which is wiring the light bar to your vehicle’s electrical system.
Installing a light bar on your vehicle’s tailgate can add style and functionality to your ride. To get started, you’ll need to gather your tools: a socket wrench, electrical tape, wire stripper, and a test light. Next, locate a suitable location for the light bar and clean the area thoroughly. Then, use the wire stripper to strip the insulation off the wires and connect them to the light bar. Secure the wires with electrical tape and test the light bar to ensure it’s working properly. Finally, mount the light bar onto the tailgate with screws and enjoy your newly installed LED tailgate light bar.
When it comes to installing an LED tailgate light bar, proper placement and alignment are key to ensuring optimal functionality and appearance. Before beginning the installation process, it is important to measure the width of your tailgate and choose a light bar that fits snugly. Once you have selected your light bar, start by cleaning the surface of your tailgate to remove any debris or dirt. Next, carefully align the light bar with the center of your tailgate, making sure it is level and straight. Use a measuring tape and level to ensure accuracy. Finally, secure the light bar in place using the provided adhesive tape or screws, taking care not to damage any wiring or components. Proper placement and alignment will ensure that your LED tailgate light bar looks great and functions perfectly for years to come.
When it comes to installing an LED tailgate light bar, there are some common installation issues that one may face. One of the most common issues is the incorrect wiring connection of the light bar, which can lead to flickering or not working at all. Another issue can be the placement of the adhesive tape, which can cause the light bar to come off or not stick properly. Additionally, the use of incorrect tools or not following the manufacturer’s instructions can also lead to installation issues. To troubleshoot these issues, it is important to double-check the wiring connection and placement of the adhesive tape, and ensure that the correct tools are being used and the instructions are being followed accurately.
Step 4: Connect the Wiring

Step 4 of the LED tailgate light bar installation process is all about connecting the wiring. This step is crucial, as it will ensure that your light bar works properly and safely while you’re driving. Start by locating the wiring harness that came with your light bar. This harness should have two wires: a red wire and a black wire. Take the red wire and connect it to the brake light wire in your vehicle. This wire should be located near the back of your vehicle, near the tail lights. Next, take the black wire from the wiring harness and connect it to the ground wire in your vehicle. This wire should also be located near the back of your vehicle, near the tail lights. Once both wires are securely connected, use zip ties or electrical tape to secure them in place. It’s important to make sure that the wiring is tidy and secure, as loose or exposed wires can be dangerous while driving. With the wiring connected and secured, you’re one step closer to having a fully functional LED tailgate light bar.
Wiring components are essential parts of any electrical installation or repair project. These components are designed to facilitate the flow of electricity from one point to another, ensuring that the electrical system operates safely and efficiently. Some of the most common wiring components include wires, cables, connectors, terminals, switches, and fuses. Wires and cables are used to carry electrical current from the power source to the LED tailgate light bar, while connectors and terminals are used to join different wires and cables together. Switches are used to turn the LED light bar on and off, while fuses are used to protect the electrical system from overloads and short circuits. Understanding these wiring components is crucial for any DIYer looking to install an LED tailgate light bar in their vehicle.
Before connecting the wiring for your LED tailgate light bar, make sure to have all necessary tools and equipment such as wire cutters, crimping tools, and electrical tape. Begin by locating the wiring harness for your brake lights and reverse lights, usually found near the tailgate hinge. Carefully cut and strip the wires using the wire cutters, and then connect the red wire from the LED light bar to the brake light wire using a crimp connector. Next, connect the black wire from the LED light bar to the ground wire using another crimp connector. Finally, wrap the connectors with electrical tape to ensure a secure connection. Repeat these steps for the reverse light wires, connecting the white wire from the LED light bar to the reverse light wire and the black wire to the ground wire. Once all connections are made and secured, turn on your headlights and test the LED light bar to ensure proper functionality.
When it comes to wiring, safety should always be the top priority. First and foremost, ensure that the power source is turned off before beginning any work. This will prevent any electrical shocks or potential fires. It’s also important to wear appropriate personal protective equipment, such as gloves and safety glasses, to avoid any injuries. Additionally, ensure that all wires are properly insulated and secured to prevent any accidental contact or damage. Finally, take extra care when working in wet or damp conditions, as this can increase the risk of electrical hazards. By taking these safety precautions, you can ensure a smooth and safe installation process for your LED tailgate light bar.
Step 5: Test Your Light Bar
After completing the installation process of your LED tailgate light bar, it is essential to test it before hitting the road. Testing your light bar will ensure that it is functioning correctly and that you won’t have any issues while driving at night. To test your light bar, simply turn on your vehicle’s headlights and then turn on the LED light bar. Check all the lights, including the brake lights, turn signals, and reverse lights, to ensure they are working correctly. If any lights are not working, double-check your wiring, connections, and fuses to identify the issue. It is crucial to test your LED tailgate light bar, especially if you plan to use it frequently. A malfunctioning light bar can be dangerous, as it can cause accidents or lead to a traffic violation. By testing it, you can ensure that it meets the safety regulations of your state and that it is visible to other drivers. So, take the time to test your LED tailgate light bar after installation to avoid any issues while on the road.
Before installing your LED tailgate light bar, it’s important to test it to ensure that it’s functioning properly. Start by connecting the light bar to a 12V power source, such as a car battery or power supply. Once connected, turn on the power source and check that all the lights on the bar are illuminated. Next, test each function of the light bar, including the turn signals, brake lights, and running lights, to ensure that they are working correctly. If you notice any issues during testing, troubleshoot the problem before installing the light bar on your vehicle. By testing your light bar in advance, you can avoid any potential issues and ensure a smooth and successful installation.
During the testing phase of installing an LED tailgate light bar, there are several common issues to look out for. One of the most common is wiring errors, which can lead to a malfunctioning or non-functional light bar. It is important to carefully follow the instructions and double-check all connections to ensure proper wiring. Another issue to be aware of is water damage, as the light bar is typically installed on the exterior of the vehicle and exposed to the elements. It is important to choose a waterproof or water-resistant light bar and to seal all connections to prevent water damage. Additionally, it is critical to check for any physical damage to the light bar or mounting hardware before installation, as any damage can compromise the functionality and safety of the light bar. By being vigilant and addressing these common issues during testing, you can ensure that your LED tailgate light bar is installed safely and effectively.
If you encounter any testing issues while installing your LED tailgate light bar, there are several troubleshooting tips you can follow to resolve the problem. First, check all connections to ensure they are securely in place. If the lights are not turning on, make sure the power source is connected properly and the fuse is not blown. If the lights are flickering or dimming, there may be a wiring issue or a problem with the voltage regulator. In this case, check the wiring for any loose or damaged connections and replace the voltage regulator if necessary. If you are still experiencing issues, consult the manufacturer’s instructions or seek assistance from a professional. By following these troubleshooting tips, you can quickly and easily resolve any testing issues and enjoy the benefits of your new LED tailgate light bar.
Installing an LED tailgate light bar offers numerous benefits for drivers, making it a worthwhile investment. Firstly, it provides increased visibility and safety, as the bright LED lights make it easier for other drivers to see your vehicle from afar. This is especially helpful during adverse weather conditions or night driving. Secondly, it adds a stylish and modern touch to your vehicle, making it stand out on the road. Additionally, LED lights are energy-efficient and have a longer lifespan than traditional bulbs, saving you money in the long run. Lastly, installation is quick and easy, requiring only a few simple steps, making it a hassle-free upgrade for any vehicle owner.
Proper installation and maintenance of LED tailgate light bar are crucial for its optimal functioning and longevity. A well-installed light bar ensures that it works efficiently and provides maximum visibility, thereby enhancing safety on the road. Poor installation, on the other hand, can lead to malfunctioning of the lights, which can be dangerous and even result in accidents. Furthermore, regular maintenance of the light bar helps to detect any issues early, preventing them from escalating into more significant problems. Neglecting maintenance can lead to reduced performance, shorter lifespan, and increased repair costs. Therefore, it is essential to follow the manufacturer’s instructions for installation and maintenance to ensure that your LED tailgate light bar stays in perfect condition for a long time.
Congratulations on successfully installing your new LED tailgate light bar! You’ve taken the first step in enhancing the look and functionality of your vehicle. Now it’s time to enjoy the benefits of your new upgrade. Whether you’re driving in the city or off-roading, your new light bar will provide increased visibility and safety. Not only that, but the sleek design and vibrant lighting will surely turn heads and make your vehicle stand out from the rest. So, get out there and enjoy your new accessory, and don’t forget to show it off to your friends and family!
Conclusion

In conclusion, installing an LED tailgate light bar is a simple and straightforward process that can be accomplished in just a few easy steps. By following the expert guide outlined in this article, you can ensure that your installation is done safely and effectively, providing you with a reliable and eye-catching addition to your vehicle. With the right tools and a bit of patience, you can easily transform the look of your tailgate and enhance its visibility on the road. So why wait? Get started on your LED tailgate light bar installation today and enjoy the benefits of a brighter and more stylish vehicle.

