LED Light Bulb Testing Made Easy: How to Use a Multimeter for Accurate Results
Light Emitting Diode (LED) bulbs are becoming increasingly popular due to their energy efficiency and long-lasting lifespan. They are a great alternative to traditional incandescent and fluorescent bulbs. However, like any other electrical device, LED bulbs can also malfunction or fail over time. This is where a multimeter comes in handy. By using a multimeter, you can easily test the functionality and performance of an LED bulb, without the need for professional assistance. In this article, we will walk you through the steps on how to use a multimeter to test LED light bulbs accurately. Before we dive into the details of using a multimeter for LED bulb testing, it’s essential to understand what a multimeter is and how it works. A multimeter is a versatile electrical tool that can measure voltage, current, and resistance. It can be used to troubleshoot electrical problems and diagnose faults in circuits and devices. In the context of LED bulbs, a multimeter can help detect issues such as burned-out diodes, faulty wiring, or incorrect voltage. By using a multimeter, you can quickly identify the cause of the problem and take appropriate steps to fix it.
Testing LED light bulbs is crucial for ensuring their quality, reliability, and longevity. There are a plethora of factors that can impact the performance of LED bulbs, including voltage fluctuations, temperature changes, and electrical surges. By testing the LED bulbs, you can determine whether they meet the required specifications, such as voltage and current ratings, and identify any potential issues or defects that may cause them to malfunction prematurely. Additionally, testing LED bulbs can help you avoid unnecessary costs and wastage by identifying faulty bulbs before they are installed or shipped to customers. Using a multimeter for LED bulb testing can provide accurate and reliable results, enabling you to make informed decisions about the quality and suitability of the bulbs.
Multimeters are an essential tool for testing electrical components, including LED light bulbs. They work by measuring different electrical properties such as voltage, current, and resistance. The device is equipped with probes that are connected to the component being tested. When the probes make contact with the component, the multimeter reads the electrical signal and displays the measurement on a digital or analog screen. This allows the user to determine if the component is functioning correctly or if it needs to be replaced. Multimeters are versatile tools that can provide accurate readings for a wide range of electrical components, making them an indispensable tool for electricians and DIY enthusiasts alike.
Understanding LED Light Bulbs
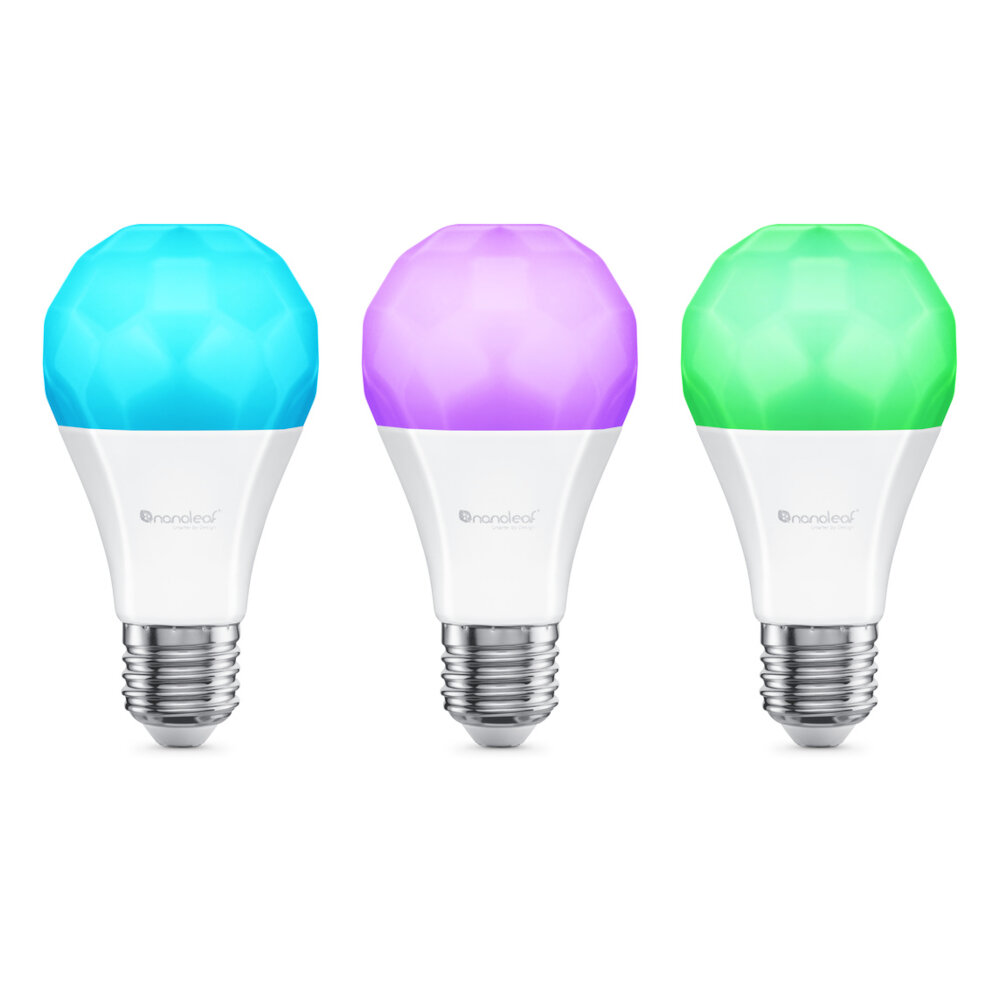
LED light bulbs have become increasingly popular in recent years due to their energy efficiency and long lifespan. However, understanding the technology behind these bulbs can be confusing for those who are not familiar with it. LED stands for \light-emitting diode,\ which is a semiconductor device that emits light when an electric current passes through it. LED bulbs contain multiple diodes that emit light in different colors, and a microchip that controls the amount and color of light that is emitted. LED bulbs are much more efficient than traditional incandescent bulbs because they produce less heat and use less energy to produce the same amount of light. This means that they not only save money on energy bills, but they also last much longer than traditional bulbs, which need to be replaced frequently. When it comes to testing LED light bulbs, using a multimeter is essential for accurate results. A multimeter is a versatile device that can measure voltage, current, and resistance in electrical circuits. To test an LED bulb with a multimeter, you will need to set the device to the \diode test\ mode, which sends a small amount of current through the diode to measure its voltage drop. The voltage drop is a measure of the diode’s conductivity, which indicates whether it is working properly. A working LED diode should have a voltage drop of around 2-3 volts, while a faulty diode will have a much higher or lower voltage drop. By using a multimeter to test LED bulbs, you can quickly and accurately identify any faulty diodes and replace them as needed, ensuring that your LED bulbs continue to provide energy-efficient and long-lasting light.
LED technology is a type of lighting technology that stands for Light Emitting Diode. LEDs are semiconductor devices that produce light when an electrical current flows through them. They are much more energy-efficient than traditional incandescent bulbs and have a longer lifespan. LED lights also offer a range of color options and can be dimmed or brightened easily. With the advancement of technology, LEDs have become more affordable and accessible for everyday use in homes, offices, and other applications. The use of LED technology has revolutionized the lighting industry and has become the go-to option for those looking for an energy-efficient and long-lasting lighting solution.
LED light bulbs, or Light Emitting Diodes, are different from other types of bulbs in several ways. First and foremost, they are much more energy-efficient than traditional incandescent bulbs or even compact fluorescent bulbs (CFLs), using up to 75% less energy to produce the same amount of light. Additionally, LED bulbs have a much longer lifespan, lasting up to 25 times longer than traditional bulbs. They also emit less heat, making them safer to use and reducing the strain on air conditioning systems. Finally, LED bulbs are capable of producing a wider range of colors and hues, making them ideal for creating ambience or mood lighting in a variety of settings.
LED light bulbs work by using a semiconductor material that emits light when an electric current passes through it. Specifically, when a voltage is applied to the LED, electrons are able to flow through the semiconductor material, filling up \holes\ and releasing energy in the form of photons of light. This process, called electroluminescence, is what allows LED bulbs to emit light without generating significant heat, making them more energy-efficient and long-lasting than traditional incandescent bulbs. Additionally, LED bulbs can be designed to emit light in a specific color or wavelength, making them ideal for a variety of applications ranging from home lighting to electronic displays.
Types of Multimeters
Multimeters are versatile and essential tools used by electricians, technicians, and DIY enthusiasts for testing, troubleshooting, and diagnosing electrical circuits and devices. There are three types of multimeters: analog, digital, and auto-ranging. Analog multimeters have a moving needle that indicates the measurement value on a scale. Digital multimeters (DMM) have a numerical display that shows the measurement value. Auto-ranging multimeters are digital multimeters that automatically select the appropriate range for the measurement. They are more convenient to use than manual range selection multimeters. The range of a multimeter is the maximum value it can measure for a particular function. Some multimeters have additional functions such as capacitance, frequency, and temperature measurement. Analog multimeters are simple to use and do not require batteries to operate. They are suitable for measuring the voltage, current, and resistance of DC and AC circuits. However, they are less accurate than digital multimeters, and the readings may be affected by parallax error. Digital multimeters are more accurate, reliable, and precise than analog multimeters. They can measure the voltage, current, and resistance of DC and AC circuits with high accuracy. Digital multimeters also have additional features such as data hold, peak hold, and backlight that make them more user-friendly. Auto-ranging multimeters are the most convenient type of multimeters to use, especially for beginners. They automatically select the appropriate range for the measurement, which reduces the risk of damage to the instrument and the circuit under test.
Multimeters are versatile tools that can be used to measure voltage, current, and resistance in electronic devices. There are several types of multimeters available, including analog, digital, and clamp multimeters. Analog multimeters use a needle to display measurements, while digital multimeters use a digital display. Clamp multimeters are designed to measure current without breaking the circuit. Additionally, there are specialized multimeters for specific applications, such as automotive multimeters for testing vehicle electrical systems. Choosing the right multimeter depends on the application and the level of precision required. Overall, multimeters are essential tools for anyone working with electronics, and selecting the right type can make all the difference in obtaining accurate results.
When it comes to multimeters, there are two main types: analog and digital. Analog multimeters use a needle and a scale to display readings, whereas digital multimeters use a digital display. Analog multimeters are generally less expensive and can be more accurate for measuring rapidly changing readings, such as in electrical motors. However, they can be more difficult to read and interpret, especially for those who are not experienced with using them. Digital multimeters are more user-friendly and provide a more precise reading, making them ideal for measuring small changes in voltage or current. They also tend to have more features, such as auto-ranging and data logging, that can make them a better choice for more complex testing. Ultimately, the choice between an analog and digital multimeter comes down to personal preference and the specific needs of the user.
When it comes to testing LED light bulbs, a digital multimeter is the best tool for accurate results. Specifically, a multimeter with a DC voltage measurement range of 0-30 volts is ideal for testing LED bulbs. This is because LED bulbs operate on low voltage and current, and a multimeter with a higher voltage range may cause damage to the bulb or the multimeter itself. Additionally, a multimeter with a continuity function can quickly determine if the LED bulb is functioning correctly by checking for a complete circuit. Overall, a digital multimeter with a DC voltage range of 0-30 volts and a continuity function is the recommended choice for testing LED light bulbs.
Testing LED Light Bulbs with a Multimeter
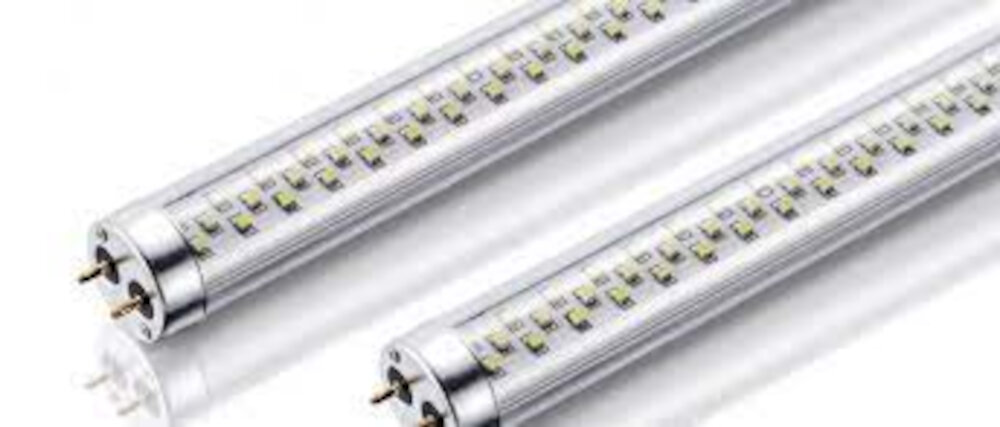
LED light bulbs are becoming increasingly popular due to their energy efficiency and long lifespan. However, like any electrical device, they can also experience problems such as dimming or flickering. In order to diagnose these issues, it is important to test the LED light bulbs with a multimeter. A multimeter is a versatile tool that measures voltage, current, and resistance, making it an ideal device for testing electrical components. By using a multimeter, you can accurately measure the voltage and current of an LED light bulb to determine if it is functioning properly. To test an LED light bulb with a multimeter, you will need to set the multimeter to the correct setting and connect the multimeter leads to the LED bulb. It is important to ensure that the LED light bulb is not connected to any electrical source before testing. Once the multimeter is set to the correct setting, you can touch the leads to the contacts of the LED bulb to measure the voltage and current. By comparing the readings to the specifications of the LED bulb, you can determine if the bulb is working correctly or if it needs to be replaced. Overall, testing LED light bulbs with a multimeter is a simple and effective way to diagnose any issues and ensure that the bulbs are functioning properly.
Testing LED light bulbs with a multimeter is a simple procedure that can be completed in a few easy steps. First, set the multimeter to the voltage setting and then connect the probes of the multimeter to the positive and negative terminals of the LED bulb. Next, turn on the multimeter and check the voltage reading; it should be around the same as the voltage of the bulb. If the voltage reading is significantly different, it could indicate a problem with the bulb. Additionally, you can use the continuity setting to check the circuit of the LED bulb, which should be open when the bulb is off and closed when it is on. By following these steps, you can quickly and accurately test LED light bulbs with a multimeter.
When it comes to testing LED light bulbs, obtaining accurate results is crucial. To ensure accurate readings, it is important to use a high-quality multimeter and to make sure it is properly calibrated. Additionally, it is important to follow the manufacturer’s instructions for testing the LED bulb, as different models may require different testing methods. It is also important to make sure that the circuit being tested is properly grounded and that the multimeter is set to the correct voltage range. Finally, it is important to take multiple readings to confirm the accuracy of the results and to note any variations or inconsistencies. By following these tips, you can be confident in the accuracy of your LED light bulb testing results.
When testing LED light bulbs with a multimeter, there are some common mistakes that one should avoid to get accurate results. One of the most common mistakes is not setting the multimeter to the correct voltage range. LED light bulbs have a lower voltage than traditional incandescent bulbs, so it is important to set the multimeter to a lower voltage range to avoid damaging the LED. Another mistake is not checking the polarity of the LED. LEDs are polarized, which means they have a positive and negative side. If the multimeter is not connected to the correct polarity, then it will not provide accurate readings. Lastly, it is important to avoid touching the LED with your fingers as the oils from your skin can damage the LED and affect the readings. By avoiding these common mistakes, you can ensure accurate results when testing LED light bulbs with a multimeter.
Troubleshooting LED Light Bulb Issues

LED light bulbs are becoming increasingly popular as they are more energy-efficient and have a longer lifespan than traditional incandescent bulbs. However, like any other electrical device, LED light bulbs can sometimes encounter issues that require troubleshooting. One common issue is flickering. If your LED bulb flickers, it could be due to a loose connection or a faulty driver. To troubleshoot, check the bulb’s connection and ensure it is secure. If the connection is secure, try replacing the driver to see if that resolves the issue. Another issue is dimming. If your LED bulb is not producing enough light, it could be due to a faulty driver or an incompatible dimmer switch. To troubleshoot, ensure that the bulb is compatible with the dimmer switch and that the driver is functioning properly. If the issue persists, consider replacing the dimmer switch or the driver. Another common issue with LED light bulbs is overheating. Overheating can occur due to a lack of ventilation, improper installation, or a faulty driver. To troubleshoot, ensure that the bulb is installed correctly and has proper ventilation. If the bulb is still overheating, consider replacing the driver. Another issue is color shifting. LED light bulbs can sometimes change color over time, which can be due to the quality of the bulb or environmental factors such as temperature fluctuations. To troubleshoot, ensure that the bulb is of high quality and has a stable color temperature rating. If the issue persists, consider replacing the bulb with a higher quality one. By troubleshooting these common issues, you can ensure that your LED light bulbs are functioning properly and efficiently.
LED light bulbs have become increasingly popular due to their energy efficiency and longer lifespan. However, like any electronic device, they can encounter issues. Common issues with LED light bulbs include flickering, dimming, or not turning on at all. These issues can be caused by various factors such as faulty wiring, a damaged circuit board, or a defective LED driver. To diagnose these issues, you can use a multimeter to measure the voltage, current, and resistance of different components of the LED light bulb. By doing so, you can pinpoint the source of the problem and determine if the LED light bulb needs to be replaced or if a specific component needs to be repaired or replaced.
LED light bulbs are a popular alternative to traditional incandescent bulbs due to their energy efficiency and longer lifespan. However, like any electronic device, they can experience issues. One common problem is flickering or dimming, which can be caused by incompatible dimmer switches or loose connections. Another issue is a lack of illumination, which could indicate a faulty bulb or a problem with the fixture. To fix these issues, it is important to check the compatibility of the dimmer switch and ensure all connections are tight. If the problem persists, try replacing the bulb or contacting a professional for further assistance. Overall, understanding the potential issues with LED light bulbs and how to troubleshoot them can help ensure optimal performance and longevity.
In conclusion, using a multimeter to test LED light bulbs is a simple and accurate process that can save you time and money. Remember to first turn off the power supply before testing and use the diode setting on your multimeter to get accurate readings. Additionally, make sure to test each diode individually to ensure that the LED bulb is functioning properly. By following these steps, you can quickly determine whether your LED light bulb is faulty and needs to be replaced or if the issue lies elsewhere in your electrical system. Overall, using a multimeter for LED light bulb testing is a valuable skill for any DIYer or electrician to have in their toolkit.
Proper testing and troubleshooting of LED light bulbs are crucial to ensure their efficiency, longevity, and quality. With the increasing demand for energy-efficient lighting solutions, LED bulbs have become a popular choice among consumers. However, the failure of LED bulbs due to improper testing and troubleshooting can lead to a significant waste of resources and money. Therefore, it is important to use accurate testing methods such as a multimeter to measure voltage, current, and resistance in LED bulbs. By doing so, any defects or faults can be identified and corrected, ensuring that the LED bulb operates optimally and meets the required standards. Proper testing and troubleshooting also help to minimize the risk of fire, electric shock, or premature failure of the LED bulb.
In conclusion, using a multimeter for LED light bulb testing is a simple and effective way to ensure accurate results. It is important to choose the correct setting on the multimeter and to handle the bulb with care to prevent damage. With a little practice, you can confidently test your LED bulbs and troubleshoot any issues that may arise. Remember to always follow safety precautions when working with electricity and to seek professional help if you are unsure about any aspect of the testing process. Overall, a multimeter is a valuable tool for any DIY enthusiast or professional electrician, and can save time and money in the long run by identifying and addressing potential problems early on.
Conclusion

In conclusion, using a multimeter for testing LED light bulbs is a simple and effective way to ensure accurate results. By following the steps outlined in this guide, you can easily test the voltage and resistance of your LED bulbs and diagnose any issues they may have. With the right tools and knowledge, you can save time and money by identifying faulty bulbs and replacing them before they cause further problems. So, don’t hesitate to invest in a reliable multimeter and start testing your LED light bulbs like a pro!

