LED Light Repair Made Easy: A StepbyStep Guide
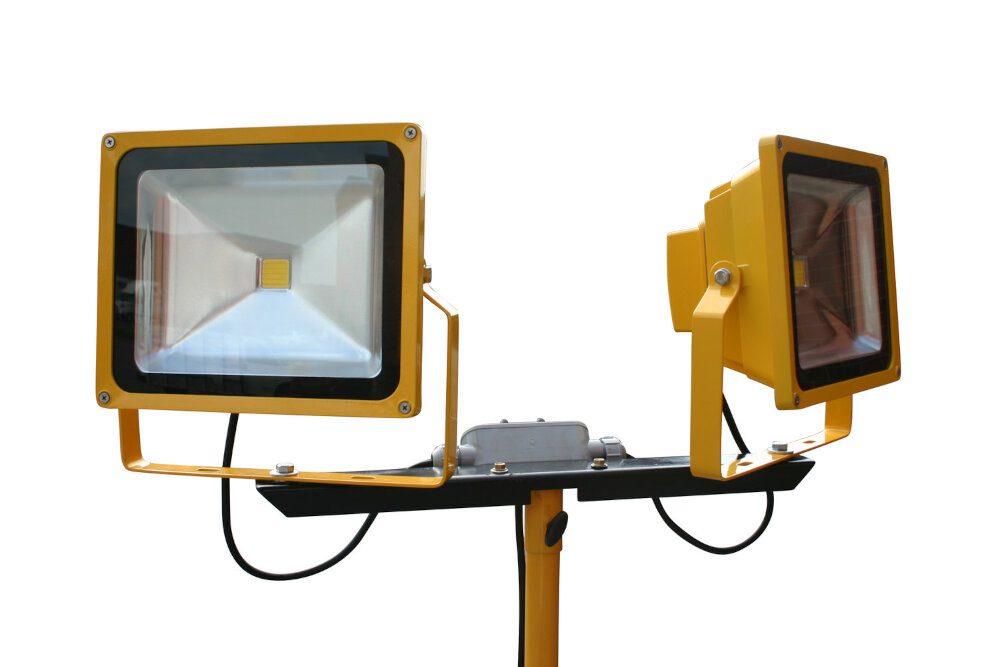
Light-emitting diodes, or LEDs, have revolutionized the way we illuminate our homes, offices, and public spaces. These energy-efficient, long-lasting bulbs come in a variety of colors, shapes, and sizes, and are used in everything from traffic signals to TV screens. However, like any other electronic device, LEDs can sometimes malfunction or stop working altogether. Fortunately, repairing an LED light is not as complicated as you might think. With a few basic tools and some simple instructions, you can troubleshoot and fix most LED lighting problems yourself, without having to call a professional. In this step-by-step guide, we will provide you with all the information you need to repair your LED light, whether it’s a single bulb or a complex lighting system. We will cover the most common issues that LED lights face, such as flickering, dimming, and color distortion, and show you how to diagnose and solve them. We will also explain the different types of LED lights and their components, so you can better understand how they work and what might be causing them to malfunction. By the end of this guide, you will have the knowledge and confidence to tackle any LED light repair project, and keep your lights shining bright for years to come.
The adoption of LED lights has revolutionized the lighting industry by offering numerous benefits. These lights are highly energy-efficient and consume significantly less power than traditional incandescent bulbs. LED lights have a longer lifespan and are more durable compared to other lighting options, resulting in reduced maintenance costs. They also emit less heat, making them safer to use and reducing the risk of fires. Furthermore, LED lights do not contain any toxic materials, making them environmentally friendly. The versatility of LED lights also allows for a wide range of applications, from home lighting to commercial and industrial use. With all these advantages, it is no wonder that LED lights have become increasingly prevalent in our daily lives.
LED lights are known for their long-lasting durability and energy efficiency, however, like any other electrical gadget, they can malfunction over time. Some of the reasons why LED lights might need repair include power surges, faulty wiring, and temperature fluctuations. Power surges can damage the LED driver, causing the light to flicker or lose power. Faulty wiring can result in an uneven distribution of power, leading to dimming or complete failure of the LED light. Temperature fluctuations can cause the LED light to overheat, resulting in a burnt-out LED. It is important to identify the cause of the problem before attempting any repair work to ensure the best possible outcome.
StepbyStep Guide
LED lights are a popular choice for energy-efficient lighting, but like any electronic device, they can sometimes malfunction. If your LED lights are not working properly, don’t worry, you don’t have to replace them just yet. With a little bit of knowledge and the right tools, you can repair your LED lights and save money on replacement costs. In this article, we will provide you with a step-by-step guide on how to repair your LED lights. The first step in repairing your LED lights is to identify the problem. There are several common issues that can cause LED lights to malfunction, including loose connections, damaged wiring, and faulty bulbs. Once you have identified the problem, you can begin the repair process. The next step is to gather the necessary tools and supplies. You will need a screwdriver, wire cutters, wire strippers, a soldering iron, and replacement parts if necessary. Once you have all the tools you need, you can begin the repair process by removing the cover of your LED light fixture and inspecting the wiring and components. By following this step-by-step guide, you can easily repair your LED lights and enjoy energy-efficient lighting once again.
The first step in repairing an LED light is to identify the specific problem with the device. This may involve examining the light closely, testing its electrical components, and conducting a thorough diagnosis of the issue at hand. Some common problems with LED lights may include issues with the wiring, faulty connections, or a damaged circuit board. By pinpointing the root cause of the problem, you can then move on to the next steps in the repair process and ensure that the light is functioning properly once again. It is crucial to take the time to carefully identify the problem to avoid further damage to the light and ensure a successful repair.
Once you have identified the faulty LED light, it’s time to gather the necessary tools to repair it. The tools required may vary depending on the type of LED light and the extent of the damage. However, some essential tools that are generally required for LED light repair include a screwdriver set, pliers, wire strippers, multimeter, soldering iron, solder wire, and a desoldering pump. While selecting the tools, make sure to choose those that are suitable for the job and of good quality. Having the right tools will help you to carry out the repair work efficiently and effectively, ensuring that your LED light is restored to its former glory.
Step 3 of repairing an LED light is to turn off the power supply. This step is crucial to ensure your safety while working on the light. It is recommended to unplug the light from the power source or turn off the circuit breaker. This will prevent any electrical shock or injury that may occur during the repair process. Turning off the power supply also ensures that you can work on the LED light without any interruptions or distractions. Once the power is off, you can proceed with the repair process with peace of mind. Remember to always prioritize safety first and take necessary precautions before starting any electrical repair work.
Step 4 of the LED light repair process involves carefully removing the cover of the light. This can be a delicate task and should be done with precision to avoid damaging the light further. The cover is typically held in place by screws, clips or adhesive, and may require a special tool or technique to open. Once the cover is removed, the inner workings of the light will be exposed, allowing for a closer inspection of the problem. It is important to take your time and be gentle when removing the cover to ensure that the light is not further damaged in the repair process.
Step 5 of the LED Light Repair Made Easy guide involves inspecting the LED light to identify the source of the problem. This step is crucial in determining the root cause of the issue and finding the appropriate solution. The inspection process includes examining the wiring, the circuit board, and the light bulb itself to look for any signs of damage, wear and tear or loose connections. It is important to be thorough in this step to ensure that the repair is effective and long-lasting. Once the issue has been identified, the appropriate steps can be taken to fix the problem and restore the LED light to its optimal functioning state.
Step 6 of the LED Light Repair Made Easy guide involves replacing faulty components. This step is crucial because it ensures that the LED light works efficiently and safely. Faulty components can cause the light to flicker, dim or not work at all. Identifying the faulty components can be challenging but with the help of a multimeter, it can be done accurately. Once the faulty components have been identified, they should be removed and replaced with new ones. It is essential to use components that are compatible with the LED light to avoid further damage. Replacing faulty components might seem daunting, but it is a necessary step that can save money and extend the life of the LED light.
After successfully replacing the faulty LED, it is time to reassemble the light. Carefully place the LED back into its socket, ensuring that it is correctly aligned with the positive and negative terminals. Secure the LED in place by reattaching any clips or screws that were removed earlier. Next, reconnect the wires to the LED driver and ensure that they are snugly in place. Take a moment to inspect the reassembled light for any loose or disconnected parts. Finally, plug in the light and test it to ensure that it is functioning properly. If everything checks out, your LED light should be ready to use again.
Step 8 in the LED light repair process involves turning on the power supply. This is a crucial step that must be taken with care to ensure that the repair work has been successful. When turning on the power supply, it is important to follow safety guidelines and ensure that all connections have been properly secured. Once the power supply is turned on, the LED lights should illuminate, indicating that the repair work has been successful. This step marks the completion of the repair process, and users can now enjoy the full functionality of their LED lights. It is always advisable to seek professional help if the repair process seems too complicated or if safety concerns arise.
After performing the necessary repairs and replacements, it is crucial to test the LED light to ensure it is functioning correctly. Step 9 is the final step in the LED light repair process, where you can determine the success of your efforts. The testing process involves connecting the LED light to a power source and observing its behavior. If the light turns on and emits a bright glow, then the repair was successful. However, if the light remains dim or fails to turn on, then there may be underlying issues that require further attention. Testing the repaired LED light is a critical step to ensure it is safe and operational for its intended use.
Tips and Tricks
When it comes to repairing LED lights, there are a few tips and tricks that can make the process easier and more efficient. One of the most important things to keep in mind is to always use the appropriate tools for the job. This includes things like wire cutters, needle-nose pliers, and a soldering iron. Additionally, it is important to have a basic understanding of how the LED light works and what might be causing any issues. This can help you diagnose the problem more quickly and accurately, ultimately saving you time and frustration. Another helpful tip is to take your time and work carefully. LED lights can be delicate, so rushing through the repair process can cause further damage or even break the light completely. Make sure to follow any instructions or guides closely, and don’t be afraid to consult with an expert if you’re unsure about something. Finally, it can be helpful to keep a log or record of any repairs you make, including what steps you took and what tools you used. This can make future repairs easier and more efficient, and ensure that your LED lights stay in good working condition for years to come. In addition to these tips, there are a few tricks that can make repairing LED lights even easier. For example, using a magnifying glass or microscope can help you see small details and work more precisely. Additionally, using a heat gun or hair dryer can help soften any glue or adhesive that might be holding the light together, making it easier to disassemble and repair. Finally, it can be helpful to have a few spare parts on hand, such as extra LEDs or resistors, in case you need to replace anything during the repair process. By following these tips and tricks, you can become a pro at repairing LED lights and ensure that your lights stay bright and functional for years to come.
Maintaining LED lights is crucial for their longevity and optimal performance. Firstly, it is important to clean the lights regularly with a soft cloth to remove dust and dirt that might accumulate on the surface. Secondly, it is recommended to avoid using harsh chemicals or abrasive materials to clean them, as this can damage the protective coating on the lights. Thirdly, inspect the wiring and connections regularly for any signs of wear or damage, and replace or repair as necessary. Lastly, make sure to keep the lights away from extreme temperatures and moisture, as this can also affect their performance. With these tips, your LED lights should last for many years to come.
If you are having trouble with your LED lights, there are a few tricks you can use to troubleshoot the problem. One of the first things to check is the power source – make sure that the outlet or power supply is functioning properly. Next, examine the wiring to ensure that there are no loose or damaged connections. If the wiring looks good, check the LED bulbs themselves – they may need to be replaced or repositioned. Additionally, you can try resetting the LED lights by turning them off and on again. By using these simple troubleshooting techniques, you can quickly identify and resolve any issues with your LED lights, saving you time and money in the long run.
Common Problems and Solutions

When it comes to LED light repair, there are a few common problems that can arise. One of the most frequent issues is a flickering light. This can be caused by a loose connection or a faulty driver. To fix this problem, start by checking all the connections and making sure they are tight. If this doesn’t solve the issue, check the driver with a multimeter to see if it’s functioning correctly. If it’s not, you’ll need to replace it. Another common issue is a dimming light. This can be caused by a variety of factors, including a faulty driver, a damaged LED, or a malfunctioning power source. To fix this problem, start by checking the power source and making sure it’s functioning correctly. If it is, then you’ll need to check the LED and the driver to see if they are working correctly. If either of these components is faulty, you’ll need to replace it. In addition to these problems, LED lights can also experience issues with color temperature and color rendering. Color temperature refers to the warmth or coolness of the light, while color rendering refers to how accurate the colors look under the light. If you’re experiencing issues with either of these factors, it could be due to a variety of causes, including a faulty LED or driver, or an issue with the power source. To fix the problem, start by checking the LED and driver to see if they are functioning correctly. If they are, then you’ll need to check the power source to see if it’s delivering the correct voltage. If it’s not, you’ll need to replace it. By understanding these common problems and their solutions, you can quickly and easily repair your LED lights, saving you time and money in the long run.
Dimming LED lights can be a frustrating problem for many homeowners. While LED lights are known for their energy efficiency and long lifespan, they can sometimes experience a decrease in brightness over time. This can be caused by a variety of factors, including a faulty driver or a burned-out LED. To address this issue, it is important to first identify the root cause of the problem. Once the cause has been determined, homeowners can take steps to repair or replace the affected components, restoring their LED lights to their full brightness and efficiency. With a little bit of troubleshooting and some basic repair skills, anyone can tackle this common problem and enjoy the benefits of bright, energy-efficient LED lighting once again.
When it comes to repairing LED lights, one of the most common issues is a malfunctioning power supply. The power supply is responsible for converting the alternating current (AC) from the outlet to the direct current (DC) that the LED light requires to operate. If the power supply is not functioning properly, the LED light may not turn on or may flicker. To check the power supply, start by unplugging the LED light and inspecting the power cord for any damage or frayed wires. Then, use a multimeter to test the voltage output of the power supply. If the voltage output is not within the manufacturer’s specifications, the power supply may need to be replaced. By checking the power supply first, you can quickly and easily identify and fix the issue with your LED light.
One common issue with LED lights is flickering, which can be very frustrating and distracting. There are a few potential causes for this problem, including loose connections, voltage fluctuations, or a faulty LED driver. To address flickering, first check all connections to ensure they are secure and tight. If this does not solve the problem, consider checking the voltage of the circuit and ensuring it is within the recommended range for the LED lights being used. If neither of these solutions work, it may be necessary to replace the LED driver. By identifying and addressing the root cause of the flickering, you can restore your LED lights to their full functionality and enjoy consistent, reliable lighting.
If your LED light is not turning on, another possible solution is to check the wiring. The wiring could be loose or disconnected, which could prevent the electrical current from flowing properly to the LED bulb. To check the wiring, you’ll need to remove the cover or casing of the light fixture and inspect the wires for any signs of damage or disconnection. If you find any loose wires, you can try tightening the connections or using wire connectors to secure them in place. If there is significant damage to the wiring, you may need to replace the entire fixture or call in a professional electrician to help. By checking the wiring, you can ensure that your LED light is properly connected and receiving the necessary electrical current to function.
Problem 3 in the article titled \LED Light Repair Made Easy: A Step-by-Step Guide\ is the issue of burnt-out LED lights. LED lights are known for their energy efficiency and long-lasting nature, but they can still burn out over time due to a variety of reasons, such as overheating or power surges. When this happens, it can be frustrating to deal with since replacing the entire fixture can be costly. However, with the right tools and knowledge, it is possible to repair burnt-out LED lights and bring them back to life. The article provides step-by-step instructions on how to diagnose the issue, replace the burnt-out LED, and get the light fixture working again, saving both money and resources in the process.
One of the most common solutions to LED light repair is to replace the LED bulb. This may be necessary if the LED bulb has been damaged or has burned out, resulting in a lack of illumination or poor lighting quality. Replacing the LED bulb is a relatively simple process that can be done with basic tools and minimal technical expertise. First, locate the LED bulb socket and remove the old bulb by gently pulling it out. Then, insert the new LED bulb into the socket, making sure it is securely seated. Finally, turn on the light to test the new bulb and ensure that it is functioning properly. Overall, replacing the LED bulb is an effective and efficient solution to LED light repair, and can quickly restore the lighting quality and functionality of the fixture.
LED Light Repair Made Easy is a comprehensive step-by-step guide that provides useful insights into fixing LED lights. The article highlights the importance of understanding the basic components of LED lights, including the driver, circuit board, and LED chips. It further explains how to diagnose common LED light problems, such as flickering, dimming, and no light at all. The guide provides clear instructions on how to repair and replace faulty components, including soldering techniques. The article also emphasizes the significance of safety measures and cautions readers to ensure that they switch off the power source before attempting any repairs. Overall, the guide is an excellent resource for anyone looking to repair their LED lights at home.
LED lights have become an essential part of our daily lives. From homes to offices, streets to stadiums, they are everywhere. However, with prolonged usage, even the best of LED lights can develop faults, which can lead to reduced brightness or complete failure. Repairing LED lights is crucial as it not only saves money but also helps reduce waste and protect the environment. A small repair can extend the life of a light, preventing it from ending up in a landfill. Moreover, faulty LED lights can be a safety hazard, causing accidents or electrical fires. Repairing LED lights is easy and can be done with basic tools and minimal technical knowledge. It is a sustainable and cost-effective solution that everyone should consider.
Are you tired of constantly replacing your LED lights and spending money on new ones? Why not try repairing them yourself with our step-by-step guide? Not only will it save you money, but it’s also a fun and rewarding DIY project. Don’t let the thought of repairing electronics intimidate you. With our easy-to-follow instructions and a few basic tools, you can easily fix any issues with your LED lights. Plus, you’ll gain valuable knowledge and skills that can be applied to future repairs. So, don’t hesitate to give it a try and take control of your lighting needs.
Conclusion
In conclusion, repairing LED lights may seem daunting at first, but with this step-by-step guide, it can be made easy and accessible to anyone. By following the instructions carefully and using the proper tools, you can save money and resources by fixing your LED lights instead of replacing them. Additionally, this guide highlights the importance of safety precautions when working with electricity and encourages seeking professional help if necessary. With these tips in mind, you can confidently approach LED light repairs and extend the lifespan of your lighting fixtures.

