LED Strip Lights: Where to Cut and Install for Perfect Lighting Placement
LED strip lights offer a versatile and stylish lighting solution that can transform any space into a cozy and inviting environment. Whether you want to create a warm ambiance in your living room or add some flair to your kitchen, LED strip lights can help you achieve your desired lighting effect. However, to get the most out of your LED strip lights, you need to know where to cut and install them for perfect lighting placement. In this guide, we’ll explore the different ways you can cut and install LED strip lights to create a beautiful and functional lighting scheme. One of the great things about LED strip lights is that they can be cut to fit any space, making them a flexible lighting option for any room in your home. But cutting LED strip lights can be a bit tricky, as you need to make sure you cut them in the right place to avoid damaging the lights. Additionally, you need to consider where to install the lights to get the best lighting effect. Depending on the room you’re installing them in, you may want to place the lights in different locations to achieve the desired lighting effect. In the following sections, we’ll discuss some tips on where to cut and install LED strip lights to ensure you get the perfect lighting placement for your space.
LED strip lights are a versatile lighting solution that can be used for a variety of applications. These lights consist of a flexible circuit board that is lined with many small LED bulbs. They are available in a range of colors, brightness levels, and lengths to suit different requirements. LED strip lights are easy to install and can be cut to fit the desired length, making them a popular choice for DIY enthusiasts. They are also energy-efficient, eco-friendly, and can last for a long time, making them a worthwhile investment for anyone looking to enhance their home or business lighting. With their ability to produce bright and colorful lighting, LED strip lights are an excellent choice for creating a stylish and modern atmosphere in any space.
Proper installation and placement of LED strip lights are crucial in achieving the perfect lighting effect. The incorrect installation and placement can lead to uneven lighting, shadowing, or even damage to the LED strip lights. It is essential to carefully plan the placement of the strips and cut them to the appropriate length to avoid any wasted materials. Moreover, the installation process should follow the manufacturer’s instructions to ensure the LED strips are correctly mounted and connected to the power source. Overall, taking the time to properly install and place LED strip lights can make a significant difference in creating a beautiful and functional lighting design.
Cutting LED Strip Lights
Cutting LED strip lights can seem daunting at first, but it is a simple process that can be done with just a few tools. Before making any cuts, it is important to measure the length of the strip you need and mark it with a pencil or tape. Then, use a sharp pair of scissors or a cutting tool to make a clean cut along the marked line. It is important to cut the strip only along the designated cut points, which are usually marked with a scissor icon. Cutting the strip in the wrong place can damage it and render it unusable. Once the strip has been cut, it can be easily installed using adhesive tape or mounting brackets. When cutting LED strip lights, it is important to consider the placement of the lights and the desired lighting effect. For example, if you want to install the lights in a curved or irregular shape, you may need to make multiple cuts and connect the pieces using connectors or soldering. It is also important to consider the voltage and current requirements of the strip and to make sure that the power supply can handle the load. With careful planning and precise cutting, LED strip lights can be a versatile and effective lighting solution for any space.
When it comes to cutting LED strips, safety should always be a top priority. Before you begin, make sure that the strip is disconnected from any power source. Use sharp scissors or a craft knife to cut the strip only at the designated cut points to avoid damaging the circuitry. It is also essential to ensure that the ends of the strip are properly sealed to prevent moisture or debris from entering. Moreover, be careful not to bend or twist the strip too much as it can cause the circuit to break. By following these guidelines, you can confidently cut and install LED strips without any safety concerns, and enjoy perfect lighting placement in your home or workspace.
When it comes to cutting LED strip lights, there are a few essential tools that are necessary for a clean and precise cut. First and foremost, a sharp pair of scissors or a utility knife is a must-have. These tools will ensure that the cut is straight and clean, without any jagged edges. Additionally, a ruler or measuring tape is necessary for accurately measuring the length of the strip before cutting. It is also important to have a cutting surface that is flat and stable, such as a cutting mat or a sturdy table. Lastly, when working with LED strip lights, it is important to exercise caution and wear protective gear, such as gloves and eye protection, to avoid any potential hazards. By having these tools on hand, cutting and installing LED strip lights can be a simple and straightforward process.
LED strip lights are an excellent option for adding illumination to any space. However, sometimes the pre-cut strips are too long or too short for specific areas. To cut LED strips, first, measure the space where you want to install the strip. Then, using scissors or a sharp blade, carefully cut the strip along the designated cut lines. It’s crucial to ensure that the cut is straight and clean to avoid damaging the copper contacts or the LED diodes. If necessary, reattach the cut end using soldering tools or connectors. Always remember to follow the manufacturer’s instructions and safety guidelines when cutting and installing LED strips. With these simple steps, you can customize your LED strips to fit any space and achieve perfect lighting placement.
Installing LED Strip Lights
Installing LED strip lights is a great way to add ambiance and lighting to any space in your home or office. LED strip lights are easy to install and come in a variety of colors and sizes, making them a versatile lighting option. Before you begin installing your LED strip lights, it’s important to determine where you want to place them and how much lighting you need for your space. You’ll also need to decide which type of LED strip lights to use based on your needs and preferences. To install LED strip lights, you’ll need a few tools and materials, including a power supply, LED strip lights, connectors, and a dimmer switch (if desired). Begin by measuring the area where you want to install the LED strip lights, and cut the strip to the appropriate length. Next, connect the LED strip lights to the power supply using the connectors, making sure that the polarity is correct. Once the LED strip lights are connected, you can mount them to the desired surface using adhesive tape or clips. Finally, test the lights to ensure that they are working properly, and adjust the brightness or color as desired using a dimmer switch or remote control. With these simple steps, you can quickly and easily install LED strip lights to enhance the lighting and atmosphere in any room.
Choosing the right surface for installation is crucial to ensuring that your LED strip lights provide the perfect lighting placement. When selecting a surface, it is essential to consider the type of adhesive that will be used and the surface’s material. For example, surfaces such as wood or drywall are ideal for adhesive tapes, while surfaces such as metal or glass require a more robust adhesive. Additionally, it is important to consider the placement of the LED strip lights and whether the chosen surface can withstand the weight of the lighting. By taking into account these factors and choosing the right surface, you can ensure that your LED strip lights are installed securely and provide optimal lighting for your space.
Before installing LED strip lights, it is essential to prepare the surface to ensure proper placement and adhesion. The surface should be clean, dry, and free of any debris or dust particles that may interfere with the adhesive backing of the strip lights. To achieve this, use a soft cloth or sponge with a mild cleaning solution to wipe down the surface thoroughly. It is crucial to let the surface dry completely before proceeding with the installation process. Additionally, if the surface is uneven, it is recommended to sand it down to create a smooth surface for the LED strip lights to adhere to. Taking the time to prepare the surface will ensure that the LED strip lights are installed correctly and will provide optimal lighting placement.
When it comes to installing LED strip lights, it is important to have a step-by-step guide to ensure the perfect lighting placement. First, measure the area where you want to install the lights and purchase the appropriate length of LED strip lights. Next, clean the surface where you will be installing the lights to ensure a secure attachment. Then, cut the LED strip lights to the desired length using scissors or a utility knife, making sure to only cut on the marked cutting points. After that, attach the lights to the surface using adhesive tape or mounting clips. Finally, connect the lights to a power source and enjoy the perfect lighting placement in your desired area.
Placement of LED Strip Lights
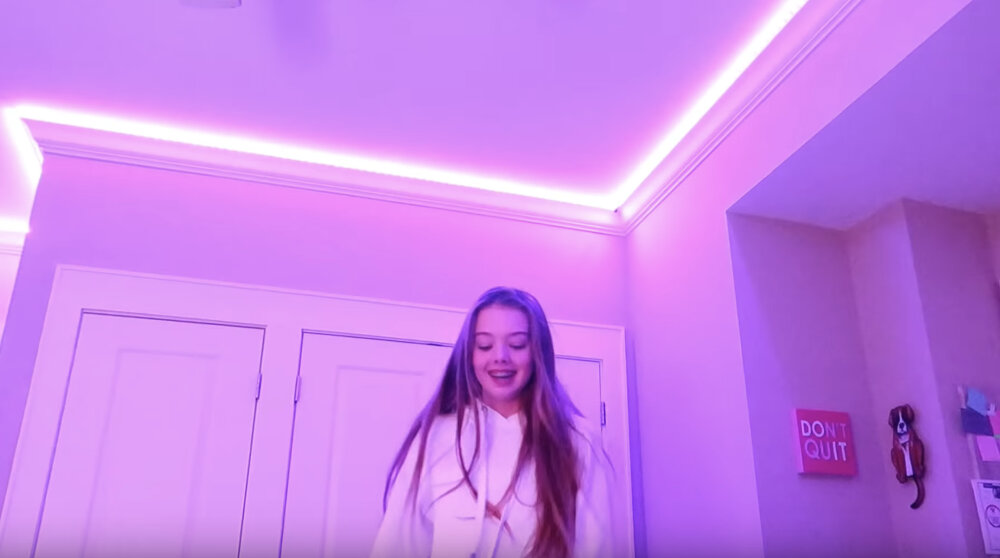
LED strip lights have become a popular lighting solution due to their versatility and energy efficiency. However, improper placement can ruin the intended effect of the LED strip lights. The placement of LED strip lights greatly depends on the intended use and desired effect. Here are some tips for perfect lighting placement:First, consider the task or mood you want to achieve. For task lighting, such as under-cabinet lighting in the kitchen, the strip lights should be placed closer to the work surface. For mood lighting, such as in the bedroom, the strip lights can be placed higher up on the wall or ceiling to create a softer glow. Additionally, the color temperature of the LED strip lights can also affect the mood. A warmer color temperature is more relaxing, while a cooler temperature is more energizing. With these considerations in mind, you can decide on the ideal placement of the LED strip lights to achieve the desired effect. Second, pay attention to the surrounding environment. LED strip lights can highlight architectural features or create an ambiance that complements the space. For example, installing LED strip lights behind a bookshelf can create a cozy reading nook. Placing LED strip lights along a staircase can create a dramatic effect. It is also important to consider the color of the surrounding walls and furniture. The color of the LED strip lights should complement the space, rather than clash with it. With careful consideration of the surroundings, the placement of LED strip lights can elevate the ambiance of a space.
Understanding the importance of placement is crucial when it comes to installing LED strip lights. The placement of these lights can make or break the ambiance and functionality of any space. Correct placement ensures that the light is distributed evenly, highlighting the key features of the room. It is important to consider the intended use of the space when deciding on the placement of the lights. Additionally, it is essential to take into account the color and intensity of the light, as well as any potential obstructions that may affect the distribution of light. Proper placement of LED strip lights can transform any room into a well-lit, visually appealing space.
When it comes to placing LED strips in different areas of the home, there are a few key tips to keep in mind. For accent lighting in the living room, consider installing strips behind the TV or along the underside of a bookshelf to create a cozy ambiance. In the kitchen, under-cabinet lighting can brighten up workspaces and make food preparation easier. For a dramatic effect in the bedroom, install strips along the headboard or underneath the bed frame. In the bathroom, waterproof LED strips can be placed around mirrors or along the baseboards for a spa-like feel. No matter where you decide to place your LED strips, remember to measure carefully, plan the placement, and use high-quality adhesive to ensure a secure hold.
Placing LED strips can be a fun and creative way to add some extra lighting to your space. However, there are some common mistakes that people make when installing them. One of the biggest mistakes is not properly measuring the length of the strip before cutting it, which can result in wasted material and uneven lighting. It’s also important to avoid placing the strips too close together or too far apart, as this can affect the overall brightness and appearance of the lighting. Another mistake to avoid is not properly securing the strips in place, which can cause them to fall or become damaged over time. To ensure a successful installation, take the time to carefully plan out the placement and follow the manufacturer’s instructions closely.
Types of LED Strip Lights
LED strip lights are one of the most popular lighting solutions available in today’s market. They are highly versatile and can be used for a wide range of applications, including accent lighting, task lighting, and ambient lighting. When it comes to LED strip lights, there are several different types to choose from, each with its own set of features and benefits. One of the most common types of LED strip lights is the 3528. This type of LED strip light is small and compact, making it ideal for applications where space is limited. It is also energy-efficient, making it a great choice for those who are looking to save money on their energy bills. Another popular type of LED strip light is the 5050. This type of LED strip light is larger and more powerful than the 3528, making it ideal for applications where a brighter light is needed. It is also available in a range of colors, making it a great choice for those who want to add a pop of color to their space. Other types of LED strip lights include the 2835, which is a high-efficiency option, and the 5630, which is the brightest option available. No matter what type of LED strip light you choose, it is important to make sure that it is installed correctly for optimal performance and longevity.
LED strip lights have become increasingly popular due to their versatility and energy efficiency. There are several different types of LED strip lights available in the market. The most common types of LED strip lights include 3528, 5050, and 2835. The 3528 LED strip lights are the most basic and are suitable for general lighting purposes. The 5050 LED strip lights are larger and brighter than the 3528 and are ideal for accent lighting. The 2835 LED strip lights are the newest type and offer a high level of brightness and efficiency. They are perfect for use in areas that require high levels of illumination. Each type of LED strip light has its own benefits, so it is important to consider the specific requirements of your project before selecting the appropriate type of LED strip light.
When it comes to LED strip lights, there are several options to choose from, including RGB, single-color, and tunable white LED strips. RGB strips offer the most versatility, as they can produce a wide range of colors and even create dynamic effects through color-changing modes. Single-color strips are best for achieving a consistent look, with options like warm white or cool white to choose from. Tunable white strips provide the most flexibility in terms of color temperature, allowing you to adjust the temperature from warm to cool as needed. Ultimately, the choice between these options will depend on your specific lighting needs and preferences.
Choosing the right LED strip for your needs may seem daunting, but with a little research, you can find the perfect fit for your space. First, consider the brightness and color temperature that you desire. If you need a bright light source, opt for a strip with a higher number of lumens. For warm or cool lighting, look for strips with a corresponding color temperature. Next, think about the size and layout of your space. Be sure to measure the length of the area you want to light and choose a strip that is the appropriate length. Additionally, consider the adhesive backing of the strip and whether it will stick to the surface you plan to install it on. Lastly, pay attention to the flexibility and durability of the strip, especially if you plan to use it in a high-traffic area or around corners. By taking these factors into account, you can select the perfect LED strip for your needs and achieve the perfect lighting placement in your home or workspace.
It’s crucial to understand the significance of proper cutting, installation, and placement of LED strip lights. Cutting the strip at the wrong place can cause damage to the circuit, making the lights dysfunctional. Additionally, the installation process should be handled with care, ensuring that the strips are securely placed in the desired location. Poor installation can cause the strip lights to fall and can lead to safety hazards. Proper placement of the LED strip lights is equally important, as it can impact the overall ambiance and aesthetic of the area. By placing the lights in the right location, you can achieve the perfect lighting placement, creating a warm and inviting atmosphere. Therefore, it is essential to give importance to these three aspects while installing LED strip lights.
When it comes to achieving the perfect lighting placement with LED strip lights, there are a few final tips to keep in mind. First, consider the placement of your power source to ensure that your LED strips can reach their intended location. Second, be mindful of the type of adhesive you use when installing your strips, as some adhesives may not hold up over time or in certain environments. Third, consider using additional accessories, such as diffusers or connectors, to enhance the functionality and aesthetic of your LED strip lights. Finally, take the time to test and adjust your lighting placement as needed to achieve the desired effect. With these tips in mind, you can create a perfectly illuminated space with LED strip lights.
Conclusion
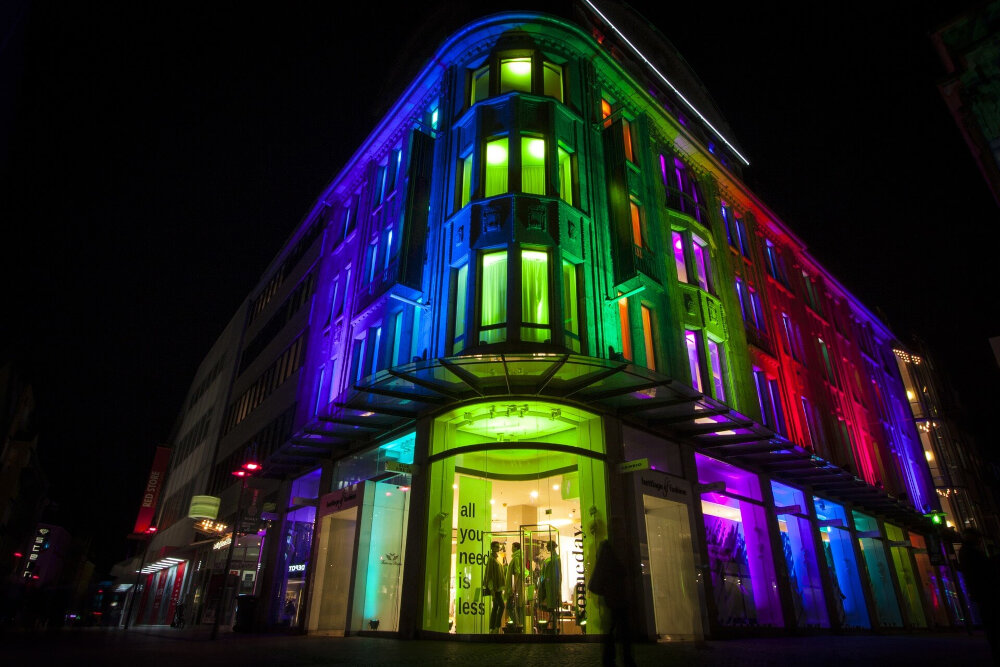
In conclusion, LED strip lights are a versatile and popular lighting solution that can add ambiance, functionality, and style to any space. When installing LED strip lights, it is essential to consider the lighting placement carefully, as it can make or break the overall effect. By knowing where to cut and install the LED strip lights, you can create perfect lighting placement that enhances the aesthetics of your room, sets the mood, and ensures optimal visibility. With a little creativity, patience, and attention to detail, you can achieve the perfect LED strip light installation that transforms your home or office into a welcoming and captivating environment.

