Quick Fix: Troubleshooting Tips for Your LED Light Remote Control
In our fast-paced world, LED lights have become commonplace, and with them come the convenience of remote controls. However, just like any other electronic device, remote controls can malfunction, leaving you in the dark. Troubleshooting your LED light remote control can seem daunting, but with the right approach, it can be a quick fix. The first step in troubleshooting your LED light remote control is to ensure that the remote control is working correctly. Check the batteries and replace them if necessary. If the batteries are fine, try resetting the remote control by removing the batteries and holding down the power button for 30 seconds. If your remote control still isn’t working, don’t worry. In this article, we will provide you with some quick and easy troubleshooting tips to help you get your LED light remote control back up and running in no time.
The LED light remote control is a device that allows you to control the brightness, color, and other settings of your LED lights from a distance. It works by sending infrared signals to the receiver built into the lights. The remote control has a range of several meters and uses a series of buttons to adjust the settings of the lights. Some remote controls also have preset modes that allow you to quickly switch between different lighting effects. However, if you encounter any issues with your remote control, there are a few troubleshooting tips that may help you resolve the problem and get your LED lights back to working properly.
The remote control for LED lights has become an essential component in modern lighting systems. Its significance lies in the convenience it offers in controlling the lighting ambiance of a room from a distance. With remote control, users can adjust the brightness, color, and even the mode of their LED lights with ease. The remote control’s usefulness is further pronounced in situations where the LED lights are installed in hard-to-reach areas, such as high ceilings or outdoor locations. Additionally, remote control saves energy by enabling users to switch off their LED lights without physically accessing the switch. Therefore, the remote control for LED lights offers considerable benefits that enhance the user experience and improve the efficiency of the lighting system.
Check the Batteries
Checking the batteries is perhaps the simplest yet most overlooked solution for LED light remote control issues. Many users tend to forget that the remote control runs on batteries, and that it needs to have enough power to function correctly. If you’re experiencing problems with your LED light remote control, the first thing you should do is check the batteries. Make sure they’re properly inserted and that they’re not dead. If the batteries are running low, replacing them with fresh ones can instantly fix your remote control issues. It’s essential to remember that batteries have a limited lifespan, and they will eventually die out. Even if your remote control was working fine the day before, if it’s been a while since you replaced the batteries, it’s possible that they’ve run out of power. As a rule of thumb, it’s a good idea to replace the batteries in your LED light remote control every six months to ensure that it continues to work correctly. Don’t wait until your remote control stops working altogether before you replace the batteries. By regularly checking and replacing the batteries, you can prevent any remote control issues and ensure that your LED lights are always functioning correctly.
Batteries play a crucial role in the functioning of remote controls, including those for LED lights. Without a reliable source of power, the remote control would be rendered useless. A dead or dying battery can often be the cause of issues with the remote, such as unresponsiveness or intermittent functionality. It is important to ensure that the batteries are properly inserted and have enough power to operate the remote. Additionally, using high-quality batteries can make a significant difference in the longevity and overall performance of the remote control. Therefore, it is essential to regularly check and replace the batteries in your LED light remote control to ensure optimal functionality.
If you are facing issues with your LED light remote control not working properly, the first thing you should do is to check the batteries. To do this, you need to open the back cover of the remote control and take out the batteries. Check if they are corroded or expired. If the batteries are corroded, you need to clean the battery compartment with a dry cloth. If the batteries are expired, replace them with new ones. Make sure you insert the batteries properly in the right direction. After replacing the batteries, close the back cover and test the remote control by turning on the LED lights. If it still doesn’t work, then there might be some other issues that you need to take care of.
If you find that the batteries in your LED light remote control are dead, it’s important to replace them promptly to ensure the device continues to function properly. First, remove the back cover of the remote control by either sliding it off or pressing a button to release it. Once the cover is off, remove the old batteries and dispose of them properly. Make sure to note the correct battery orientation and insert the new batteries accordingly. Finally, replace the back cover and test the remote control to ensure it’s working correctly. It’s important to use high-quality batteries to ensure the longevity of the remote control’s battery life.
Reset the Remote Control

If you are experiencing issues with your LED light remote control, one of the first troubleshooting steps you can try is resetting the remote control. This process is typically straightforward and simple, and it can often resolve common problems such as unresponsive buttons or a malfunctioning remote. To reset your remote control, start by removing the batteries from the device. After waiting for at least 30 seconds, reinsert the batteries and try using the remote control again. Resetting the remote control can be an effective solution for a range of issues, but it is important to note that this may not always be the case. If your remote control continues to malfunction even after resetting it, you may need to explore additional troubleshooting steps or consider replacing the device altogether. However, taking the time to reset your remote control is an easy and quick way to troubleshoot your LED light system and ensure that your remote control is functioning properly.
Resetting the remote control can be a quick and easy solution to fix issues with your LED light remote control. Over time, the remote control can become unresponsive, and the buttons may no longer work as they should. By resetting the remote control, any glitches or malfunctions in the system can be cleared, allowing the remote control to function properly once again. This can be particularly useful if the remote control has been dropped or exposed to water, as these incidents can cause damage to the electrical components. Resetting the remote control is a simple process that involves pressing a combination of buttons, which can vary depending on the brand and model of your remote control.
If you’re having trouble with your LED light remote control, resetting it can often be a quick and effective solution. To start, locate the reset button on the remote control. This button is usually small and recessed, so you may need to use a paperclip or similar tool to press it. Once you’ve found the button, press and hold it for several seconds until the LED lights on the remote control start flashing. This indicates that the remote control has been successfully reset. You may need to reprogram the remote control with your LED lights after resetting it, so make sure to consult your user manual for specific instructions on how to do this.
If you’re experiencing problems with your LED light remote control, resetting it may be the easiest and most effective solution. Common issues that can be fixed by resetting the remote control include unresponsive buttons, erratic behavior, and connectivity problems. By resetting the remote control, you can clear any minor technical glitches that may be interfering with its performance. This process varies depending on the brand and model of the remote control, but it typically involves removing the batteries and holding down the power button for several seconds. Once the remote control has been reset, you can reinsert the batteries and test it to ensure that it’s now functioning properly.
Check the Sensor on the LED Light
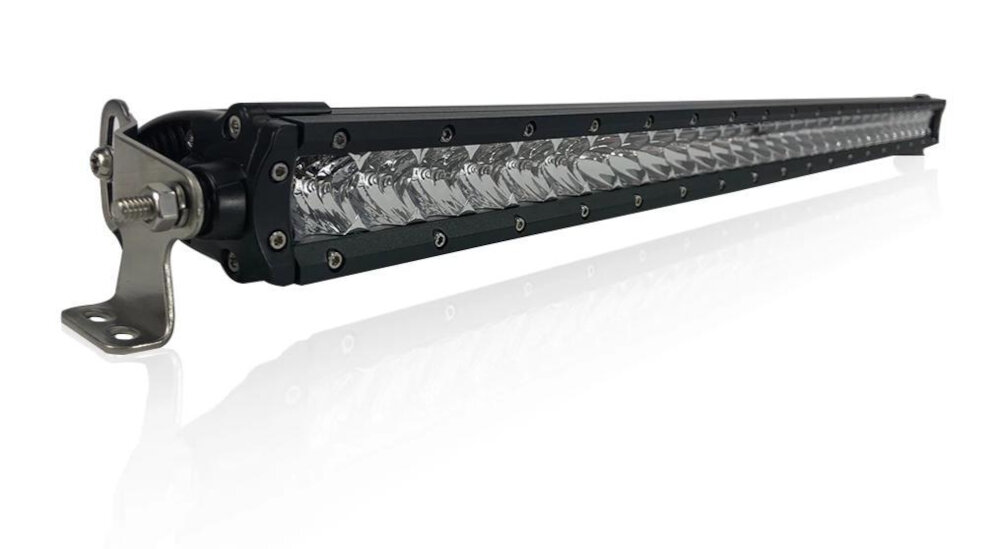
When it comes to troubleshooting your LED light remote control, checking the sensor on the LED light is an important step. The sensor is responsible for receiving signals from the remote control, so if it is not working properly, you may experience issues with turning your LED light on or off, adjusting its brightness, or changing its color. Before you start troubleshooting the sensor, it is important to make sure that the batteries in your remote control are working properly and that there are no obstructions between the remote and the sensor. To check the sensor on your LED light, start by turning off the power to the light. You can do this by unplugging it or turning off the switch that controls it. Once the power is off, locate the sensor on the LED light. In most cases, it will be located on the front of the light, near the bottom. Check the sensor for any signs of damage or dirt. If it appears to be dirty, gently clean it with a soft cloth. If it is damaged, you may need to replace it. Once you have checked the sensor, turn the power back on and test your remote control to see if the issue has been resolved.
The sensor on an LED light is a crucial component that detects signals from the remote control and translates them into actions such as turning the light on or off, adjusting its brightness, or changing its color. This sensor operates by sensing infrared waves emitted by the remote control, which contain the signals that carry out specific commands. The sensor is typically located on the front of the LED light and should be unobstructed and free from dust or debris to function correctly. If the sensor is not working correctly, the LED light may not respond to commands from the remote control, leading to frustration and inconvenience. Therefore, it is essential to ensure that the sensor is in good condition and positioned correctly for trouble-free operation.
To check the sensor on your LED light, start by ensuring that the remote control is working correctly. Point the remote control at the sensor and press any button. If the LED light responds accordingly, the sensor is working fine. If the LED light does not respond, try replacing the batteries in the remote control. If this does not work, use a digital camera or smartphone camera to test the sensor. Turn on the camera and point the remote control at the camera lens. Press a button on the remote control, and if the sensor is working, you should see a flashing light on the camera screen. If there is no flashing light, the sensor may be faulty, and you may need to replace it.
If you’re experiencing issues with the sensor on your LED light, there are a few things you can try to fix the problem. First, check to make sure the sensor is not blocked by any obstructions, such as furniture or decor. If it is, simply move the obstruction out of the way. Next, ensure that the sensor is clean and free of dust or debris, as this can also cause issues. If necessary, gently clean the sensor with a soft cloth. Additionally, make sure that the batteries in the remote control are fresh and fully charged, as weak batteries can cause problems with the sensor’s responsiveness. Finally, if none of these solutions work, try resetting the LED light and remote control by unplugging them from the power source for a few minutes, then plugging them back in and attempting to use the remote control again.
Contact Customer Support

If you encounter any issues while operating your LED light remote control, the first and foremost step you should take is getting in touch with customer support. The customer support team is equipped with the necessary knowledge and resources to provide you with quick and effective solutions to your problems. They will be able to guide you through the troubleshooting process and help you identify the root cause of the issue. Additionally, they can help you with any technical queries you may have regarding your remote control. To contact customer support, you can refer to the manual that came along with your LED light remote control or visit the manufacturer’s website. Most manufacturers have a dedicated customer support section on their website where you can find contact details such as email addresses, phone numbers, and chat support. When contacting customer support, it is important to provide as much information as possible regarding the issue you are facing. This will enable the representative to understand your problem better and provide you with the right solution. By reaching out to customer support, you can ensure that your LED light remote control issues are resolved in a timely and efficient manner.
If you are experiencing issues with your LED light remote control, it is recommended to contact customer support if you have exhausted all troubleshooting options. If the remote control is not responding to any commands or if the LED lights are not turning on, it may be a sign of a more significant issue that requires professional assistance. Additionally, if you have attempted to replace the batteries or reprogram the remote control, and the issue persists, it is best to reach out to customer support for further assistance. It is essential to address any issues promptly to ensure the longevity and optimal performance of your LED lights.
If you’re experiencing issues with your LED light remote control, the first step is to consult the user manual that came with your device. If the manual doesn’t provide a solution or if you’re still having trouble, the next option is to contact customer support. Most manufacturers offer customer support via email, phone, or live chat. Before contacting customer support, make sure you have your product information, such as the model number, ready. Explain the issue you’re experiencing in detail and provide any troubleshooting steps you’ve already taken. The customer support representative will likely ask you questions to diagnose the problem and provide a solution. With patience and persistence, you can get your LED light remote control working properly again.
When reaching out to customer support for assistance with your LED light remote control, it’s important to provide as much information as possible. Be sure to include the make and model of your remote, as well as any specific issues you’re experiencing. If you’ve already attempted any troubleshooting or fixes, let the customer support representative know what you’ve tried so they can better assist you. Additionally, providing any relevant order or purchase information can help expedite the process and ensure you receive the correct assistance. Clear and concise communication is key when seeking support, so take the time to gather all necessary information before reaching out.
The LED light remote control has become an essential component in our homes and offices, making it easy to control the lighting ambiance with just a click of a button. With this device, you can easily adjust the brightness and color of your LED lights, creating a cozy and relaxing atmosphere. It also saves time and energy, as you can switch off the lights from the comfort of your bed or sofa without having to get up. Additionally, the remote control reduces the wear and tear on the light switch, thereby prolonging its lifespan. Therefore, it is crucial to ensure that your LED light remote control is functioning correctly to make the most out of it.
LED lights are a popular choice for their energy-saving properties and versatility in lighting options. However, when it comes to remote control issues, frustration can arise quickly. To troubleshoot these problems, there are several quick fixes that can be attempted. First, check the batteries and replace if necessary. Next, ensure that the remote and receiver are properly synced. Double-check that the receiver is not obstructed and that the LED lights themselves are functioning properly. If all else fails, consult the manufacturer’s instructions or seek professional assistance. By following these troubleshooting tips, LED light remote control issues can be resolved efficiently and effectively.
In conclusion, taking care of your LED light remote control is essential for its longevity and efficient functioning. Always ensure that the remote control is clean and free from any dust or debris. Avoid exposing it to extreme temperatures or humidity that may damage the internal components. Regularly replace the batteries when they run out of power to prevent damage from leakage. When not in use, store the remote control in a safe and secure place to avoid damage or loss. By following these maintenance tips, you can ensure that your LED light remote control lasts for a long time and provides you with the convenience of controlling your lights from a distance.
Conclusion

In conclusion, troubleshooting your LED light remote control can be a quick and easy process with a few simple tips. From checking the batteries to resetting the remote, there are several steps you can take to get your remote control working properly. It is important to remember to always read the manual and follow the manufacturer’s instructions, as well as to handle the remote with care to avoid any damage. With these troubleshooting tips, you can enjoy the convenience and functionality of your LED light remote control for years to come.


