StepbyStep Guide: Installing an LED Light Bar on Your Vehicle
If you’re someone who loves off-roading or often drives on dark roads, you know how important it is to have good lighting. One of the best ways to upgrade your vehicle’s lighting is by installing an LED light bar. An LED light bar is an energy-efficient and powerful lighting option that provides great visibility on the road. However, installing an LED light bar can be overwhelming for some. That’s why we have put together this step-by-step guide to help you install an LED light bar on your vehicle. With the right tools and some patience, anyone can install an LED light bar on their vehicle and enjoy the benefits of improved visibility and a stylish look. So, let’s get started!
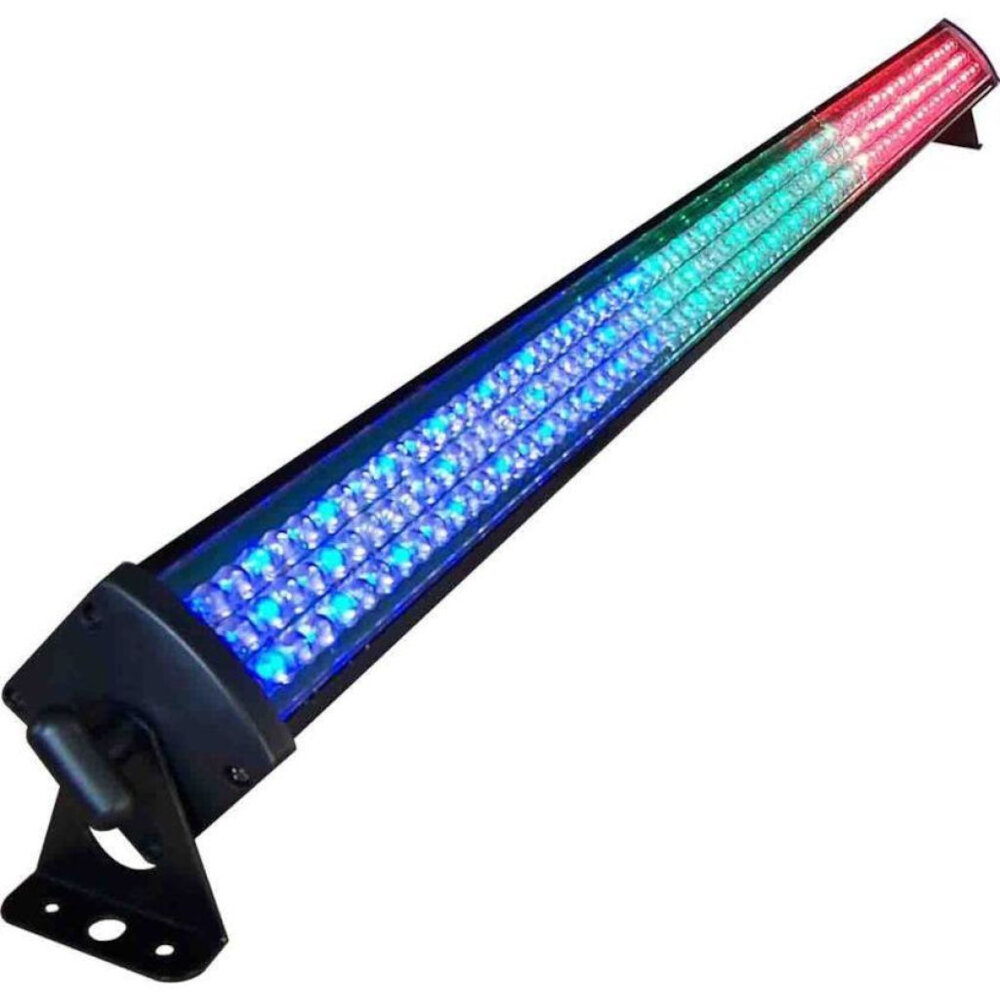
An LED light bar is a lighting system that utilizes light-emitting diodes (LEDs) to produce bright and efficient lighting. LED light bars are commonly used in vehicles, off-road trucks, and boats as auxiliary lighting. The light bars are designed to provide a wider and brighter beam pattern than traditional headlights, making them ideal for nighttime driving, off-road adventures, and emergency situations. LED light bars are known for their durability, energy efficiency, and long lifespan. They come in various sizes and shapes to fit different types of vehicles and can be easily mounted on the roof, bumper, or grille using brackets and screws. LED light bars are a great addition to any vehicle, providing better visibility and safety when driving in low light conditions.
LED light bars are an essential addition to any vehicle, as they offer a multitude of benefits. Firstly, they provide enhanced visibility in low-light conditions, making it safer for drivers to navigate through fog, rain, and darkness. Additionally, LED light bars are incredibly durable and long-lasting, ensuring that they can withstand the harsh conditions of off-road driving. They are also energy-efficient, consuming less power than traditional halogen bulbs, which can save money on fuel consumption. With their easy installation process and improved functionality, LED light bars are an excellent investment for any vehicle owner looking to improve their driving experience.
Tools and Materials
When it comes to installing an LED light bar on your vehicle, having the right tools and materials is crucial for a successful and seamless installation process. Some of the essential tools and equipment that you will need include a drill, drill bits, wire strippers, crimping tool, pliers, screwdrivers, and a multimeter. You will also need some materials such as wire connectors, zip ties, mounting brackets, and of course, the LED light bar itself. It is important to ensure that you have all the necessary tools and materials before commencing the installation process to avoid any delays or complications. Using the right tools and materials will not only make the installation process easier but also ensure that the LED light bar is installed correctly and securely. For instance, the use of zip ties and mounting brackets to attach the LED light bar to your vehicle will ensure that it is firmly in place and won’t come loose while driving. Similarly, the use of wire connectors and a crimping tool will ensure that the electrical connections are secure and won’t come loose over time. In summary, having the right tools and materials is essential for a successful and long-lasting installation of an LED light bar on your vehicle.
Before starting the installation process of an LED light bar on your vehicle, it is necessary to gather all the required tools and materials. The list of tools typically includes a socket set, wrenches, drill bits, wire cutters, crimping tool, electrical tape, and a multimeter. Additionally, materials like mounting brackets, bolts, and nuts, wiring harness kit, fuse, and relay are also essential for the installation process. It is essential to ensure that all the materials are of good quality and compatible with the LED light bar and the vehicle. Having all the necessary tools and materials beforehand will make the installation process smoother and quicker.
Installing an LED light bar on your vehicle can significantly improve your visibility while driving in low-light conditions. The process involves several steps, including selecting the right light bar for your vehicle, positioning it in the desired location, and wiring it properly to your car’s electrical system. It is important to choose a high-quality light bar that is both durable and energy-efficient, and to mount it securely using the appropriate hardware. Additionally, you must ensure that the wiring is connected correctly to prevent any potential electrical hazards. With the right tools and careful attention to detail, you can easily install an LED light bar on your vehicle and enjoy improved visibility on even the darkest roads.
Preparation

Preparation is the key to success when it comes to installing an LED light bar on your vehicle. Before beginning any work, it is important to gather all the necessary tools and materials. These may include a mounting bracket, wiring harness, and of course, the LED light bar itself. It is also important to have a clear understanding of the installation process and any potential challenges that may arise along the way. In addition to gathering the necessary tools and materials, it is also important to ensure that the installation site is clean and free from any debris. This will help to prevent any damage to the vehicle or the LED light bar during the installation process. It is also important to take the time to carefully read the manufacturer’s instructions and any other relevant documentation before beginning the installation process. This will help to ensure that the installation is completed correctly and that the LED light bar is functioning properly once it is installed. Overall, taking the time to properly prepare for the installation process can help to ensure a successful and stress-free installation experience.
Selecting the right location for your LED light bar is crucial to ensure maximum visibility and performance. The first step is to decide on the purpose of your light bar and the type of beam pattern you require. For off-road vehicles, an overhead mount is recommended to provide better illumination of the terrain, while a bumper or grille mount is suitable for on-road vehicles, providing better visibility in adverse weather conditions. It is also important to consider the size of the light bar and the vehicle’s size and shape to ensure a proper fit. Additionally, mounting brackets and hardware should be carefully selected to ensure a secure and stable installation. Finally, be sure to consult local laws and regulations regarding the use and placement of light bars on your vehicle.
Before starting the installation process of an LED light bar on your vehicle, it’s essential to measure and mark the spot where you want to mount it. Begin by selecting a location on your vehicle where you want to install the light bar. It could be the front bumper, roof rack, or even the hood. Once you have selected the spot, measure the width of the light bar and mark the center of the mounting brackets with a pencil. Use a leveling tool to ensure that the mark is straight and even. Next, use a drill to make holes on the marked spots for the mounting brackets. After drilling, test the fit of the light bar by placing it on the brackets. If it fits well, tighten the screws, and your LED light bar is ready for use.
Before installing the LED light bar on your vehicle, it is crucial to prepare the surface properly. First, clean the area with soap and water to remove any dirt, grime, or debris. Use a degreaser to get rid of any oily residue. Then, use a rubbing compound to smooth out any scratches or imperfections on the surface. Afterward, dry the area completely with a clean cloth. Next, use painter’s tape to mark the exact spot for the light bar installation. Finally, use a drill to make the necessary holes for the mounting brackets. By preparing the surface correctly, you can ensure a secure and long-lasting installation of your LED light bar.
Installation Process
The installation process is a crucial aspect of adding an LED light bar to your vehicle. Before starting the installation, it is essential to read the instructions manual and understand the different components, such as the wiring harness, switch, and mounting brackets. The first step is to locate a suitable location on your vehicle to mount the LED light bar. This could be on the roof, bumper, or grille, depending on the design of your vehicle. Once you have identified a suitable location, the next step is to install the mounting brackets. It is important to ensure that the brackets are securely attached to the vehicle to prevent any mishaps while driving. After the brackets are installed, you can proceed to wire the LED light bar. This involves connecting the wiring harness to the battery and the switch. It is important to ensure that the wiring is done correctly to prevent any electrical faults. Finally, you can mount the LED light bar on the brackets and test if it is working correctly. With these steps, you can successfully install an LED light bar on your vehicle and enhance its lighting capabilities.
Installing an LED light bar on your vehicle can be a great addition to enhance the visibility during off-road adventures or night driving. The step-by-step guide to installing a light bar is relatively simple and can be done with basic tools. Firstly, choose the right location to mount the light bar and ensure the wiring is long enough to reach the battery. Then, attach the mounting brackets to the light bar and secure them to the vehicle. Next, connect the wiring harness to the light bar and battery, making sure all connections are properly insulated. Finally, test the light bar to ensure it is functioning correctly before hitting the road. Following this step-by-step guide will allow you to successfully install an LED light bar on your vehicle and enjoy a safer and more enjoyable driving experience.
When it comes to installing an LED light bar on your vehicle, including wiring and mounting instructions is crucial for ensuring a successful installation. A comprehensive set of instructions will provide detailed guidance on how to properly wire the light bar to your vehicle’s electrical system and mount it securely, thereby reducing the risk of damage or malfunction. Additionally, it will outline any necessary tools and materials required for the installation, as well as any safety precautions that should be taken. By including these instructions, the installation process can be made simpler and more accessible to anyone looking to add an LED light bar to their vehicle.
When it comes to installing an LED light bar on your vehicle, the process can seem overwhelming at first. However, there are a few tips to make the process easier. First, make sure you have all the necessary tools and equipment before you begin. This includes a wiring harness, fuse, switch, and mounting brackets. It’s also important to read the instructions thoroughly and familiarize yourself with the steps before starting. Additionally, having a second person to assist can be helpful, especially when it comes to mounting the light bar. Lastly, take your time and be patient. Rushing through the installation can lead to mistakes and potential damage to your vehicle. By following these tips, the process of installing an LED light bar can be much smoother and stress-free.
Testing and Adjustments

Testing and adjustments are crucial steps in ensuring the proper functioning of the LED light bar. Once the installation is complete, it is important to test the light bar to ensure that it is working correctly. This can be done by turning on the light and checking that all the LEDs are lit. It is also important to check that the wiring is properly connected and that there are no loose connections. If any issues are found during the testing phase, adjustments should be made to correct the problem. This may involve repositioning the light bar or adjusting the wiring. Once the adjustments have been made, the light bar should be tested again to ensure that the problem has been resolved. Adjustments may also be necessary to optimize the performance of the LED light bar. This may involve adjusting the angle of the light to achieve the desired beam pattern. It may also involve adjusting the brightness of the light to suit the driving conditions. For example, if the light bar is being used in foggy conditions, it may be necessary to dim the light to reduce glare. On the other hand, if the light is being used for off-roading, it may be necessary to increase the brightness to provide better illumination. By making these adjustments, the LED light bar can be optimized for the specific driving conditions, ensuring maximum visibility and safety on the road.
After installing an LED light bar on your vehicle, it’s essential to test it to ensure it’s working correctly. The first step is to turn on your vehicle and the light bar. Check that all the lights are illuminating and that none are flickering or dimmer than the others. Next, test the different light modes, such as high beam and low beam, to ensure they are working correctly. If your light bar comes with a remote control, make sure it’s functioning correctly and that you can switch between different light modes. Finally, take your vehicle out for a drive and test the light bar’s effectiveness in different conditions, such as dark, foggy or rainy weather. If everything checks out, you can rest easy knowing you have a functioning LED light bar that will provide additional visibility and safety on the road.
As with any installation project, adjustments may need to be made during the process of installing an LED light bar on your vehicle. These could include adjusting the mounting brackets to ensure the light bar sits properly on your vehicle, or adjusting the wiring to ensure that the lights are properly connected and functioning as intended. It’s important to take your time during the installation process and be prepared to make any necessary adjustments to ensure that the final product is safe and effective. Additionally, it’s always a good idea to consult the manufacturer’s instructions or seek the advice of a professional if you are unsure about any aspect of the installation process.
This comprehensive guide provides step-by-step instructions on how to install an LED light bar on your vehicle. The guide covers all the necessary tools and materials needed to complete the installation process, including the LED light bar, wiring, connectors, and mounting brackets. The guide begins by outlining the safety precautions that should be taken before beginning the installation process. It then progresses to the step-by-step instructions on how to mount the light bar, wire it into the vehicle’s electrical system, and ensure that it works properly. The guide also includes helpful tips and tricks to make the installation process easier and more efficient. Overall, this guide is an excellent resource for anyone looking to install an LED light bar on their vehicle.
In conclusion, maintaining your LED light bar is just as important as installing it correctly. Regular cleaning with a soft cloth and mild soap will prevent dirt and debris from accumulating on the lens. It’s also important to inspect the wiring and connections periodically to ensure they remain secure and protected from damage. If you notice any issues with the light bar, such as flickering or dimming, address them promptly to prevent further damage. And finally, always follow the manufacturer’s instructions for care and maintenance to ensure your LED light bar provides reliable and long-lasting performance. With these tips, you can enjoy the benefits of your LED light bar for years to come.
Conclusion
In conclusion, installing an LED light bar on your vehicle can be a fun and rewarding DIY project. With the right tools, parts, and a step-by-step guide, anyone can complete this task in a few hours. Not only does it improve the aesthetic of your vehicle, but it also enhances visibility during nighttime or off-road driving. Proper installation and maintenance of the LED light bar are essential to ensure its longevity and safe operation. So, if you’re up for the challenge, go ahead and add some extra light to your ride!


