StepbyStep Guide: Installing LED Wall Pack Lights for Efficient Home Lighting
In today’s world, energy efficiency is a top priority for many homeowners. One of the most effective ways to lower your energy bills and reduce your carbon footprint is by installing LED wall pack lights. These lights are highly efficient, long-lasting, and can provide bright illumination to your home’s exterior. However, installing LED wall pack lights can be a daunting task, especially if you’re not familiar with electrical wiring. In this step-by-step guide, we’ll walk you through the process of installing LED wall pack lights to help you achieve efficient home lighting. LED wall pack lights are a popular choice for homeowners looking to upgrade their outdoor lighting. Not only do they provide excellent illumination, but they are also a cost-effective and environmentally friendly lighting solution. LED lights use less energy than traditional incandescent bulbs, which means you’ll save money on your energy bills while reducing your carbon footprint. Additionally, LED lights have a longer lifespan than other types of bulbs, which means you won’t have to replace them as often. By following this step-by-step guide, you can install LED wall pack lights yourself and enjoy the benefits of efficient home lighting.
Tools and Materials Needed
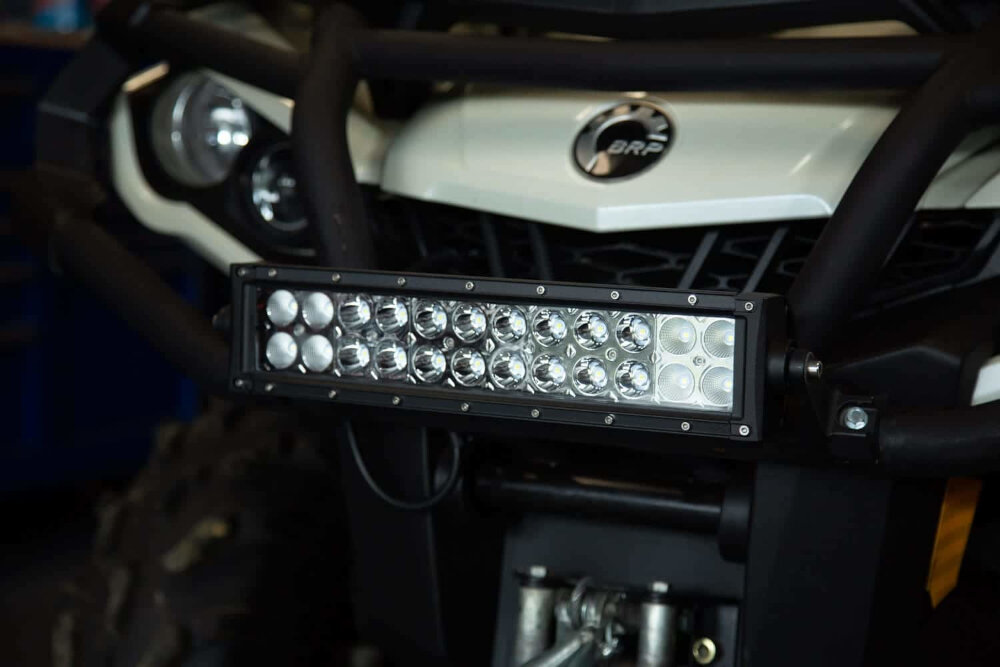
When it comes to installing LED wall pack lights for efficient home lighting, having the right tools and materials can make a significant difference. Some of the essential tools that you will need to install these lights include a drill, screwdriver, wire stripper, wire nuts, and a ladder. You will also need to have some basic knowledge of electrical wiring to be able to complete the installation successfully. If you don’t feel confident about your skills, it’s always best to hire a professional electrician to do the job for you. In addition to the tools, you will also need the right materials to install LED wall pack lights. These materials include the LED wall pack lights, the mounting bracket, conduit, and wires. You will also need to purchase a weatherproof junction box to protect the wiring and ensure that the installation is safe and secure. It’s important to choose high-quality materials that will last for a long time and withstand the elements. With the right tools and materials, you can install LED wall pack lights in your home and enjoy energy-efficient lighting that will save you money on your electricity bills.
The use of proper tools in the installation process of LED wall pack lights is crucial for achieving efficient home lighting. Among the necessary tools are a drill, screwdriver, wire strippers, and a voltage tester. A drill is needed to make holes for mounting the lights on the wall while a screwdriver is used to remove or tighten screws. Wire strippers are used to remove the insulation from the wires, and a voltage tester is used to ensure that the wires are not carrying electrical current before handling them. Having the right tools at hand and using them properly can make the installation process quick, easy, and safe. With proper installation and use, LED wall pack lights can significantly reduce energy consumption and provide long-lasting, high-quality lighting for your home.
The use of LED wall pack lights has become increasingly popular due to their energy efficiency, longer lifespan, and brighter illumination. One important step in installing LED wall pack lights is to ensure that the wiring is properly connected and secured. It is recommended to use a junction box to house the wiring and to protect it from any potential damages. Another crucial step is to position the lights at the appropriate height and angle, ensuring that they provide adequate lighting coverage. Lastly, it is important to test the lights once they are installed to make sure that they are functioning properly and emitting the desired level of brightness. By following these simple steps, homeowners can enjoy the benefits of LED wall pack lights for a long time to come.
Drill is a versatile tool that is essential in the installation of LED wall pack lights. It is used to create holes in the wall or any hard surface where the lights will be mounted. One can choose from different types of drills, including corded and cordless drills, depending on personal preferences and the nature of the task at hand. Cordless drills are ideal for outdoor lighting installation since they offer more mobility and are not limited by the length of the cord. Corded drills, on the other hand, provide consistent power and are perfect for heavy-duty tasks. Regardless of the type of drill used, it is crucial to ensure that it is equipped with the right drill bits to make clean and precise holes.
A screwdriver is a vital tool that is used for tightening or loosening screws. It is an essential tool when installing LED wall pack lights as it helps secure the light fixture to the wall. A screwdriver comes in different shapes and sizes, including flathead, Phillips, and Torx. It is essential to choose the appropriate screwdriver for your specific LED wall pack light installation to ensure the screws are tightened securely. A screwdriver is an easy-to-use tool that is a must-have in any DIYer’s toolkit.
A wire stripper is a simple yet essential tool that helps in removing the insulation from the electrical wires. It is an easy-to-use hand tool that works by clamping onto the wire and then pulling the insulation off. When installing LED wall pack lights for efficient home lighting, a wire stripper is needed to remove the insulation from the wires that connect the light fixture to the power source. By using a wire stripper, you can ensure that the wires are properly connected and securely fastened, which promotes safety and efficiency. With a wire stripper, you can make clean, precise cuts without damaging the wires, making the installation process smoother and faster.
Pliers are a versatile tool that can be used for a variety of tasks when installing LED Wall Pack Lights. These hand-held tools are typically used to grip, bend, and cut wires, which is essential for connecting the wiring of the LED Wall Pack Lights to the electrical circuit. They come in a variety of sizes and shapes, including needle-nose, slip-joint, and groove-joint pliers, each with their own unique features and benefits. Pliers are also useful for adjusting and securing the mounting brackets of the LED Wall Pack Lights, ensuring that they are securely fastened to the wall or ceiling. With their ability to handle a variety of tasks, pliers are an essential tool for any DIY homeowner looking to install LED Wall Pack Lights for efficient home lighting.
Wire nuts are an essential component when it comes to electrical installations, especially when connecting wires. These small caps are designed to twist onto the ends of wires, securing them together and creating a safe and reliable electrical connection. Wire nuts are available in a variety of sizes and colors, making it easy to match them to the wires being connected. They are also designed to accommodate a wide range of wire gauges, ensuring compatibility with most electrical systems. When installing LED wall pack lights for efficient home lighting, it is important to use wire nuts to connect the wires securely and safely, reducing the risk of electrical fires or other hazards.
LED wall pack lights are becoming increasingly popular for homeowners looking to improve their energy efficiency and reduce their electricity bills. One important step in the installation process is to ensure that the lights are properly mounted using the appropriate hardware. This can include wall brackets, mounting plates, and screws. It is also important to ensure that the wiring is properly connected and grounded to avoid any potential safety hazards. Once the lights are installed, homeowners can enjoy the benefits of a brighter, more efficient lighting system that can help to enhance the overall appearance and security of their home.
Materials are an essential aspect of any installation project, and installing LED wall pack lights is no exception. To ensure a successful installation, you will need several materials, including LED wall pack lights, mounting brackets, screws, a drill, a wiring harness, wire connectors, electrical tape, and a voltage tester. The LED wall pack lights come in various sizes and styles, so it’s essential to select the right one that suits your project’s requirements. The mounting brackets and screws are used to attach the lights to the wall securely. The drill is used to create holes in the wall for the screws to fit in. The wiring harness, wire connectors, and electrical tape are used to connect the lights to the electrical system securely. Lastly, the voltage tester is used to ensure the electrical system is safe and working correctly. With these materials, you can efficiently and effectively install LED wall pack lights and achieve efficient home lighting.
The use of LED wall pack lights is a great way to efficiently light up your home. One important step in the installation process is to ensure that the wiring is done correctly. This requires a basic knowledge of electrical wiring and safety precautions. Another important factor is to choose the right size and style of LED wall pack light for your specific needs. These lights come in various sizes and styles, and it is important to choose one that will provide the right amount of light and complement the overall aesthetic of your home. Once you have selected the appropriate size and style, the next step is to install the light fixture securely and properly. This involves mounting the fixture to the wall and connecting the wiring. With the right tools and knowledge, installing LED wall pack lights can be a simple and effective way to improve the lighting in your home.
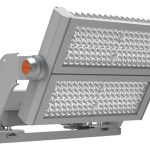
LED wall pack lights are a highly efficient and cost-effective solution for illuminating outdoor spaces. These lights provide bright and uniform lighting that helps to improve visibility and security in areas such as parking lots, walkways, and building perimeters. With their long lifespan and low energy consumption, LED wall pack lights are an environmentally friendly choice that can save you money on your energy bills. They are also easy to install and require minimal maintenance, making them an ideal choice for both residential and commercial applications. Whether you’re looking to add some extra lighting to your home or business, LED wall pack lights are a reliable and versatile option that can help you achieve your lighting goals while minimizing your environmental impact.
A mounting bracket is an essential component needed for installing LED wall pack lights. It serves as a support system for the light fixture and ensures that it stays firmly in place. The bracket is typically made of durable materials such as steel, aluminum or cast iron to withstand the weight of the light and any weather conditions it may face. It is designed to be easy to install, with pre-drilled holes for screws or bolts, and can be adjusted to ensure the light is positioned exactly where it needs to be. Without a mounting bracket, the light fixture may be unstable, which can lead to safety hazards and inefficient lighting.
Wiring is a crucial part of installing LED wall pack lights as it ensures proper electrical connectivity between the lighting fixture and the power source. Before beginning the wiring process, it is important to turn off the power supply to avoid any electrical shock. The wiring should be done according to the manufacturer’s instructions and using the appropriate wiring tools such as wire strippers, wire nuts, and electrical tape. The wiring should be neat and organized to prevent any short circuits or electrical hazards. It is important to test the wiring and ensure that the LED wall pack lights are functioning properly. Proper wiring ensures efficient home lighting and enhances the overall ambiance of the living space.
Electric tape is a versatile and reliable tool for electrical installations. It is made of a thin and flexible material that can be easily wrapped around wires and cables to insulate them and protect against moisture, dust, and other contaminants. Electric tape comes in different colors and sizes, making it easy to identify and organize wires and circuits. It is also resistant to heat, cold, and UV rays, making it suitable for both indoor and outdoor applications. When installing LED wall pack lights, electric tape can be used to secure and seal the wires, ensuring a safe and efficient electrical connection. It is an essential component of any electrical toolkit, and its durability and ease of use make it a popular choice among DIY enthusiasts and professionals alike.
Installing LED wall pack lights is an effective way to brighten up your home while saving energy and money. One crucial step in this process is figuring out which type of wall pack light best suits your needs. There are various options, including traditional wall packs, full cutoff wall packs, and semi-cutoff wall packs. Once you’ve determined which type of wall pack light is right for you, it’s important to select the appropriate wattage and color temperature to achieve your desired level of brightness and ambiance. Proper installation is also key, whether you opt for surface mounting or recessed installation. With the right LED wall pack lights, you can enhance your home’s aesthetic appeal and reduce your energy consumption.
StepbyStep Guide
Installing LED wall pack lights can be a great way to improve the energy efficiency of your home lighting system. However, if you’ve never installed these types of lights before, the process can seem intimidating. Fortunately, by following a step-by-step guide, you can make the installation process simple and straightforward. The first step in installing your LED wall pack lights is to choose the right location for them. Make sure that the location you choose provides adequate lighting coverage for your needs, and that it’s free of any obstructions that could interfere with the lights’ performance. Once you’ve chosen your location, you’ll need to mount the lights securely to the wall. This may involve drilling holes and using screws to attach the light fixture to the wall. Finally, you’ll need to wire the light fixture to your electrical system, making sure to follow all safety guidelines and local building codes. By following these steps carefully, you can enjoy all the benefits of LED wall pack lights in your home, without any of the stress or hassle.
The use of LED wall pack lights is an efficient way to brighten up the exterior of your home while also reducing energy consumption. One important component of installing these lights is the use of an outdoor junction box. This box will protect the electrical connections from weather damage and ensure safe installation. Another crucial step is to properly ground the fixture, which will prevent electrical shocks and prolong the lifespan of the light. Once the fixture is securely mounted, it’s time to connect the wires and test the light to ensure it’s functioning properly. With careful installation and maintenance, LED wall pack lights can provide reliable and cost-effective lighting for your home’s exterior.
Choosing the appropriate location for LED wall pack lights is crucial for achieving maximum lighting efficiency. It is recommended to install them in areas that require high illumination, such as entryways, parking lots, and commercial buildings. Additionally, it is important to consider the height of the installation, as it can affect the light distribution and overall performance. For instance, mounting the LED wall pack lights too high can cause unnecessary glare, while installing them too low can limit their coverage area. Therefore, it is essential to carefully evaluate the location and height of the installation to ensure optimal lighting results.
Before installing LED wall pack lights, it’s essential to prepare the wiring. The first step is to turn off the power supply to the area where you’ll be working. Use a voltage tester to ensure that the power is indeed off. Next, remove the existing fixture and disconnect the wires. Check the wiring for any signs of wear or damage and replace them as needed. Make sure that the wire connections are secure and tight to prevent any loose connections that could lead to electrical hazards. When installing the new LED wall pack, make sure to follow the manufacturer’s instructions for wiring and installation to ensure that the fixture works correctly and efficiently. Proper wiring preparation is crucial to ensure that your LED wall pack lights operate safely and efficiently for years to come.
Before installing LED wall pack lights, it is essential to install the mounting bracket securely. The mounting bracket is a critical component that holds the LED light fixture in place. To install the mounting bracket, first, select an appropriate location that is suitable for mounting the LED wall pack light. Next, mark the position of the mounting holes on the wall using a pencil or marker. Then, drill holes into the wall to accommodate the mounting screws. Once the holes are drilled, attach the mounting bracket to the wall using the screws and a screwdriver. Ensure that the mounting bracket is leveled and securely fastened to the wall. A stable and secure mounting bracket is essential for a safe and efficient installation of LED wall pack lights.
After you have mounted the LED wall pack lights, the next step is to connect the wiring. To do this, start by turning off the power supply to the area where you will be working. Then, strip the wires from the wall and the LED light fixture, ensuring that you have enough length to make the connection. Next, twist the black wire from the wall to the black wire from the LED light fixture and secure them with a wire nut. Repeat the same process with the white wire and then the green or bare wire. Once all wires are securely connected, carefully tuck them into the junction box and attach the cover plate. Finally, turn the power back on and test the lights to ensure they are working correctly.
The installation process of LED wall pack lights is relatively easy and requires minimal effort. To begin with, attach the LED wall pack lights to the mounting bracket by aligning the screw holes on the back of the fixture with the holes on the bracket. Next, insert the screws through the bracket and into the holes of the fixture. Make sure the screws are tightened securely to prevent the fixture from wobbling or falling off. The mounting bracket should be fixed onto the wall using screws and anchors, ensuring that it is level and stable. Finally, connect the wiring according to the manufacturer’s instructions, and test the light to ensure it is working correctly. With these simple steps, you can enhance the efficiency of your home lighting while minimizing energy consumption and reducing your carbon footprint.
Before installing LED wall pack lights, it is crucial to test them first to ensure that they are functioning correctly. Start by connecting the wires of the LED wall pack lights to a power source, and then switch it on to check if the lights are illuminating. Next, inspect the brightness and color temperature of the LED lights to ensure that they are appropriate for your intended use. Additionally, check the beam angle of the lights to ensure that they are providing adequate coverage. By carrying out this essential step, you can identify and address any issues with the LED wall pack lights before installation, and avoid any potential complications during the installation process.
is an HTML tag used to create ordered lists on webpages. In the context of the article titled \Step-by-Step Guide Installing LED Wall Pack Lights for Efficient Home Lighting,\ using an ordered list can be helpful to guide the reader through the steps required to install these lights. By breaking down the installation process into numbered steps, the reader can easily follow along and ensure that they do not miss any important details. In addition, the ordered list can be used to highlight any necessary tools or materials that are required for the installation process. Overall, using an ordered list is a useful technique for organizing information and making it easier for readers to understand and implement complex instructions.
Conclusion
In conclusion, installing LED wall pack lights is a smart and efficient way to brighten up your home while also reducing your energy consumption and costs. By following the step-by-step guide provided, you can easily install these lights yourself and enjoy their many benefits. LED wall pack lights offer a longer lifespan than traditional lighting, are more durable and require less maintenance. They also provide a brighter and more focused light, making them ideal for outdoor or indoor spaces where high visibility is necessary. With their efficiency and ease of use, LED wall pack lights are a great investment for any homeowner looking to upgrade their lighting system.

