Complete guide on how and why you need garage door insulation: DIY steps you can tackle all by yourself
Why you need garage door insulation? IIs this a waste of money or wise investment? How you can get the insulation implemented without hiring a team of professionals? Is it better to replace the garage door or add insulation to existing ones?
There are a lot of facts you need to know and all of that will be explained in the content below. Just to intrigue, yes you do need this type of insulation and yes you can perform the installation all by yourself within a few hours.

Why investing in garage door insulation in the first place?
The biggest question here is why you need to invest in garage door insulation. The answer is slightly more complicated than you may believe. The first thing to know is that your climate will have the final answer. This simply means that if you live in a state or country where the climate is warm, like California or Florida you don’t need insulation. But, if you live in a climate where temperatures are low, you need insulation as soon as possible.
The reasons for this upgrade are also based on the heating preferences of your home. If the garage is connected to the house then you are losing a significant amount of energy and your bills are more than just high. Investing in insulation will decrease the loss and make your home more efficient. If your garage isn’t linked to the house heating system you still need the insulation.
The last part of the answer is related to the cost of the insulation. In most cases, this is the extremely affordable and simple process you can complete all by yourself. What this means is that you can install insulation without hiring a professional.
The bottom part is that adding garage door insulation is preferable and definitely should be considered. You will get a lot of benefits and advantages but you won’t lose anything and you can tackle this project by yourself.
Warmer home is an option as well
This benefit refers to the houses which have a living room above the garage. You won’t heat the garage, meaning you will need more energy to heat the room above it. The situation is the same when it comes to cooling down the room.
Just to make sure you will have to check with your provider and see the cost and energy consumption of your home. If it is normal or under normal you still should consider this investment. You will simply decrease the bill at the end of each month.
If your energy consumption is bigger than average it means that you have been losing a significant amount of energy through the garage door. In these cases, adding insulation is more than just recommended and should be done as soon as you can.
Adding garage door insulation is an excellent investment
Regardless of your garage door type and size, this investment will cost you $1000 or under. This is something most of you can afford and there are no added costs and issues you will have to sort out. But, when the time comes to sell your home, this investment will increase the property value for an additional $2000 or even more.
Once again, if you live in colder climates, adding the insulation is probably one of the cheapest investments that can increase the value of your home. It is something you should consider as soon as possible and you must remember that in the end, you are the one who is making a wise investment.
Types of garage door insulations available
Not all insulations are the same nor they are the same to install. Before moving to the next section where we will explain how to install insulation we will have to say something about the types available and their characteristics.
- Foam
Foam is the most common and most affordable type of insulation. It will cost you $1 per one square foot. This insulation is made from polystyrene and it offers a rating of R6.5 per 1 inch. Installation is extremely simple and this option is recommended for thick doors.
- Reflective Foil
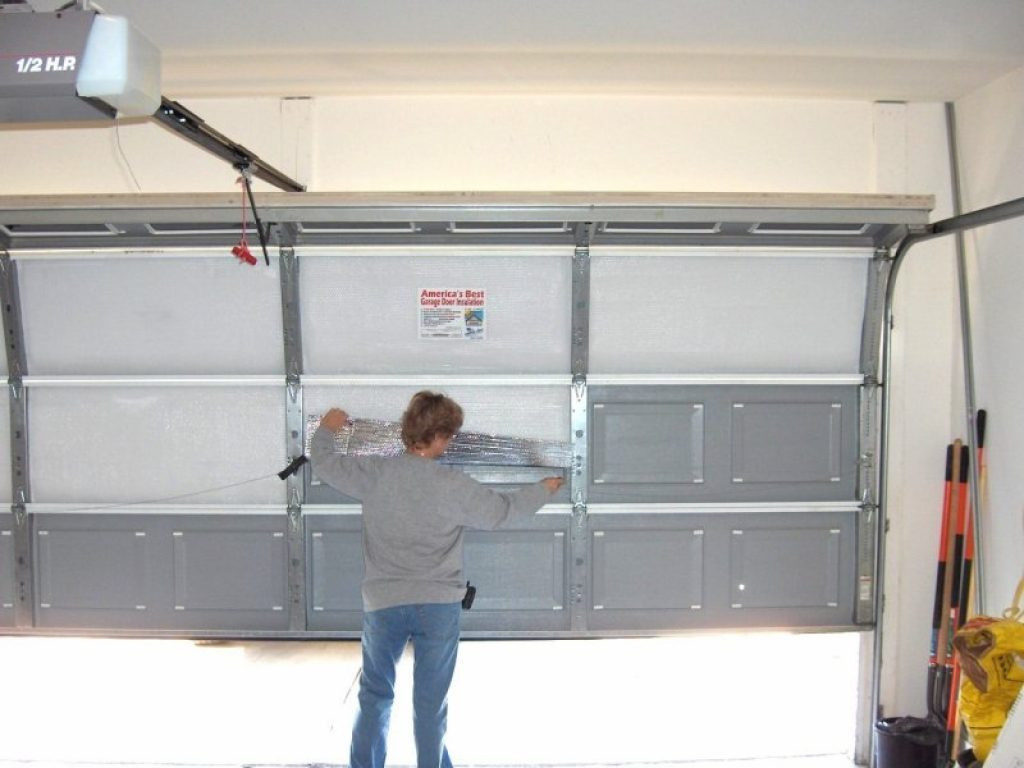
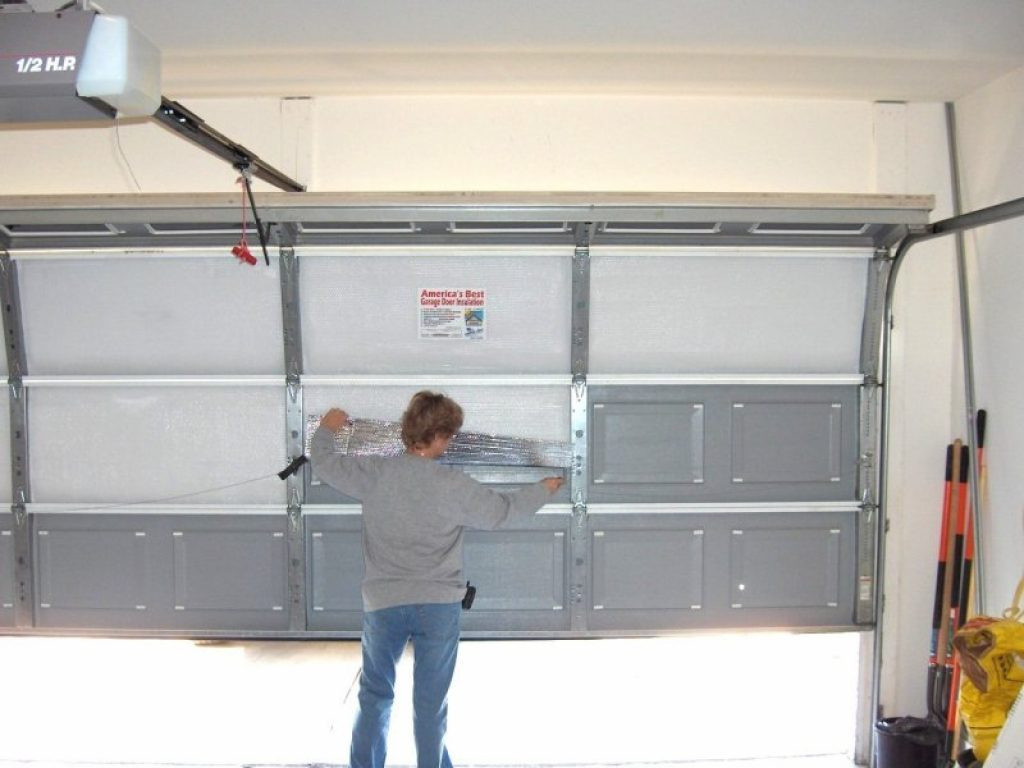
Reflective foil is precise as the name suggests. You get aluminum foil which is thicker than usual and it will repel heat and cold at all times. The insulation is the most affordable of them all, but won’t look especially well and it is more an addition to existing insulation. The installation is as simple as it sounds.
- Batt
This insulation is made from fiberglass and it is common in older homes. You can see it on attics and in cellars. The insulation in question is rigid, complicated to install and require a lot of space. You also need protection at all times and the rating is lower than with foam. On the other hand, it will insulate the garage from vapors as well.
Suitable type for your garage door
Different garage doors require different insulation types. If your garage doors are made from steel, you need to invest in any insulation you like. This is possible due to the fact steel is thicker and stronger material than aluminum. If your garage door is made from wood, you will need batt insulation. It works the best and it is the most effective in this case scenario.
Flat garage doors should be paired with foam. This type of insulation works the best and you will install it easily. You can use reflective foil as well but the foam is a bit better choice.
DIY installation: All the steps you will need to take
You can get an insulation kit online or in the local store. This kit includes all you will need. You get insulation, utility knife, gloves, tape, glue and etc. As such you are left with a simple process that will require a few hours or even less be completed. Anyway, if you are looking for a bit more specific guide, we will present it below. In addition, you can use some or all steps from the guide when applying the insulation kit.
- Clean the garage door and secure the edges
The first step is to clean the garage door. All the dust, stickers, spider web and etc. should be removed. It will help the insulation stick to the door and make a tighter fit.
The next thing is to secure and use weather stripping lines to fill the edges of the garage door. If you skip this step, the air will escape through the edge holes and your insulation won’t be as effective as needed.
- Measure each panel and apply the insulation
Not all panels of your garage door are the same. Some are bigger while others are smaller. That’s why you will have to measure each one, cut the same size of insulation and glue it to the door.
Different manufacturers recommend different sticking methods. Some will use glue, others tape while third pins. Make sure to use as recommended by the company who made the insulation. All three methods are safe and reliable, but glue is a bit better than the first two.
- Start with weather-stripping
Weather-stripping is used to prevent air from escaping next to the insulation.Use small nails to reinforce the weather-stripping starting from above and reaching the edges and the bottom. Don’t nail the nails all to the end. Leave them loose and test the weather stripping. It must not reveal sunlight when you push the garage door and it must stay in place at all times.
Once you are satisfied with the result, make sure to complete the task and complete the nailing as well. You are done.
Your weather stripping may fail over time. If this happens you will need to replace the damage element and to check the closing force of the door. This will damage the bottom of weather stripping the first but may affect the upper pieces as well. In those cases also check the springs and make any additional adjustments.
- Test the garage door and you are done
The last step is to test the garage door. It should open and close as before. If not and if they stop in the middle of the process, you will need to adjust the opening force and the spring compression. For most of you, hiring a professional to do this task is better and smarter.
Anyway, the insulation should not interfere with the opening and closing process of the door. They will stay fully operational but quieter as well.
Conclusion
Adding insulation to the garage door is more than just recommended and effective method that can keep you warmer, decrease the entry bill and also make your garage usable through the winter. The process itself is extremely easy and you can complete it without any professional help or expensive contractors. See more at our repair and maintenance section.


