Installing weather stripping to your garage door: Complete guide with practical tips
You noticed that your garage is dirty, the sunlight comes in more than you need and it is warmer or colder than usual? This all can be explained with a single sentence. Your weather stripping is damaged and it has to be replaced. This is a common problem that occurs after some period of time and the only fix is to replace the weather stripping completely. We will guide you through the entire process and help you get this task done all by yourself.
Weather stripping: Basics
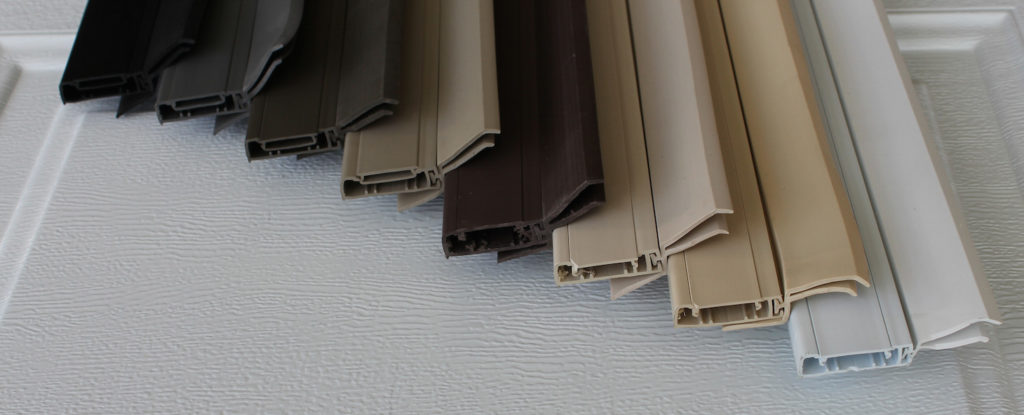
Weather stripping refers to the seals that go all around the garage door. You will have four of them and they should make sure that cold air, water or even wind cannot penetrate your garage. This is the entire purpose of weather stripping and it is something that all homeowners appreciate on their garage doors.
Some of those seals are used every single time when the garage door is opened or closed. This will damage the material, eventually which translates into the aforementioned issues. When the material or the seals are damaged, you obviously have to replace them.
Sadly, this task isn’t as simple as it sounds. You won’t be able to go to a local store and get new seals and install them within seconds. It is a bit more complex than that but it is doable. Now when you know what the weather stripping is, we can move to more important and more advanced sections.
Types of weather stripping
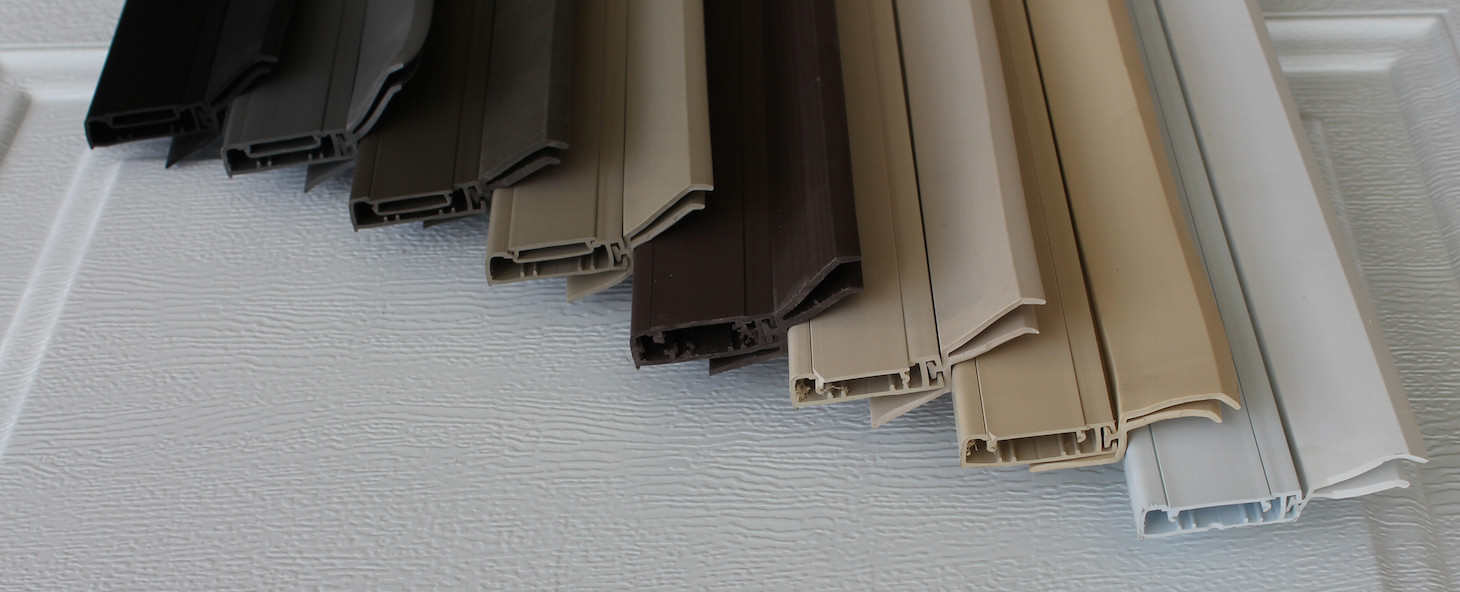
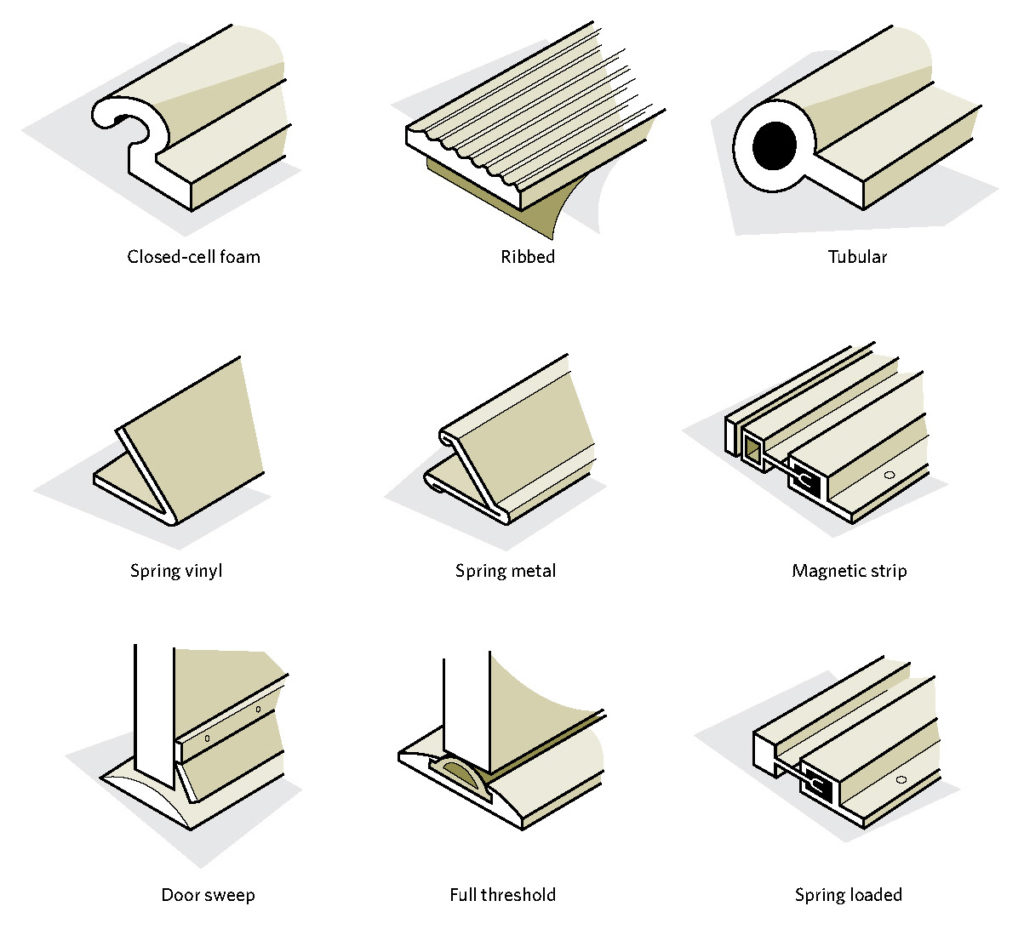
Here is an important thing you need to remember. Weather stripping comes in different forms and it is different according to the side it will be installed on. In other words, weather stripping for the top of the garage door is different than the one used for the sides and the bottom. Anyway, here are the most common types explained according to the location where they will be installed.
- Top of the garage door
Seals used for the top of the garage doors are known as reverse angle jamb seals. They have a flap which will be pushed towards the garage door when it is closed and therefore creates an airtight seal. The benefits are obvious and these seals are the best of them all.
Some garage doors won’t have this type of seals. They are more advanced and more expensive which makes them rare for residential garage doors. We highly recommend you to install one if your system doesn’t have it already. You will get all kinds of benefits.
There are two sub types here. The first one is an outside seal and the second type is an inside seal. When both are installed, the seal is perfect and will keep wind, debris, and water away from your garage.
- Sides
Sides have seals that are made from soft rubber. They are located between the tracks and the garage door and they are pushed towards the door as well, making the perfect connection. Be free to check is your system equipped with these seals. Look at the sides of the garage door and if you see a black rubber part you have them. These seals come in all sizes and in all colors so installing the one you need is possible.
- Bottom
Bottom seals are the ones that have to be replaced more frequently. They will get damaged easily and they are used every single day. Eventually, they will crack and they will let water in. We should add that these seals are the most important as well due to the fact they are located on the floor and they should keep all the water and debris away from your garage.
Types of the bottom garage door seals are divided according to the installation process. We can see that the entry-level models have single-channel retainer design. They will be attached to the garage at one point only. Two-channel models will be attached using two points which makes them more durable and more desirable. The main point here is that you should check first and see which type or retainer do you have and get a compatible bottom seal.
Seals of this kind are made from PVC, vinyl or rubber and each type comes with its own list of advantages and drawbacks. The bottom part is that you need this type of weather stripping more than any other and you will have to replace it more often just to get the results you need.
When do you need to replace garage door seals?
In order to know when the seals have to be replaced, you need to take a closer look at the weather stripping present on the system. All you have to do is to place a hand over the seal and check is there a breeze. Can you see sunlight outside and can you see cracks or damages to the seals? This type of inspection should be performed 2 times per year.
If the answer to any of the questions above is yes, you will have to replace the seals. This is easier than it sounds and definitely can be done without any professional help.
A DIY guide for replacing the garage door seals
Before you start, make sure to have all the tools and items you will need around you. It is annoying when you have to stop in the middle of the work to go get another tool or an item. You will need:
- Pry bar
- Measuring tape
- Pencil
- Nails and screws
- Hammer
- Utility knife
- Scissors
- Drill
- Silicone lubricant
- Saw
- Caulk gun
- Soap and bucket with water
- Marker
- Seals
- Threshold seal (optional)
Once you are ready, you should start with the process. We will explain how to replace all types of the weather stripping you saw at the beginning, and we advise you to follow the detailed instructions and the order.
- Disconnect the garage door opener.
- Position garage door in a suitable and comfortable position. Use chairs to secure it.
- Locate the screws of the track. There are usually two of them one on each end.
- Undo the screws and remove or better said pull out the weather stripping.
- Measure the length of your new seal.
- Place it in a bucket with water so it will slide easily inside the retainer.
- Slide it in and secure it with two screws.
If your garage door doesn’t have this type of a seal or the system doesn’t have any seal you can easily install the threshold seal. This is a slightly different process but we will guide you through it.
- Place the threshold seal snug against the closed garage door.
- Use a marker or pencil to draw an outline of the threshold seal from the inside of the garage. Repeat the step from the outside.
- Open the garage door.
- Add sealant and apply the threshold on both sides of the two lines, leaving the middle empty. Add the sealant in zigzag bead and let it dry.
Side seal replacement
Side seals are a bit more complicated to replace so you will need more time. However, we will present you a guide that can be used by anyone and can help you complete this task without a need for a professional.
- Remove the old seals. They are held in place by caulk so all you have to do is to push the pry bar and tap it with a hammer starting from the top and moving to the bottom. Once you are done the seal will come off.
- Clean the surface from the old caulk. Use a knife or a sandpaper if you prefer.
- Measure the new side seal with the old one to get the desired fit.
- Hold the top part of the side seal and start nailing it to the wall. Keep in mind that the flap has to be directed toward the garage door and it should touch them. It will be used to make the better seal.
- Repeat the process with the other side.
Replacing the top seal
This type of garage door seal comes in two forms. You can either have aluminum or vinyl one with the weather stripping. The main thing to remember is that you can choose any one of them and it depends solely on your individual preference. Here are the steps you have to follow.
- Open the garage door and secure it.
- Remove the old seal if it is present. It helps in place by several screws or nails.
- Measure with the new seal and get the desired dimension. Aluminum seals are pre-made in suitable lengths while vinyl ones should be cut accordingly.
- Add the vinyl to the header.
- Attach the header to the garage. If there are no holes, drill several ones at 8 inches apart.
- Screw it down and you are done.
Best garage door weather stripping products
If you still don’t know which weather stripping to add to your garage, here is the answer to this question. We tested several models and we will present you the ultimate list of the best ones that worked the best for us. Simply choose the one that is the most appealing for you and install it today.
- Garadry Garage Door Threshold weather stripping
This is a high-end product that is excellent for heavy-duty usages. It is so tough that it will keep all the rain, wind and dust away from your garage at all times. The installation is reasonably simple and you won’t have any issues. In addition, you can use it at all times and install it during the summer or winter, it is up to you. The seal is also tough which makes it a long and wise investment. You will be able to enjoy all its benefits for many years to come and you will have a perfectly clean garage.
- Garage Door Home Hardware Threshold Bottom weather stripping
Here we have a popular product that has been with us for quite some time. The main advantage is tough construction. The seal is made from EPDM rubber, can withstand rain, wind and even rodents. It is made to withstand the weight of the garage door and one car. In the package, you get the caulk and several additional items that can help you with the installation. We liked this product and we had a great time with the installation and the results.
- Park Smart Garage Door Seal
You will need this seal if you are looking for the best airtight weather stripping. In a nutshell, the seal is well-made and comes with polyurethane that is included in the package for easier installation. It can be installed on any garage door such as overhead, wooden or even walkthrough. We can add that the name of the products looks nice as well.
- Garage Door Threshold Seal DIY Weather Stripping
The last model on our list is made for areas where the temperature gets hot during the summer. It can withstand heavy-duty usage and it is made from EPDM rubber. Installation is simple and requires basic tools and a few minutes of your time. This particular seal is the most appealing if you want to keep the hot air or cold air from your garage. In addition, it will keep water, rodents, and dust away as well.
Final words
The last thing we will reveal to you is obvious. Weather stripping is a mandatory part of any garage and it should be considered as one. You will get a cleaner, warmer or cooler garage which looks better and which is a more appealing place to be in. Installing or replacing the weather stripping is easy after all and we presented you all the steps you will need to take. The last thing to remember is that you should always measure twice and cut once. Take your time and focus on the excellent results and accomplishments. See more at repair and maintenance.

